Remote work has only become more common, which means there’s a good chance that you’ve encountered a webinar at some point. But let’s face it: these online presentations are rarely fun for anybody, whether you’re in the audience struggling to pay attention or you’re the presenter repeating yourself for your third run-through of the day.
The solution? Record it. Remove the dread from the process and develop an engaging, well-edited presentation that you ideally only have to deliver once.
Why record a webinar?
As a format, the humble webinar has a lot going for it. Sure, bad webinars tend to remind everyone why they hate meetings. But a good webinar is a platform to really connect with your audience, maybe even from the comfort of your home.
So why would you want to record it? Well, as useful as live webinars can be, they’re just that: live. If someone from your team misses it, or if you flub a few lines, you’re out of luck. That’s where recorded webinar videos come in handy. With a recorded webinar you can:
- Avoid repeating the same presentation. With relatively little setup or tools, you can have an enduring record of your webinar session for posterity — and you don’t have to deliver the same spiel the next time someone else needs the same information.
- Polish it up afterward. Most of us aren’t trained actors, and awkward moments on video are bound to happen. If you record solo beforehand, you can streamline your presentation and just cut out the parts that don’t work. Plus, live video can be laggy, particularly if you have a less-than-reliable internet connection. If you record your webinar live, you can still cut out any dead space or uncomfortable pauses.
- Be more prepared. If you opt for recording in advance rather than recording live, it also removes the stress of cueing up any additional elements you may want to include, like slideshows and videos. It’s not fun to futz around on your computer in front of a captive audience, and setting it all up beforehand allows for a more seamless — and less nerve-wracking — experience.
Tools for making an engaging webinar recording
Once you’ve put together a compelling presentation that you’re ready to deliver in a memorable way, it’s time to plan out the technical aspects. Here’s some equipment and set up to consider for recording your fabulous webinar:
- A working computer, tablet, or cell phone. By working, we mean both that its hardware is able to handle the workload of live streaming and recording and that its internet connection is fast enough for you to capture video and audio and stream it to your audience seamlessly. Your device will be your primary recording tool, after all. This is probably the device you already use every day, but test it out beforehand just to make sure everything is running smoothly.
- An external microphone. If you’re trying to create a truly professional product, the built-in mic in your laptop or smartphone may not cut it. A high-quality mic placed at the correct distance from your mouth can both make your voice as clear as possible and reduce background noise. If you really can’t get an external mic, do your best to record in a space without a lot of echo — even if that means temporarily renovating your coat closet into a video booth.
- A suitable, non-distracting location. Don’t record yourself against a backdrop that’s too busy — or too personal. Opt for sitting in front of a blank wall, or at least one with minimal clutter. You want your viewers to stay focused on the content of the webinar so they remember the information, not the distractions. Some software will allow you to add a virtual background to your video, but in that case the same rules apply: choose a background that isn’t too busy or distracting.
- Good lighting. To make your presentation look even more professional, take the lead from TikTok and get a ring light to softly illuminate your face. When people can actually see your facial expressions, they will have an easier time paying attention to you and the information you’re delivering.
- Video capture software. You’ll need some way to record what’s happening on your computer screen. Luckily, there’s a range of free options that can give you what you need. We obviously think Descript is the best option since it transcribes as you record so you can edit your video as easily as you’d edit a text file. But there are other options out there, too. Macs allow you to screen record using the built-in Quicktime Player; on PCs, Xbox Game Bar can do the same thing. Some presentation software, like Zoom, allow you to record as well. Keep in mind that you may need to export your video files to a different format for compatibility with your editing or distribution platform of choice, but most software allows you to do that easily. If for some reason yours doesn’t, there are plenty of free video converters online (VLC is a mainstay).
- Editing software. Even if the webinar you recorded was endlessly compelling from start to finish, it’s still a good idea to spruce up the project afterward. That’s one of the benefits of recording: You can make your presentation more polished, and therefore more appealing to future audiences. For example, you can throw on a video filter to brighten the scenery and make use of a background noise reducer to improve your sound (once again, we think Descript’s Studio Sound feature is a great option). When you’re done, you can share the highlights from your social media accounts and let the likes flow in.
How to record a webinar with Descript
Descript makes for a solid recording option because when you use Descript, you can both capture your webinar and edit it using the same software. Here’s how to get the webinar footage you need with Descript:
- Open Descript. You gotta start somewhere.
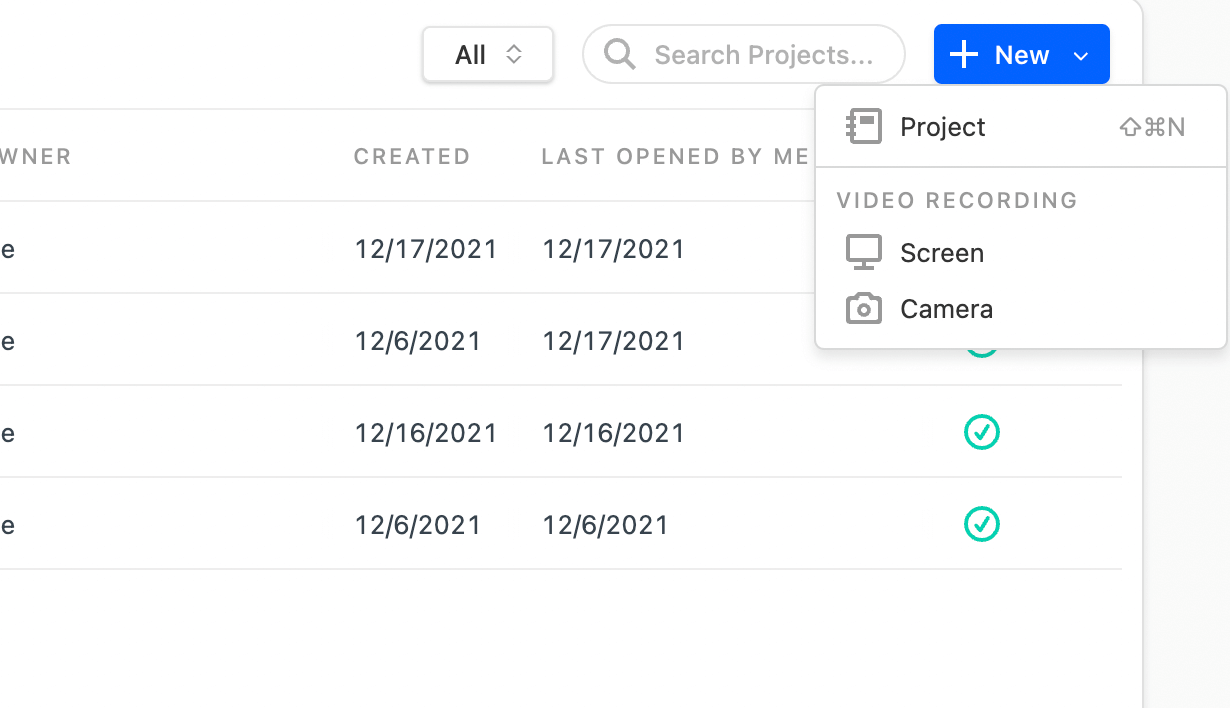
- Start a new recording project. In the upper right corner of the app, click the “+ New” button and choose the kind of recording you’ll want to do. If your webinar is really just you talking, you can choose “Camera.” If you’re using a slide presentation or have supporting imagery, “Screen” is your best bet.
- Set your recording inputs. If you want to create a picture-in-picture where people can see your face and hear your voice as you go through an onscreen presentation, simply select your webcam and microphone from the dropdown menus that appear. If your presentation has audio you want to share, make sure to select “Computer audio enabled.”
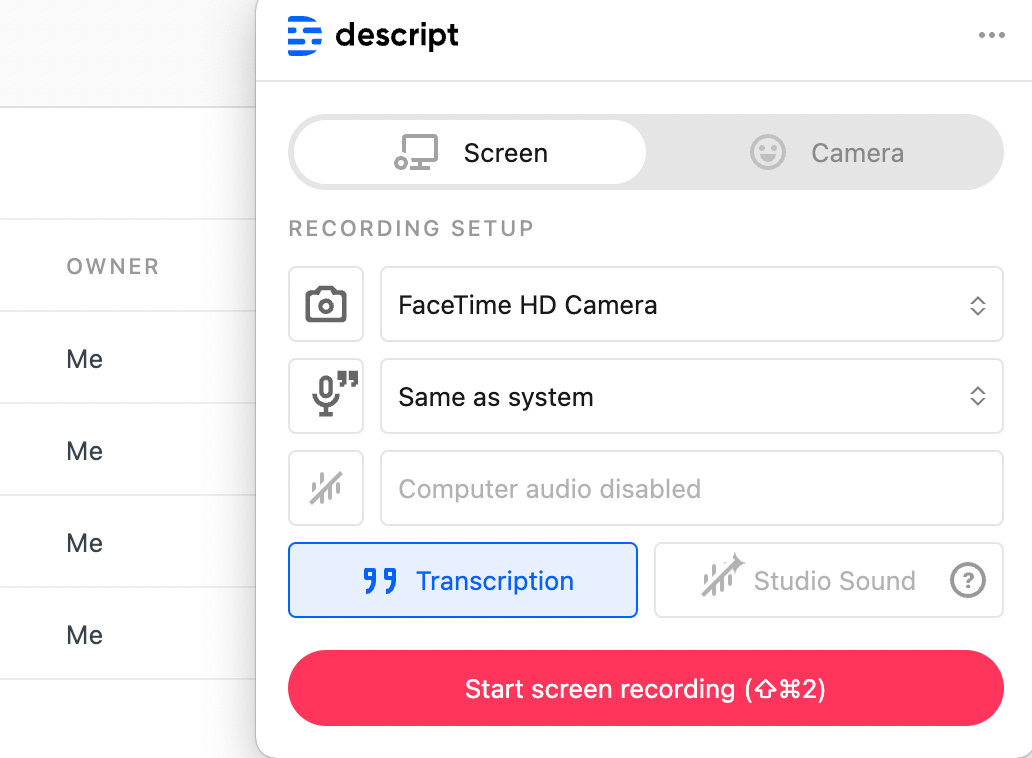
- Start your recording sesh. When you click the record button, Descript will give you the option of recording your whole screen or just a select part. Recording the whole screen may be easier for a webinar since it gives you the latitude to open or close whichever windows you may need, but if you prefer, use the cursor to draw a box around the part of the screen you want to record.
- Do your thing. You’ve written; you’ve practiced. Now’s your chance to record your webinar. Don’t worry if it’s not perfect — you can always edit it later.
- Stop the recording. When you’re finished, just press the stop button on the bar at the side of the screen.

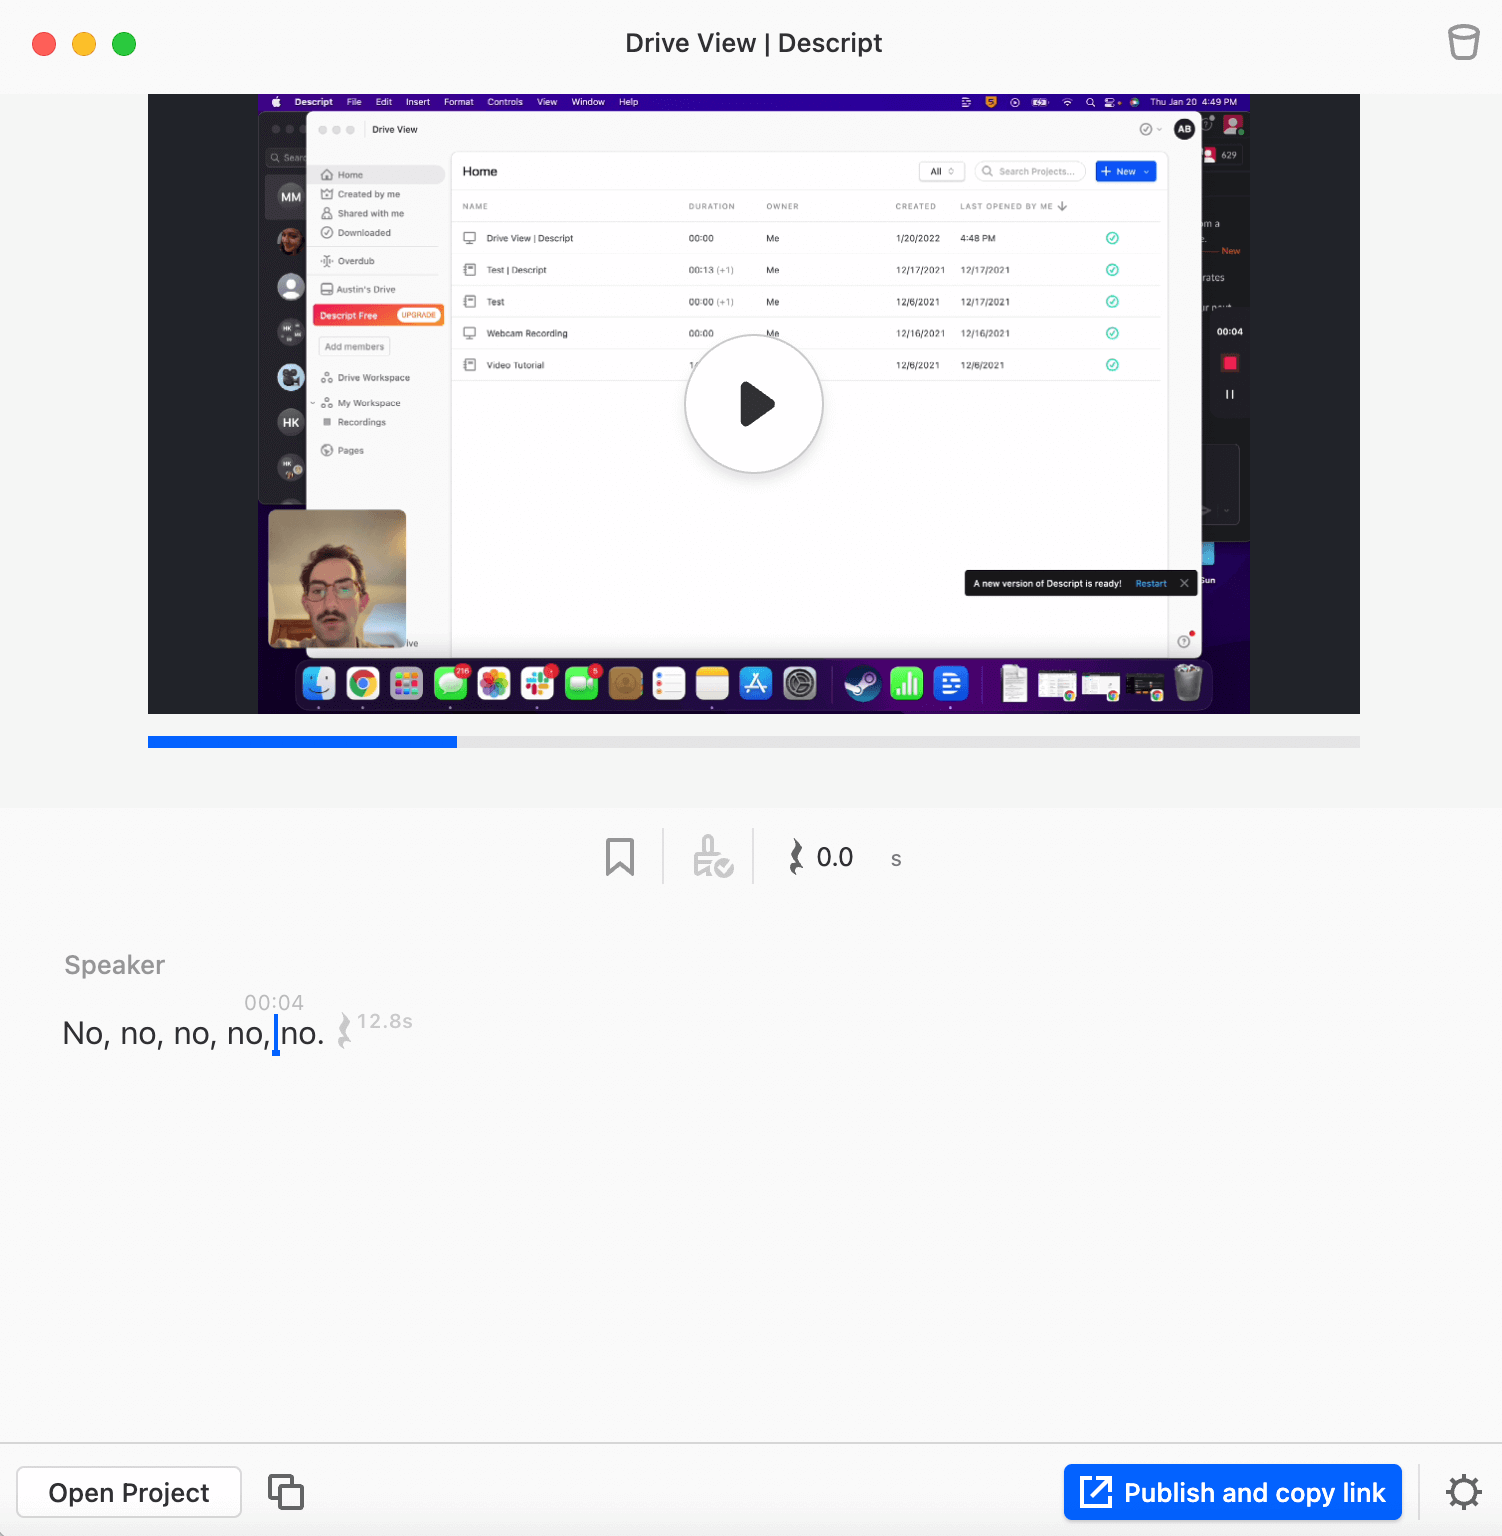
- Open your project for editing. Descript gives you the option to open a project for editing right after you’re done recording. Just click the “Open Project” button on the recording summary screen and you’ll be ready to edit.
Final thoughts
With a little imagination and even less technical know-how, you can turn your webinar presentation into a sleek video you can share with clients and colleagues — or maybe even friends and family. While bells and whistles are great, the most important part of your presentation is you. So start small: Record yourself on your webcam and give it a practice edit. With a little practice, you can create a webinar you’re proud of.