Zoom is a filmmaking technique that has many practical and stylistic uses, like drawing a viewer’s eye to a specific detail, making text easier to read, adding a bit of life and visual interest to still images in a video, or making it very clear that a character is thinking about breakfast.
With analog cameras and professional filmmaking, zoom is typically accomplished using special lenses. Your smartphone’s camera software, on the other hand, handles the process digitally. Both accomplish the same thing, by presenting images that make the subject look closer than it actually is.
If you forgot to zoom while recording, video editing software makes it a snap to quickly and easily zoom in on video after the fact. The video zoom effect in software essentially enlarges a video image by making that image the only thing visible in the frame.
Beyond just zooming in, you can also add a bit of visual interest to the scene using the Ken Burns effect, a pan and zoom across still images. Pioneered and used prolifically by historical documentary filmmaker Ken Burns, it’s become a popular way to make storytelling through photos more interesting.
What to consider before applying zoom to your video
There are a few things to consider when applying a zooming effect to your video.
Dimensions (width and height of video)
When applying a zoom effect in video editing software one of the most important factors to consider is the dimensions. Not just of the video file you will be zooming in on but also the dimensions you’ve chosen in the software’s project settings.
Dimension, in this case, refers to the height and width of the video in pixels. This is slightly different from another term often associated with video sizes — aspect ratio. Aspect ratio is used to describe the width of a video in relation to the height. Dimension describes the actual size in pixels. A standard HD video is 1,920 pixels wide by 1,080 pixels tall. The aspect ratio of this is 16:9. However, a video that is 1,280 pixels wide by 720 pixels tall also has a 16:9 aspect ratio.
- Project Dimensions
In most video editing software when you create a new project you will be asked to select the height and width. This is the dimension of the final video. For example, if you wish to produce a video that will be standard High Definition (HD), select 1,920 pixels by 1,080 pixels.
- Source Video/Image Dimensions
Now consider the dimensions of the source video or image files you are using in your project, meaning the files you wish to apply the zoom to. The video you are zooming in on should have a width and height larger than that of your overall project. This is because the digital zoom is actually simply enlarging the image, which may result in reduced image quality if enlarged beyond its full size. A larger video will allow for better-looking zoom.
Zoom Animation
When we apply zoom in a video editor what we are doing is animating the scale and position values of the video or image. With this in mind, you can refer to the speed and movement of a zoom as its animation.
- Scale. When zooming in or out using software we are scaling the video/image up or down (or, put another way, enlarging or shrinking the image). The zoom effect is achieved by animating the scale from one value to another. If we wanted to zoom in twice as close to the image we would start with the image at 100% (or 1x) at the beginning of the zoom and end the zoom at 200% (or 2x, twice its original size).
- Movement. Consider what area of the image you’d like to zoom in on and what kind of movement you’d like to take to get there. Where is the detail you’d like to draw the viewer’s attention to? Rather than zooming in on the center of the image you could, for example, opt to zoom in to a specific detail in the upper right of the video. If you are applying the Ken Burns effect, you may want to zoom in and pan across the image.
- Zoom speed. The duration of the zoom, meaning how long it takes from being zoomed out to being zoomed in, dictates the speed of the zoom. The shorter the duration, the quicker the zoom and animation will play out. A slow zoom-in is a great way to gradually draw the viewer in on a specific detail or add to the dramatic tone. A fast zoom or pan across the image can be used to surprise the viewer or create a sense of rapid movement, even when dealing with still images. Consider what you want the viewer to understand with the zoom, and time your digital zoom accordingly.
3 Different ways to apply zoom to a video
There are several ways to zoom in on a video, both while you are recording the video or “in post” (i.e. in post-production, when you are editing the video). Here are a few ways to zoom in on a video.
- Zoom in while recording the video. If you are filming the video yourself, you can simply zoom in during the recording process. Dedicated cameras and camcorders often accomplish this “optically” using lenses to manipulate the image. Most digital cameras and smartphones zoom in digitally, meaning that they enlarge the image using software to make it look as though the subject is closer. For most camera apps this can be done using a pinch or spread motion with two fingers on the phone screen.
- Zoom in digitally using video editing software. Zooming in on existing video or still, images are easily accomplished using most video editing software or applications. With a video editor that lets you zoom in, like Descript, you can import the video or stills into the application, and look for a zoom, scale, or height and width setting. Choose the zoom or scale level you desire at the beginning of the clip you’d like to zoom in on to set a keyframe. Then play the clip to where you’d like the zoom to end, and set the zoom or scale level again. You should now have your zoom animation. Better yet, some software has a dedicated Zoom and Pan feature that makes the process even simpler.
- Zoom in by digitally cropping. Cropping a video is accomplished similarly to zooming and both terms are sometimes used interchangeably. Typically, though, cropping is more stationary where the intent isn’t to create movement through “zooming” but to reframe the shot. That is to say, you set the zoom level at the beginning of the shot and it remains there through to the end of the shot. Some software has a Crop or Crop and Zoom feature dedicated to quickly setting this up. It can also be accomplished the same way as mentioned for zooming in digitally except you only need to set the scale/zoom once. If a simple, stationary crop is what you desire, you can often also set this during the export process.
A step-by-step guide to zooming with Descript
Descript’s video editor is quite capable of quickly applying zoom while still giving you a lot of control over the effect.
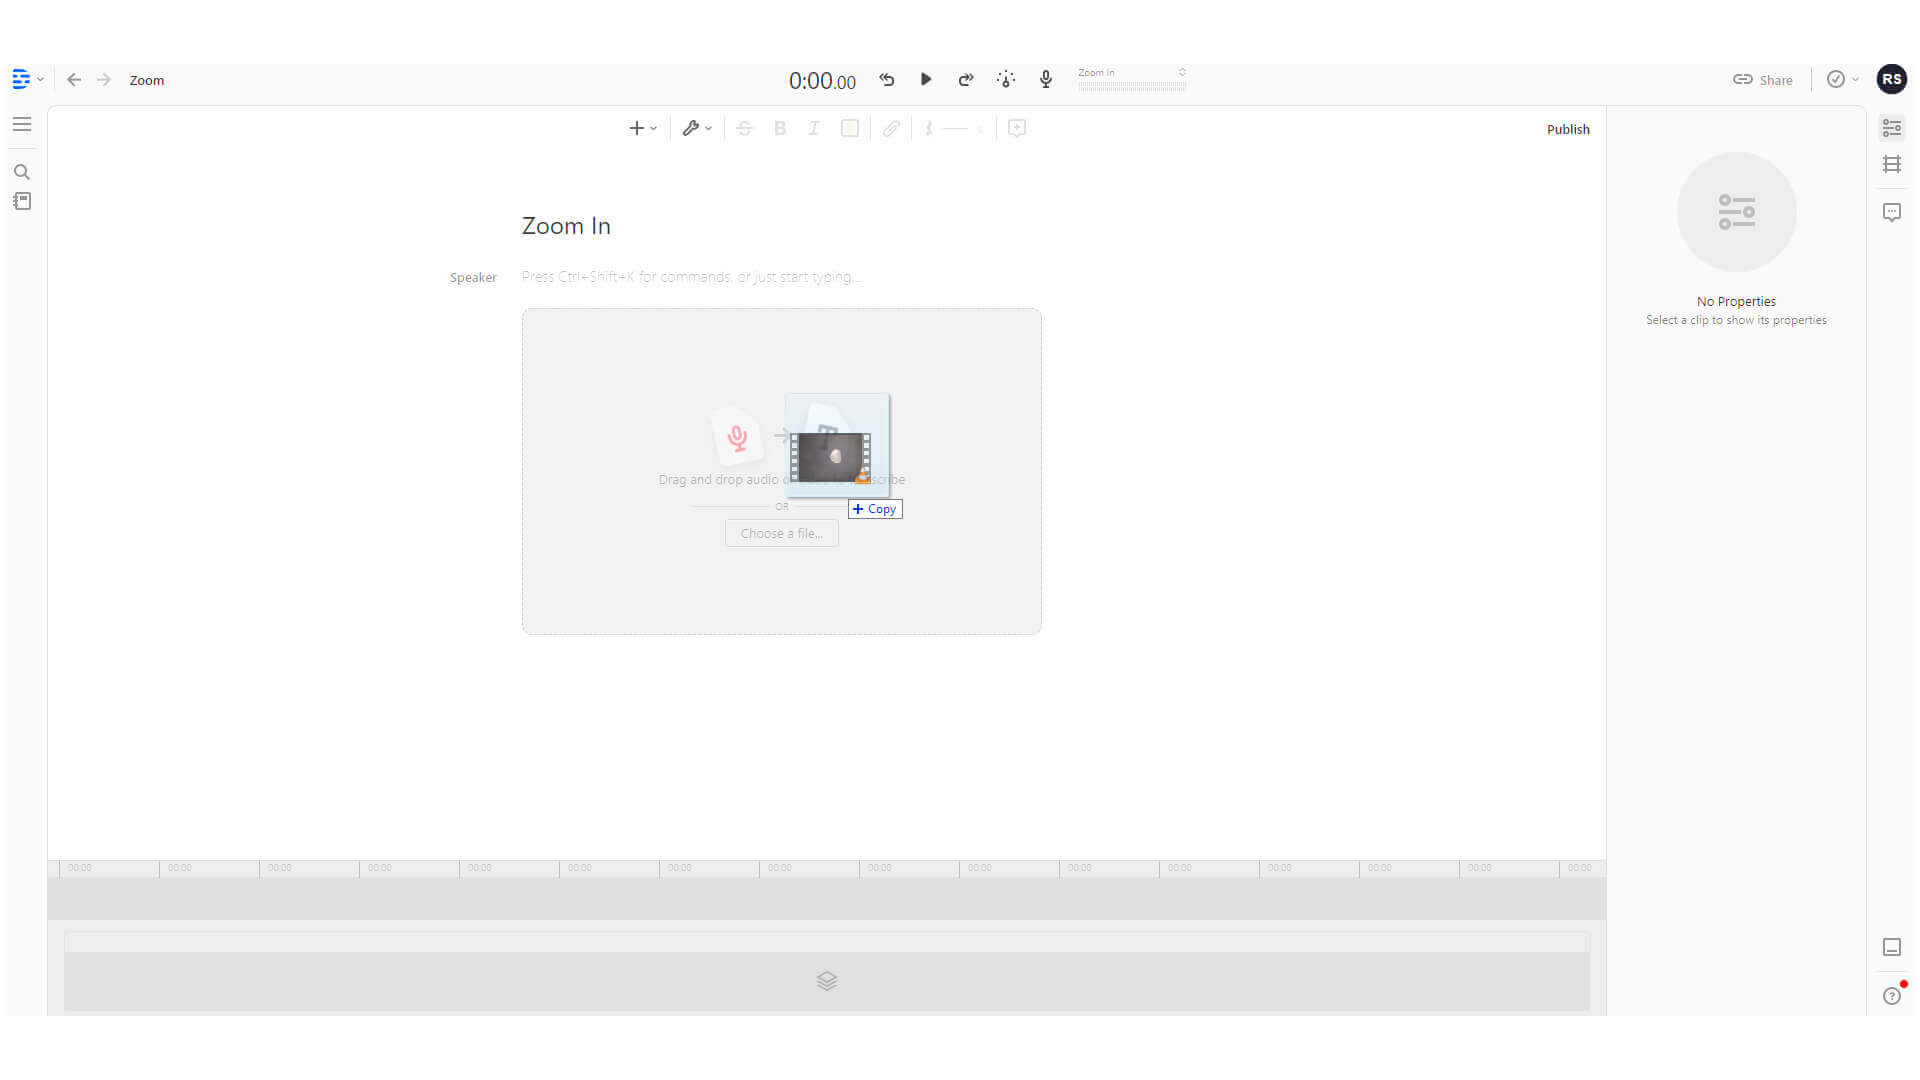
1. In the Descript desktop app, create a new project and import your video clip. You can do this by simply dragging and dropping the video file into the project.
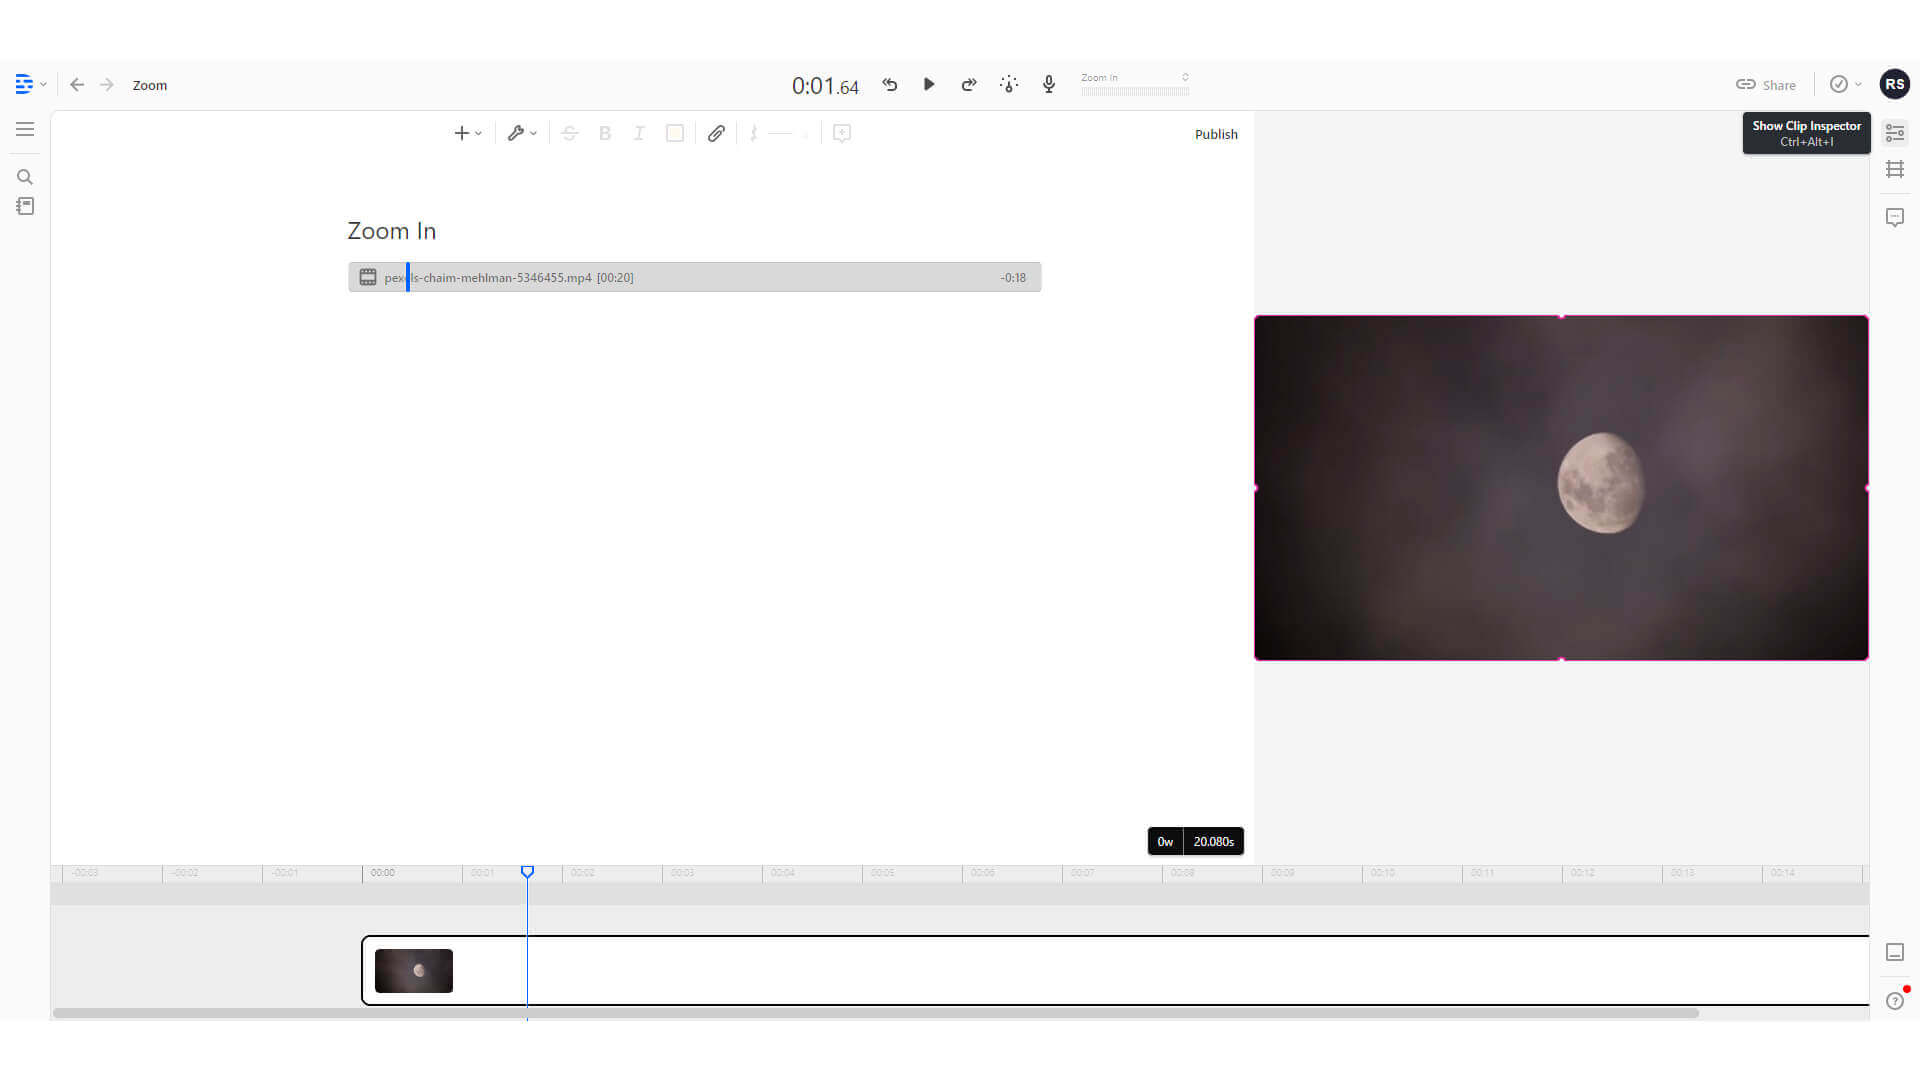
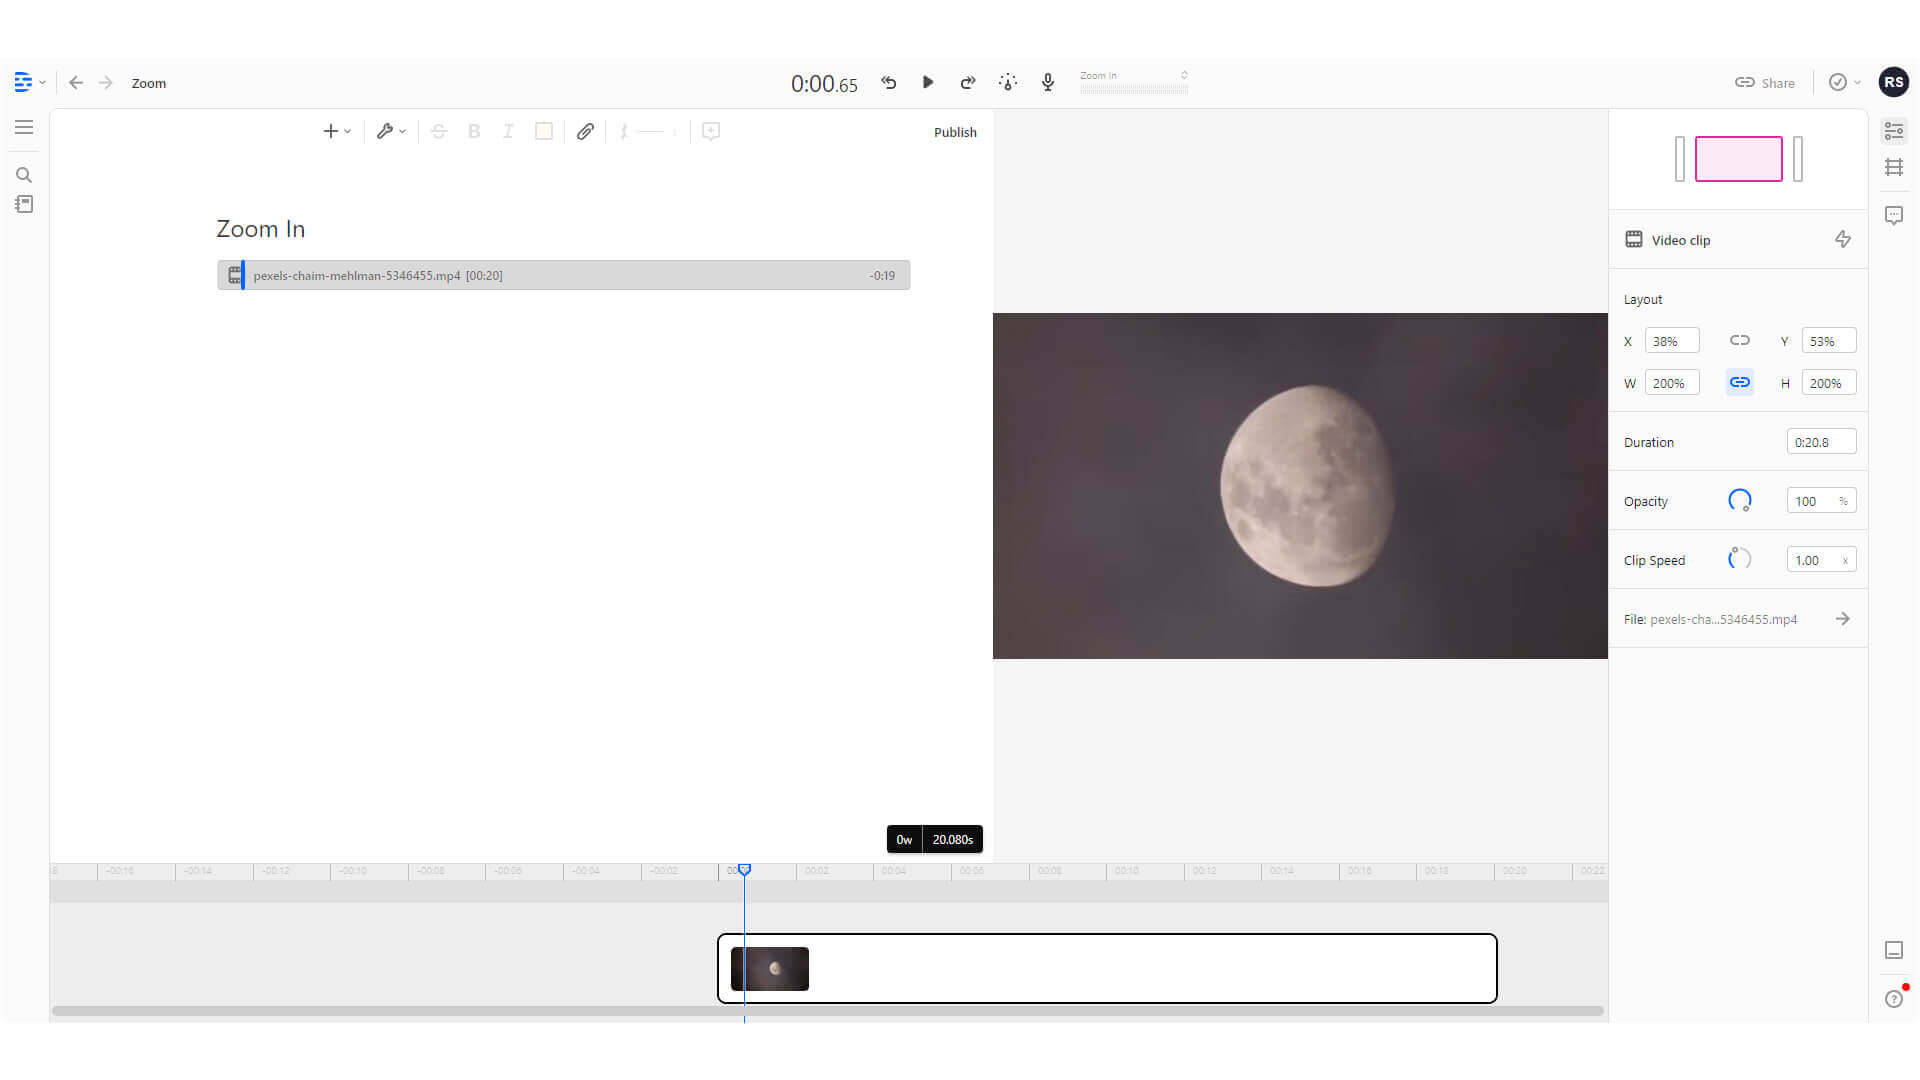
2. With the video clip imported and selected, click on the Show Clip Inspector button along the right side of the preview window.
3. In the Clip Inspection panel, look for the Layout box. This is where you can adjust the scale or zoom level. There are two options labeled W and H, which stand for width and height. At 100%, the full original video is displayed.

4. Setting these values higher allows the video to appear zoomed in. If the video appears stretched, squashed, or otherwise out of proportion, be sure the Link button between the W and H values is checked. This will ensure that the program maintains the correct aspect ratio when changing these values.
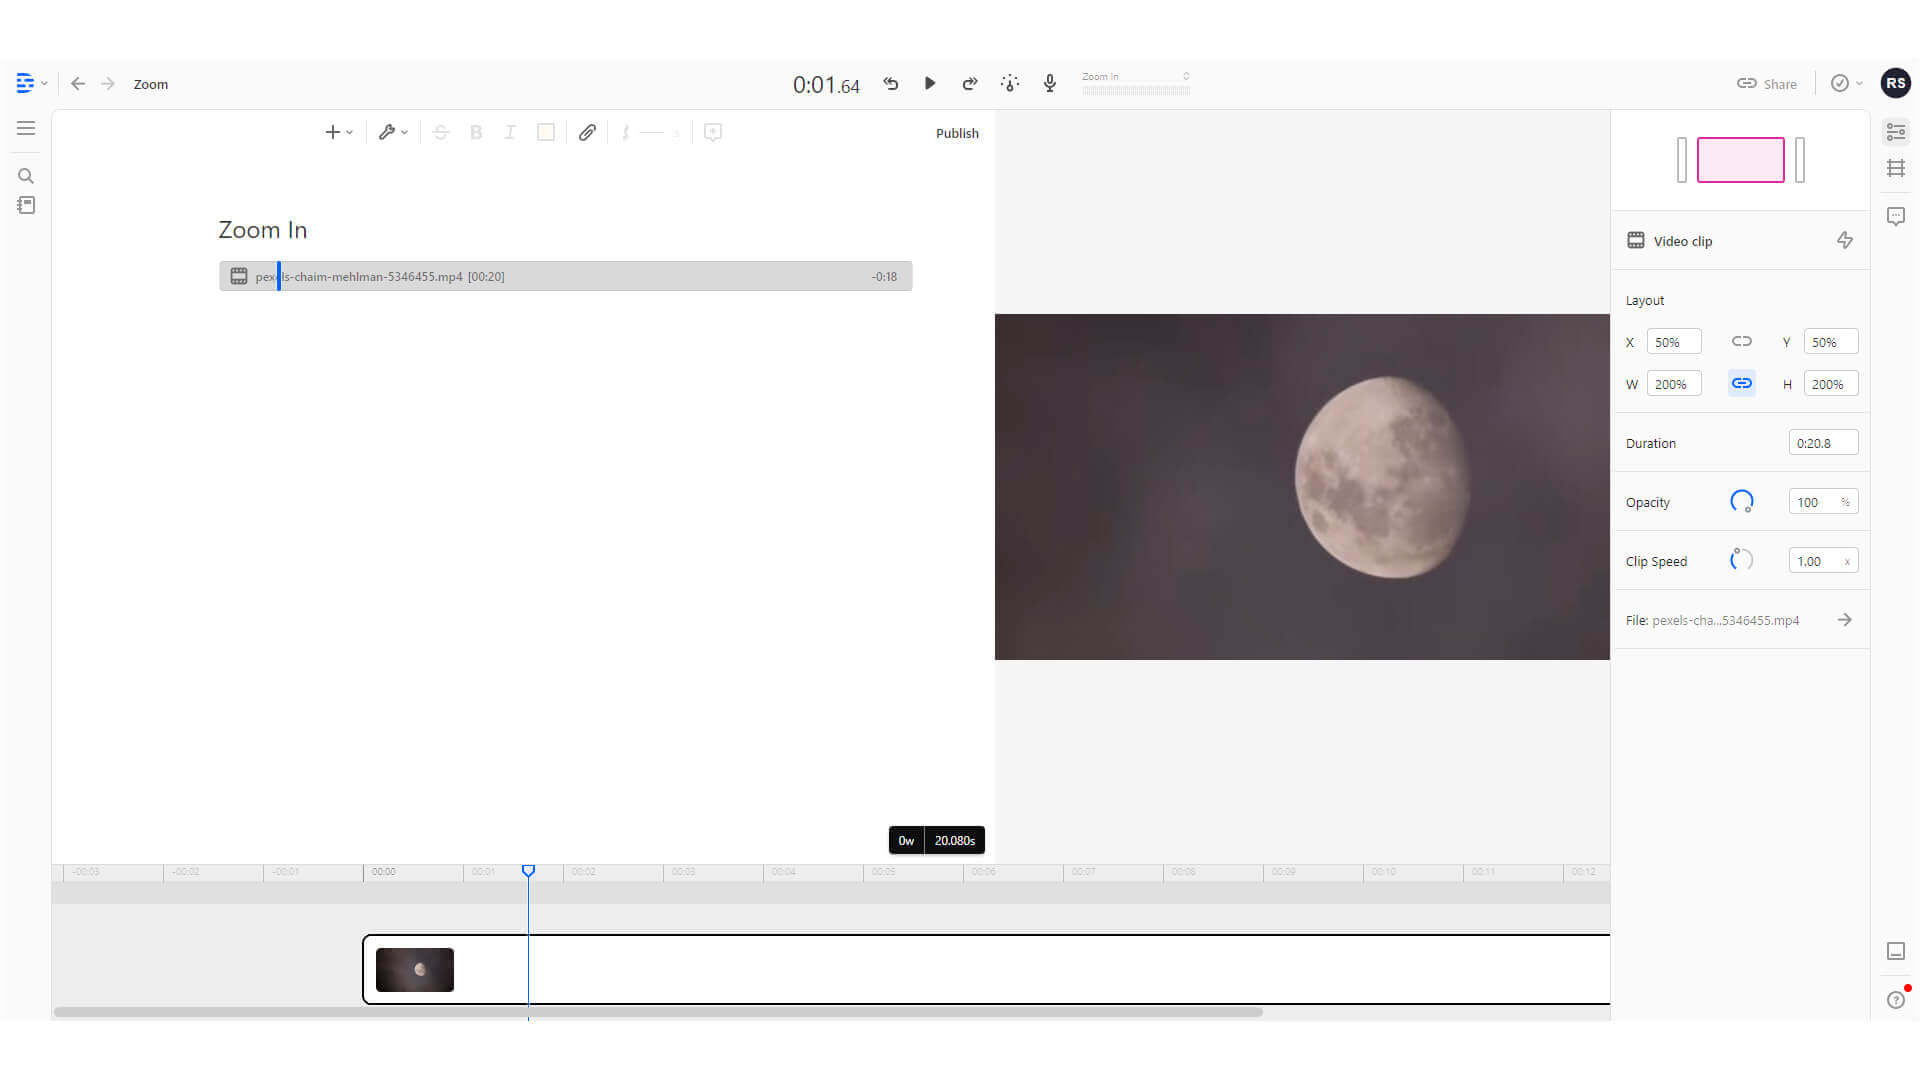
5. If you would like to adjust the position of the video or image, change the X and Y values.
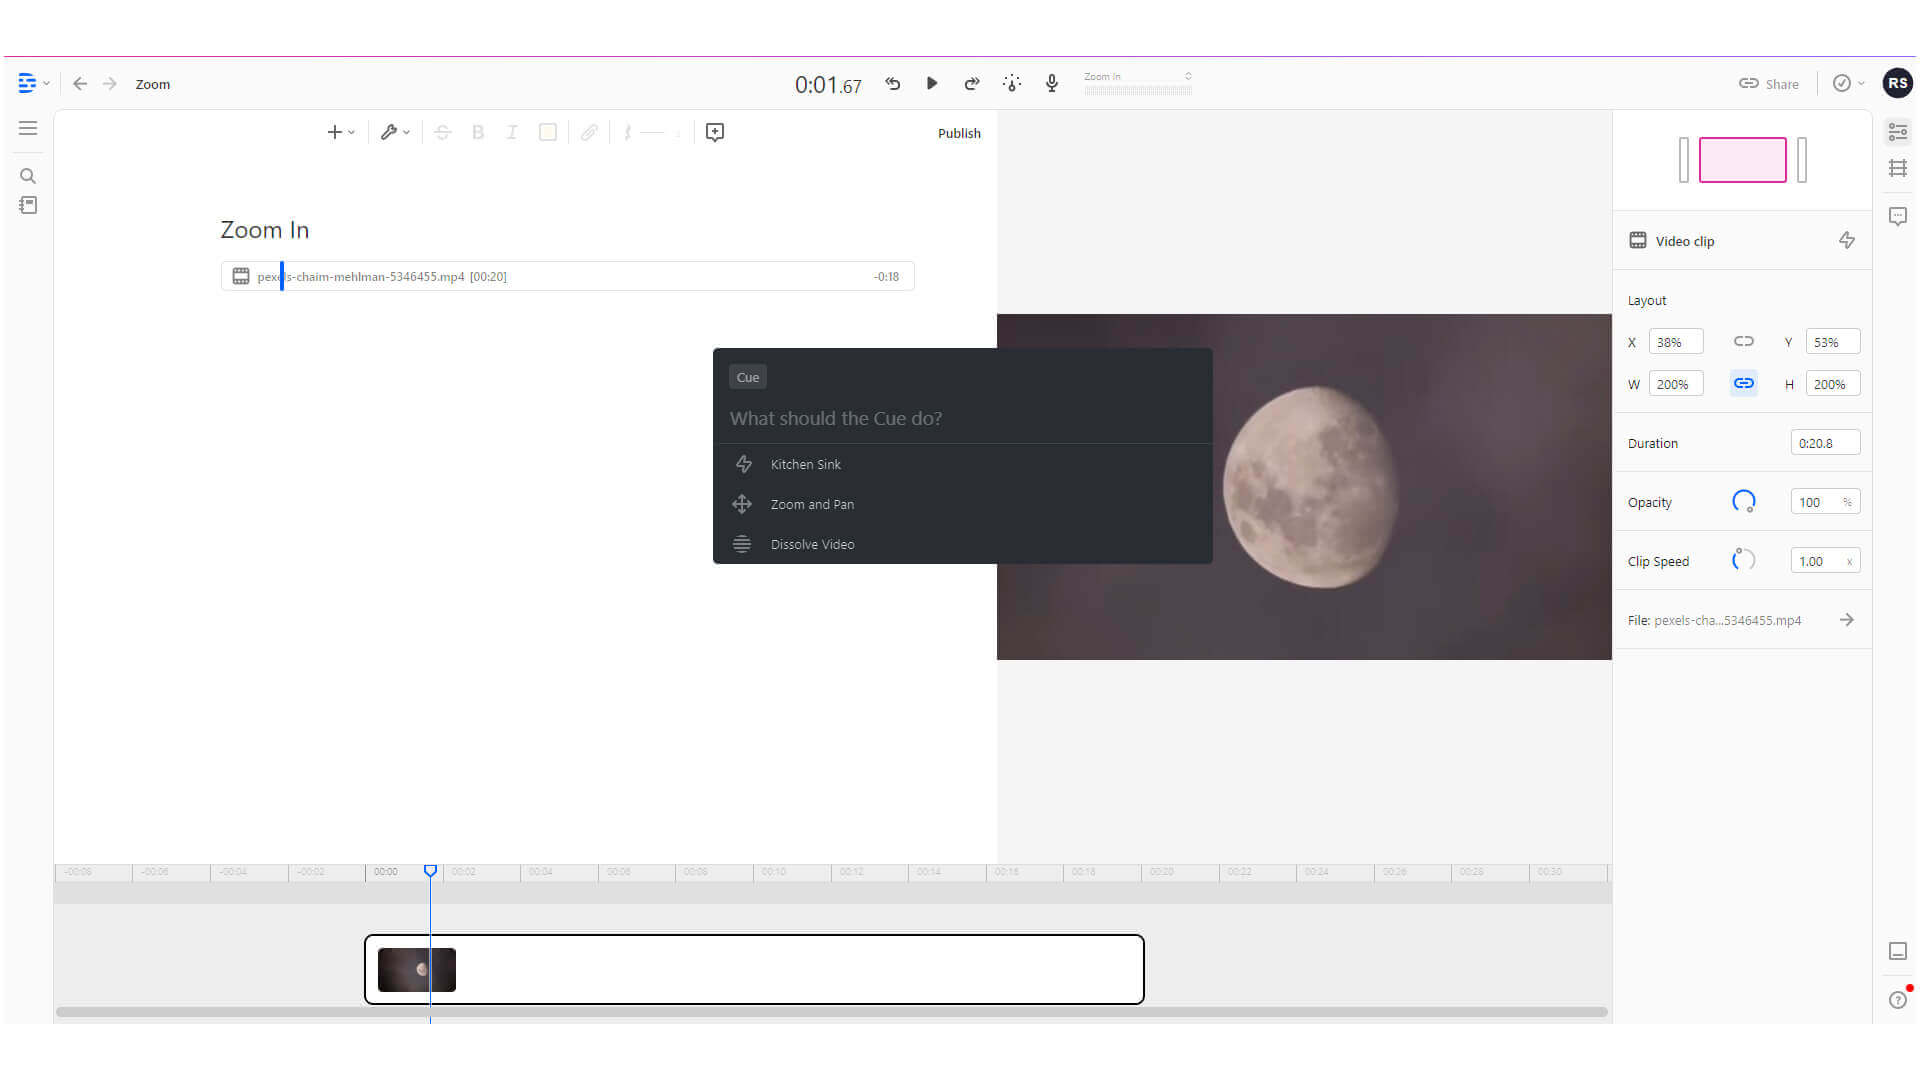
6. Now for some movement! You can set keyframes in Descript by pressing the Add Cue icon.

7. Select Zoom and Pan from the options that pop up.
8. This will automatically apply a zoom effect and set two keyframes.
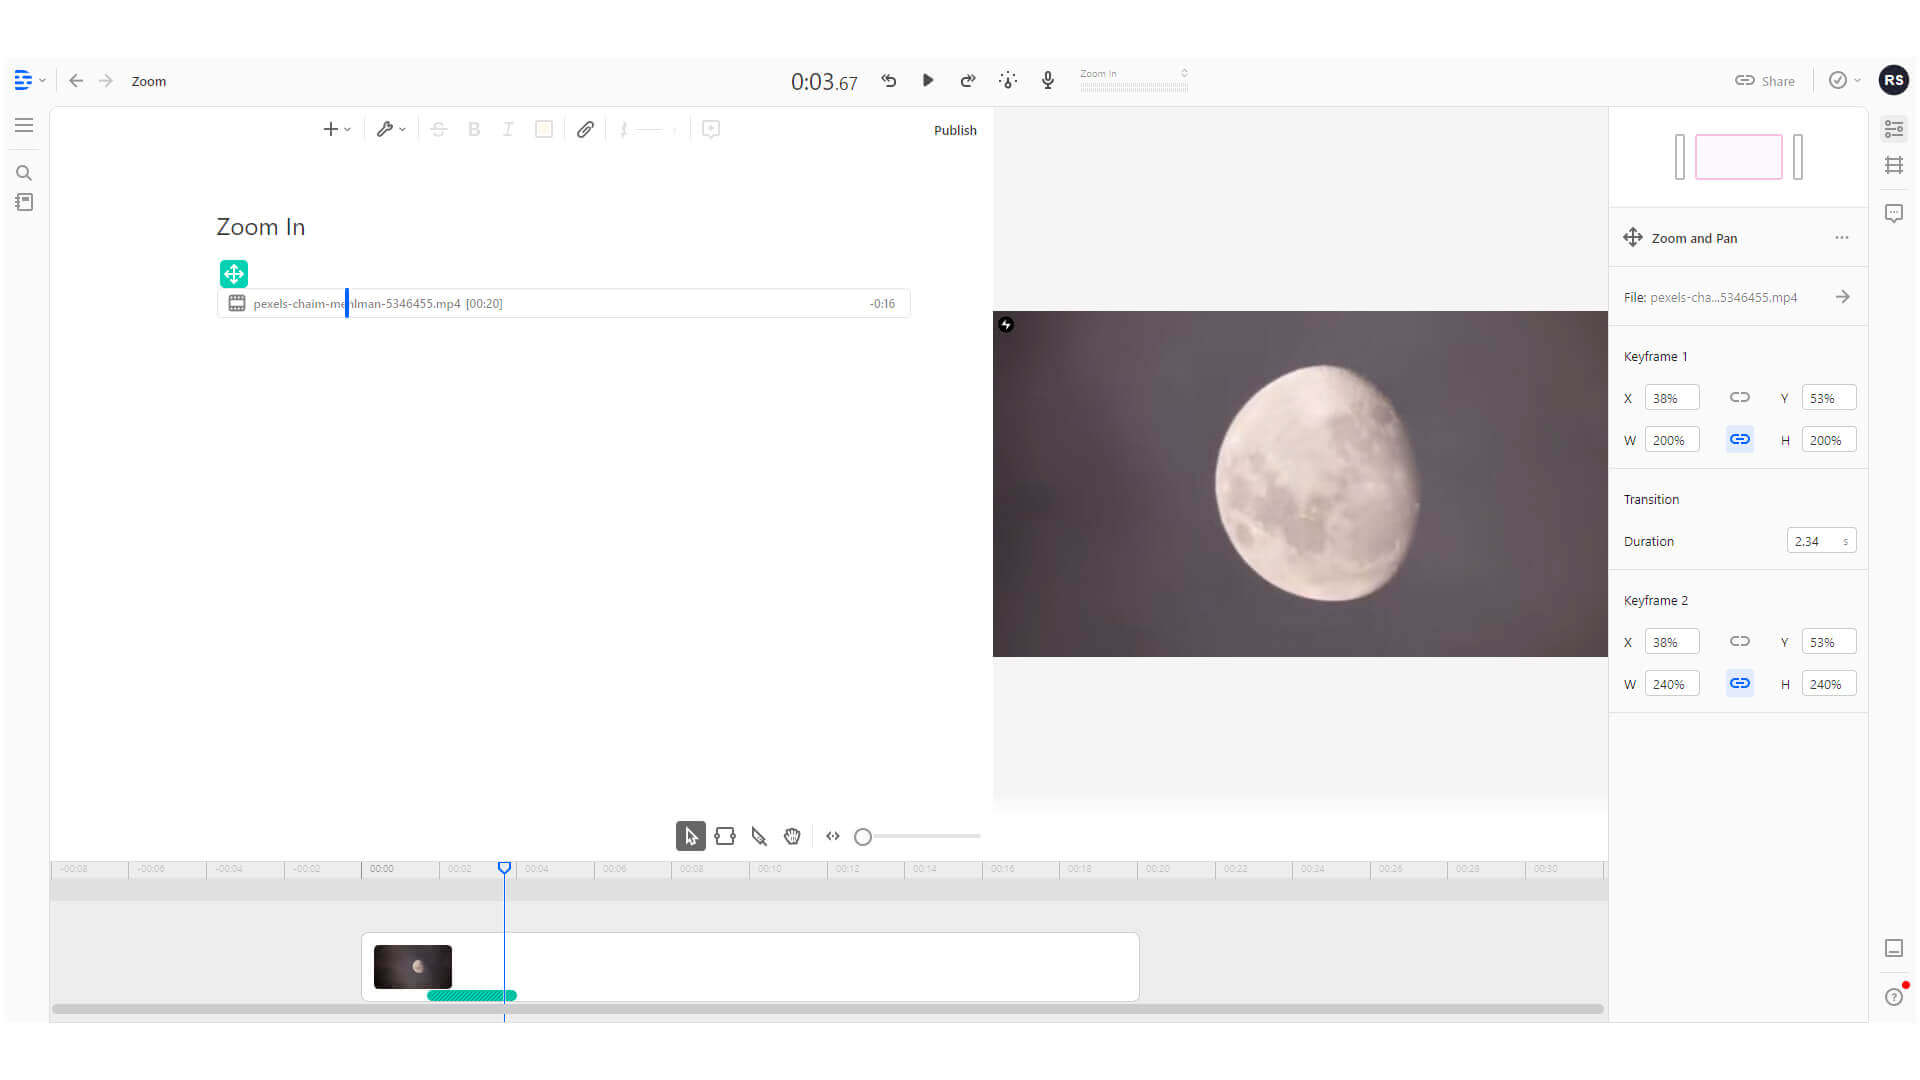
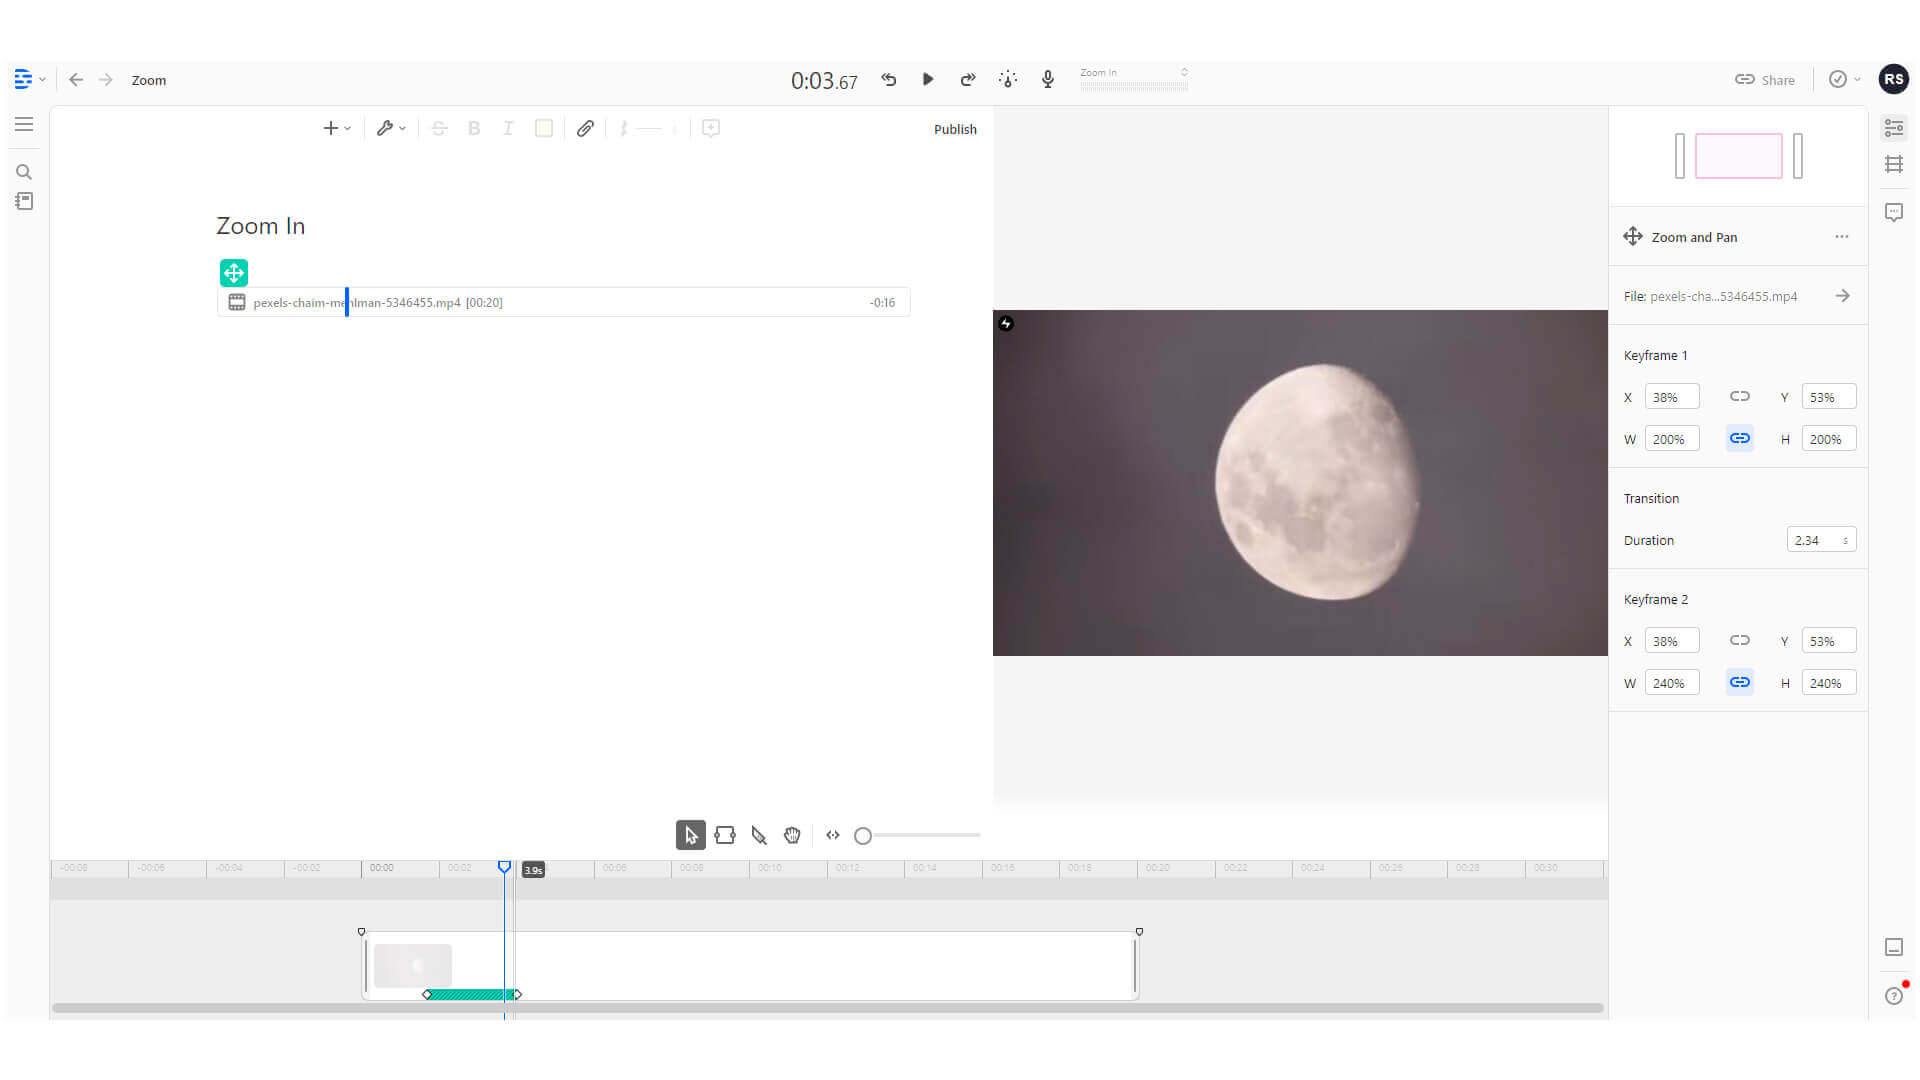
9. In the Zoom and Pan panel, you can refine the values for the zoom and position of the video as well as the duration of the zoom animation. You can also adjust the position of the keyframes, as in when the zoom starts and stops, in the timeline panel along the bottom of the interface.
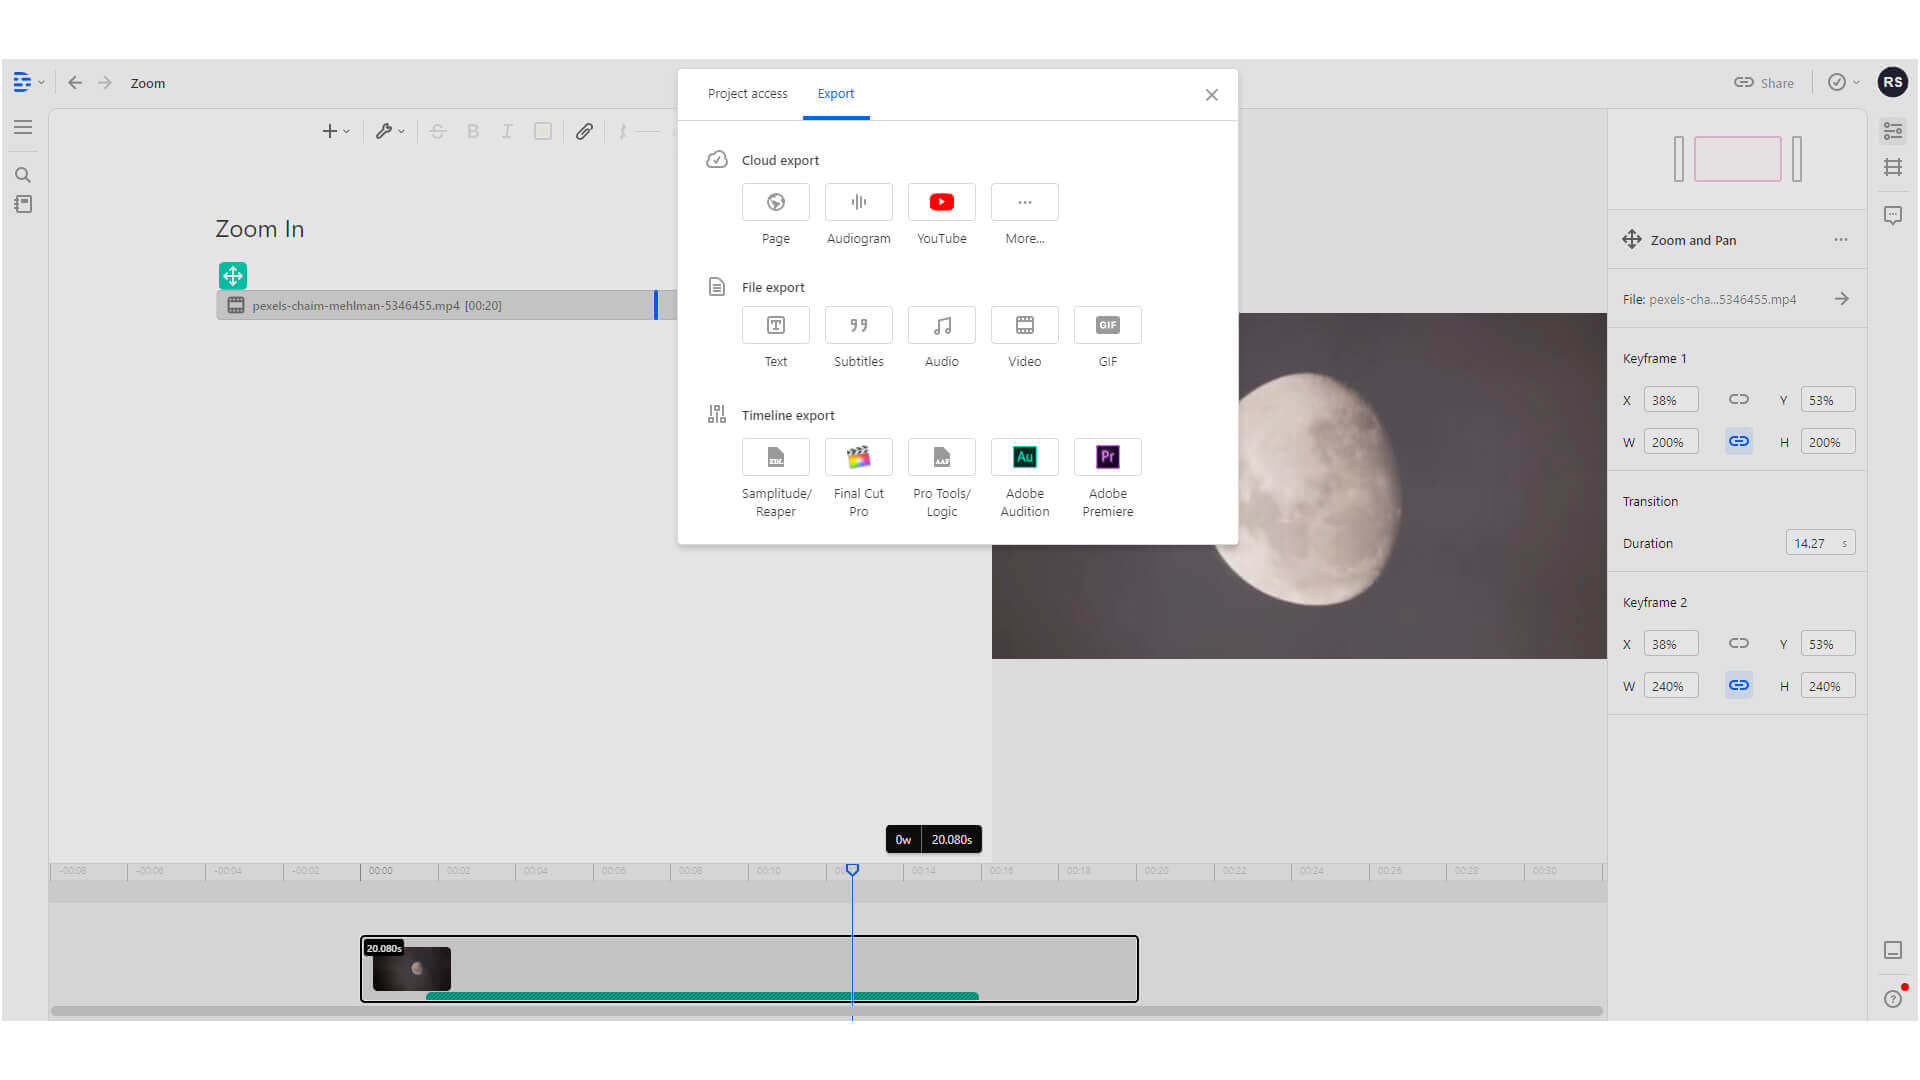
10. When finished, export the video by pressing the Share button in the top right and selecting your desired file format from the export tab.