
There are lots of reasons to record a Zoom meeting: maybe it’s a work call you want to share with colleagues who couldn’t be there. Maybe it’s a walkthrough you want to be able to reference later. Maybe it’s a remote interview you plan to publish as a podcast (in that case, you’ve got better options than Zoom!).
Whatever the reason, it’s good to know how to record a Zoom meeting. This step-by-step tutorial shares how you can record them on your laptop or phone, whether you’re the host or a participant.
How to record a Zoom meeting on your laptop
Before you record a Zoom meeting or webinar, you need to adjust a few settings.
A few minutes before starting a Zoom call, check the local and cloud recording settings:
- Local recording: This records the meeting in the video layout you’re using, capturing details like participant names, separate audio files for each participant, and timestamps. The recording files will be saved locally on your computer or in another storage space you provide. Local recording is available to free and paid subscribers.
- Cloud recording: You can start a Zoom cloud recording on your laptop or phone. Zoom will save the recording files, which include audio, video, and chat text, in the cloud. You can stream them from your browser, download them to your computer, or edit them directly in Descript (more on that below). This option is available only to paid subscribers.
💡 NOTE: If you don’t have the recording option, open the Zoom web portal and edit your recording settings. If you’re using a work laptop or office Zoom account, have your administrator enable it. Then follow the steps below to record the meeting.
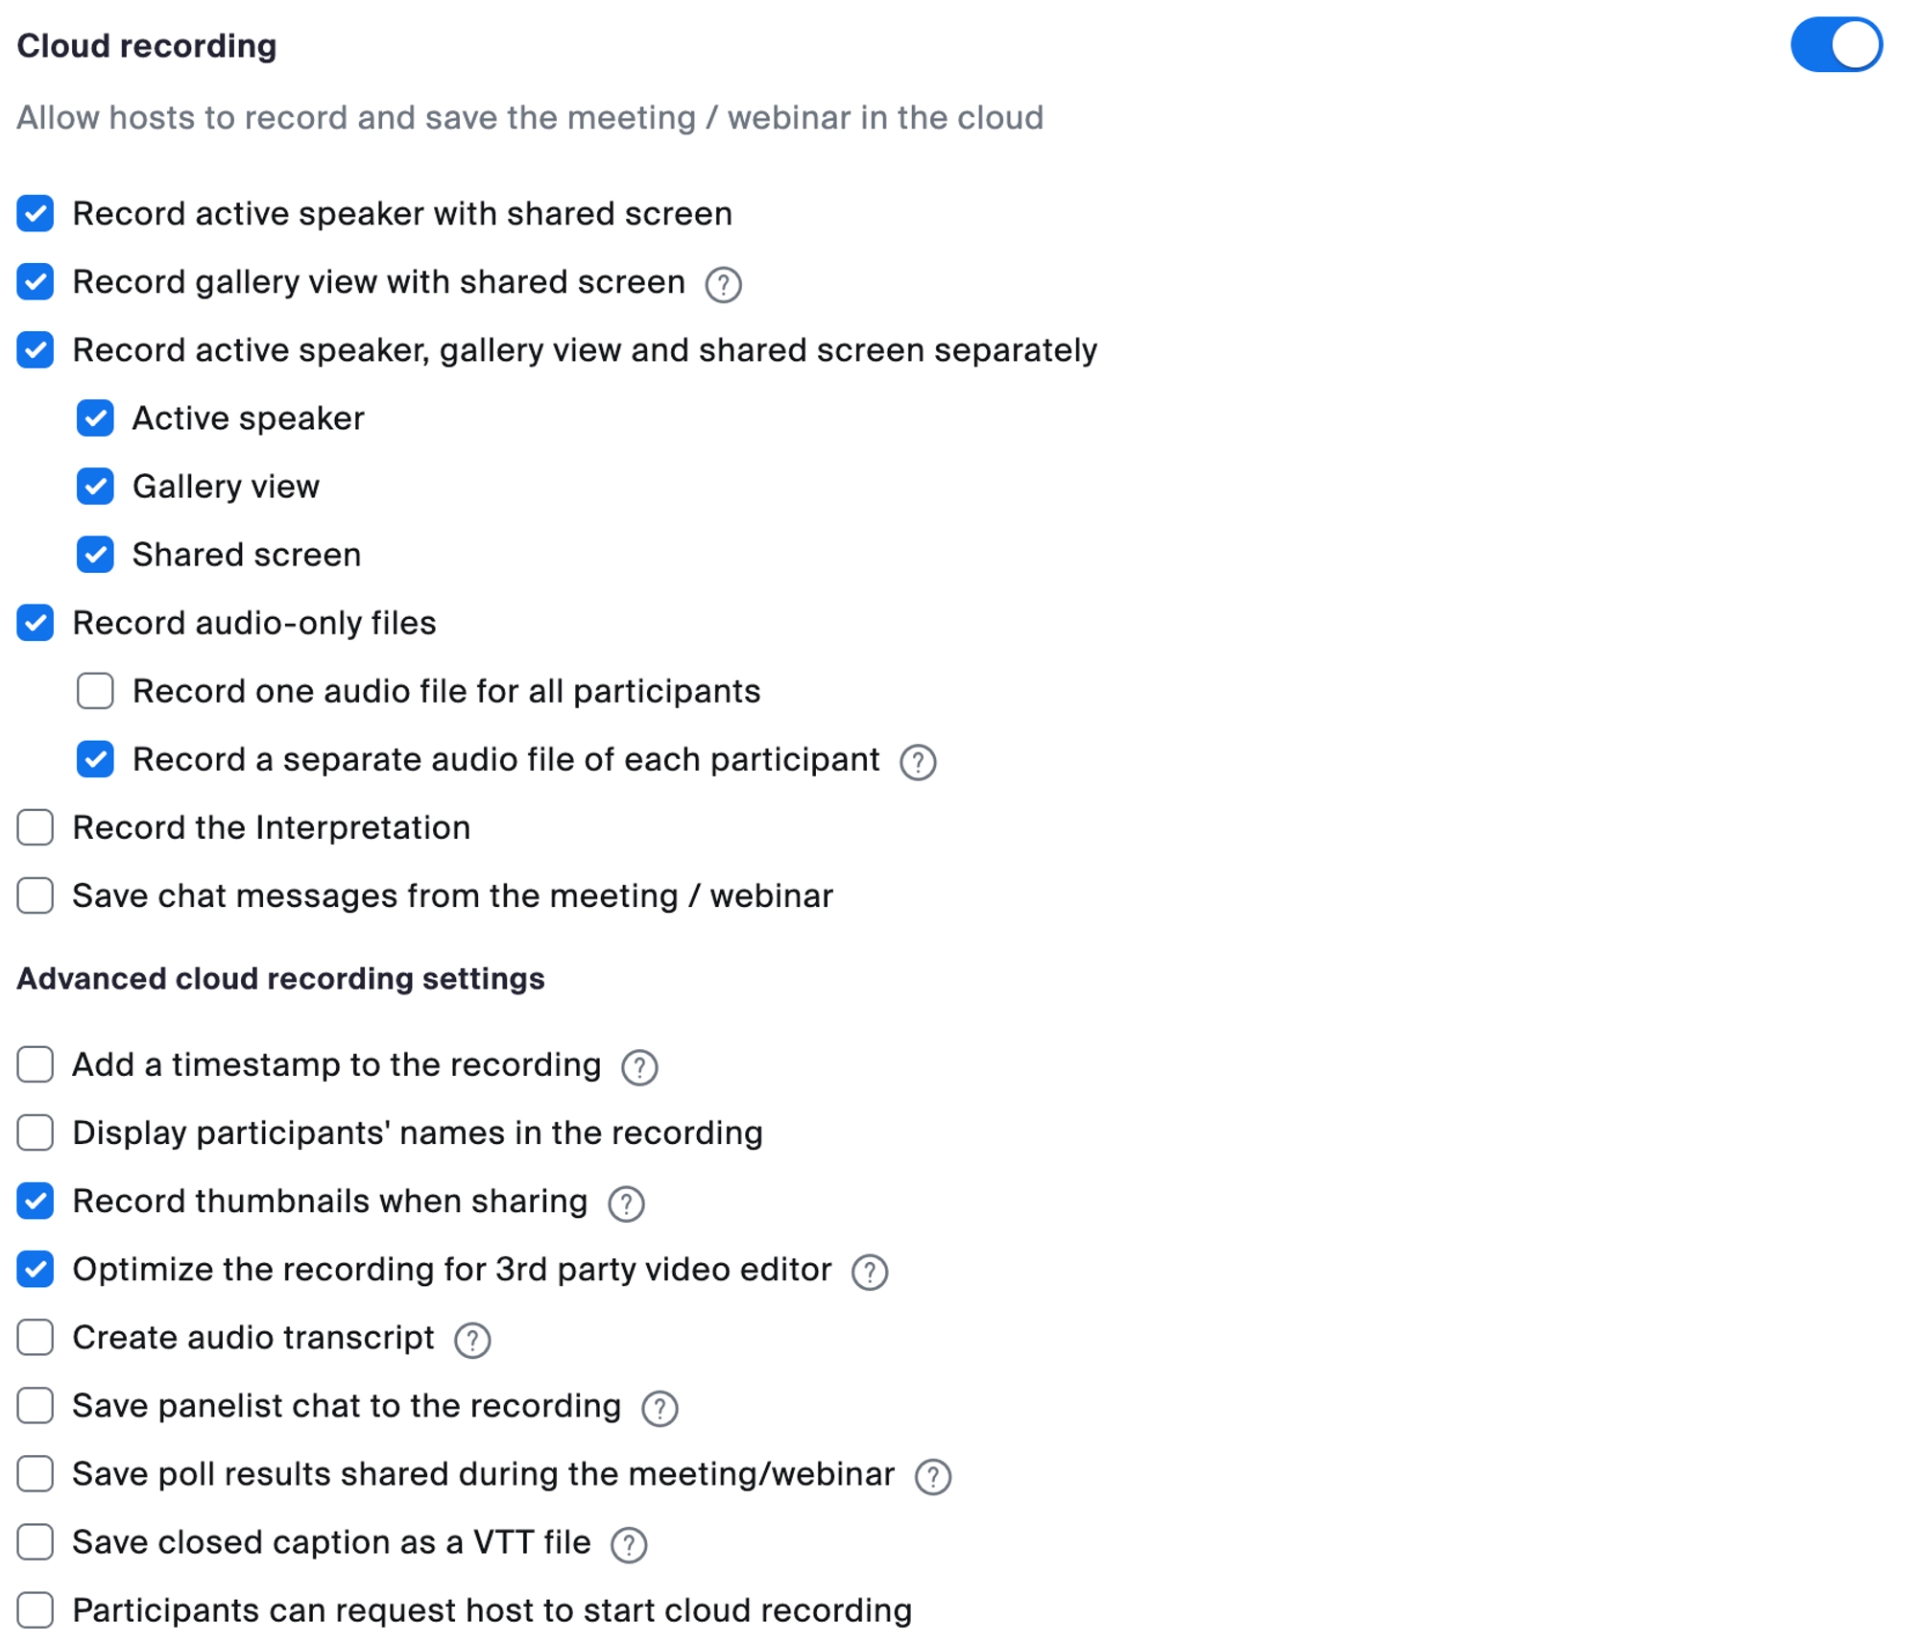
If you plan to edit and release your recording as a webinar, video or podcast, you'll also want to make sure you're getting the highest quality files. Here are the settings we recommend for a cloud recording, as found in the Zoom web portal. Above all, make sure you check Record audio-only files and Record a separate audio track of each participant. That will create a multitrack recording that's easier to edit later.
Now that you have the correct settings, here's how to record your Zoom call.
1. Launch Zoom
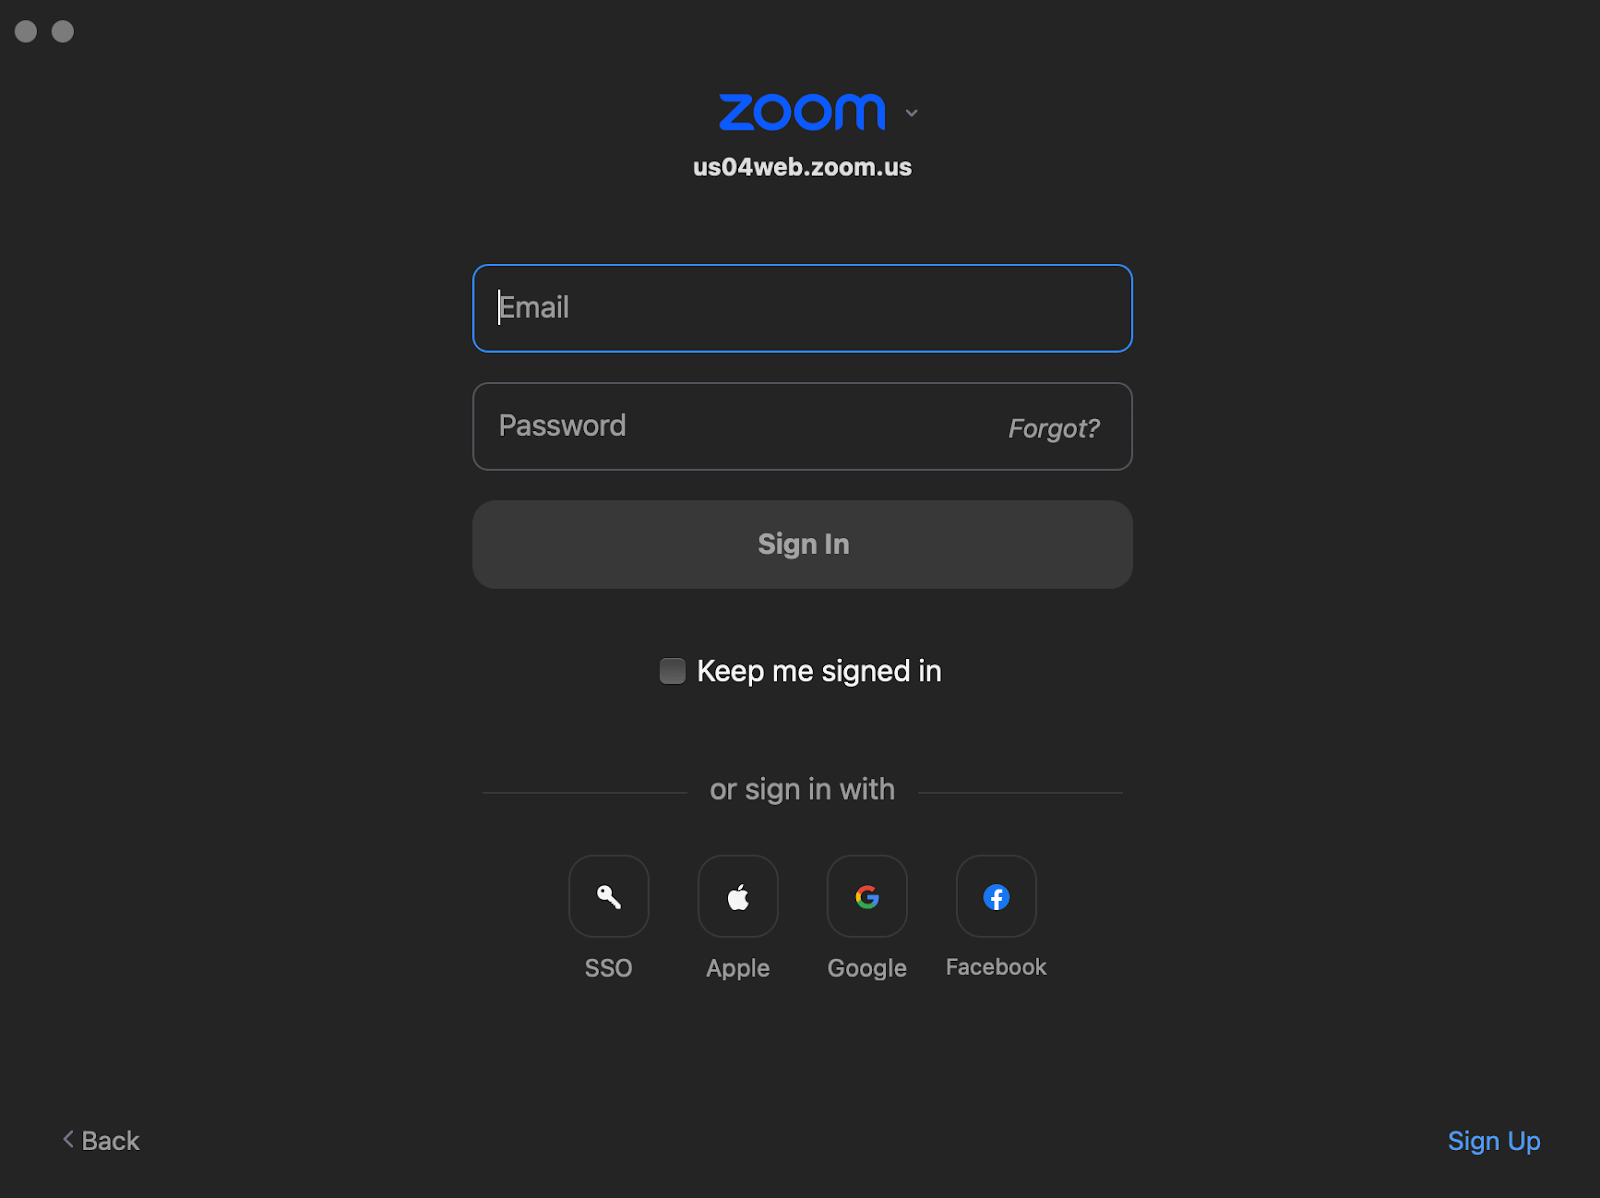
Select the Zoom desktop client on your laptop to launch it.

Enter your Zoom login credentials or sign in using your Google, Facebook, or Apple account, or single sign-on (SSO) provider.
After signing in, the system will prompt you to launch the Zoom app. Select Launch Zoom or Open Zoom.us.

2. Join or host a meeting
If you’re the meeting host, select New Meeting to start an instant meeting or Start Meeting for a scheduled meeting.
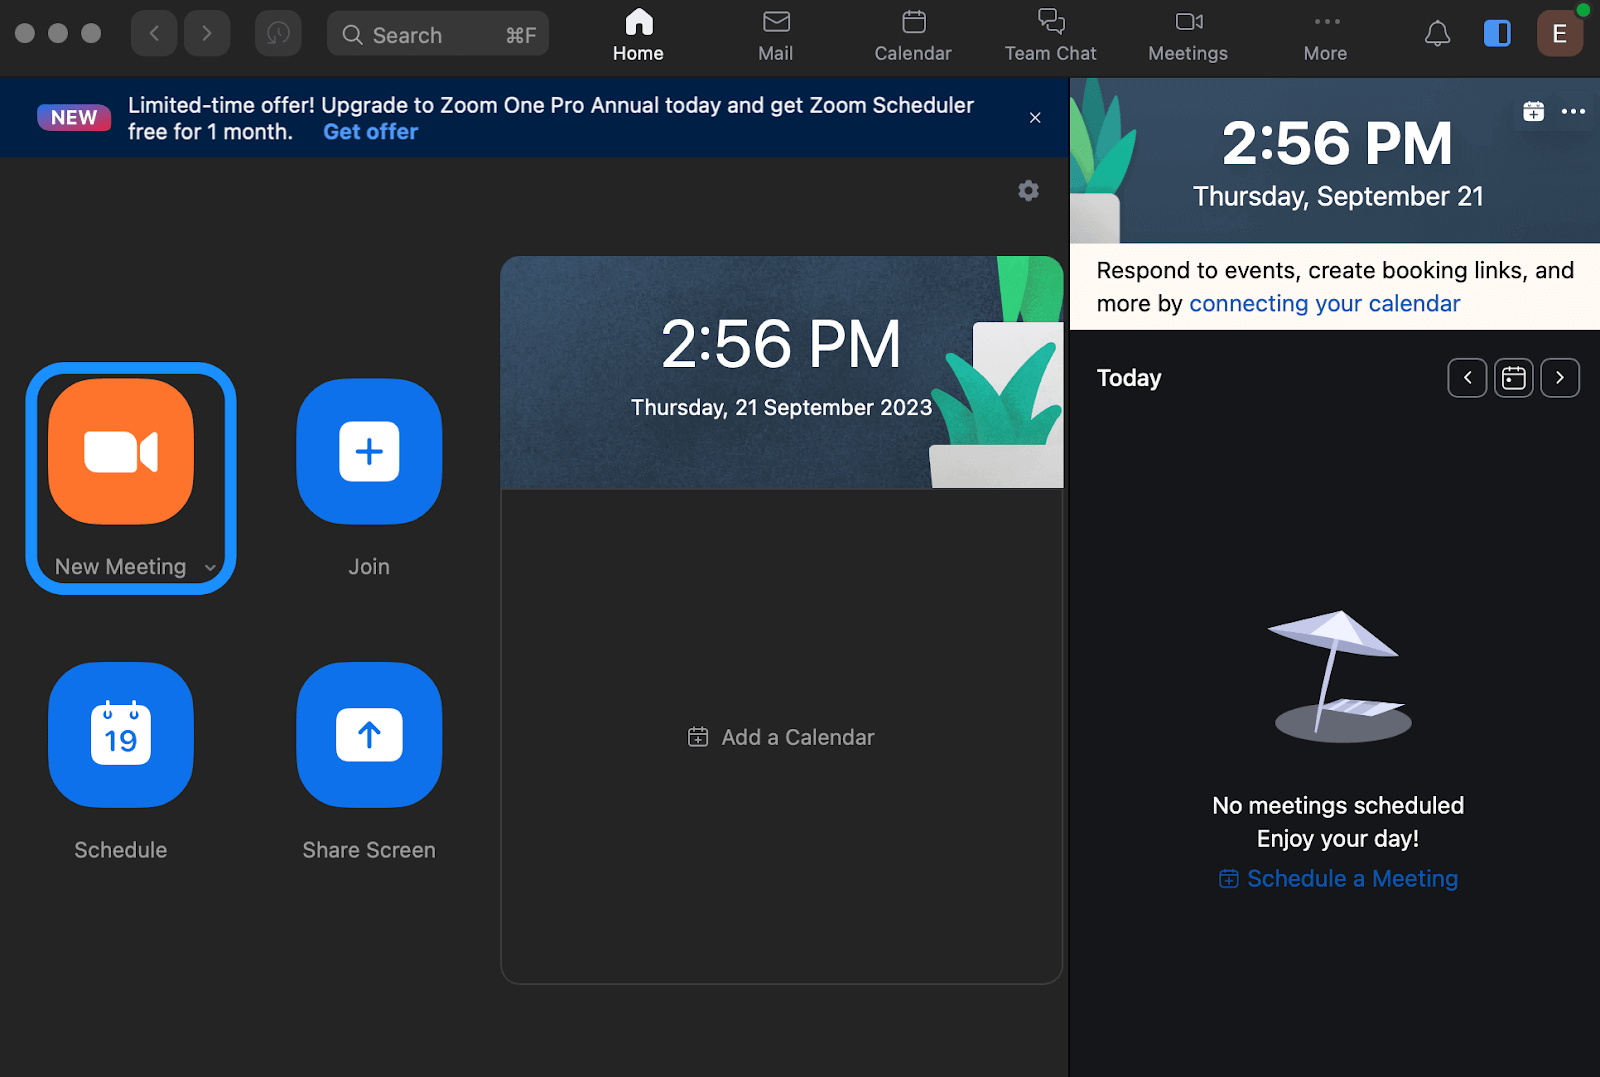
💡 NOTE: If you scheduled a Zoom meeting, go to the Meetings > Upcoming. Select the meeting you want to start, then click Start.

If you’re a participant, join using the meeting link provided by the meeting host, then enter the passcode if prompted. Alternatively, enter the meeting ID and passcode on the login screen.
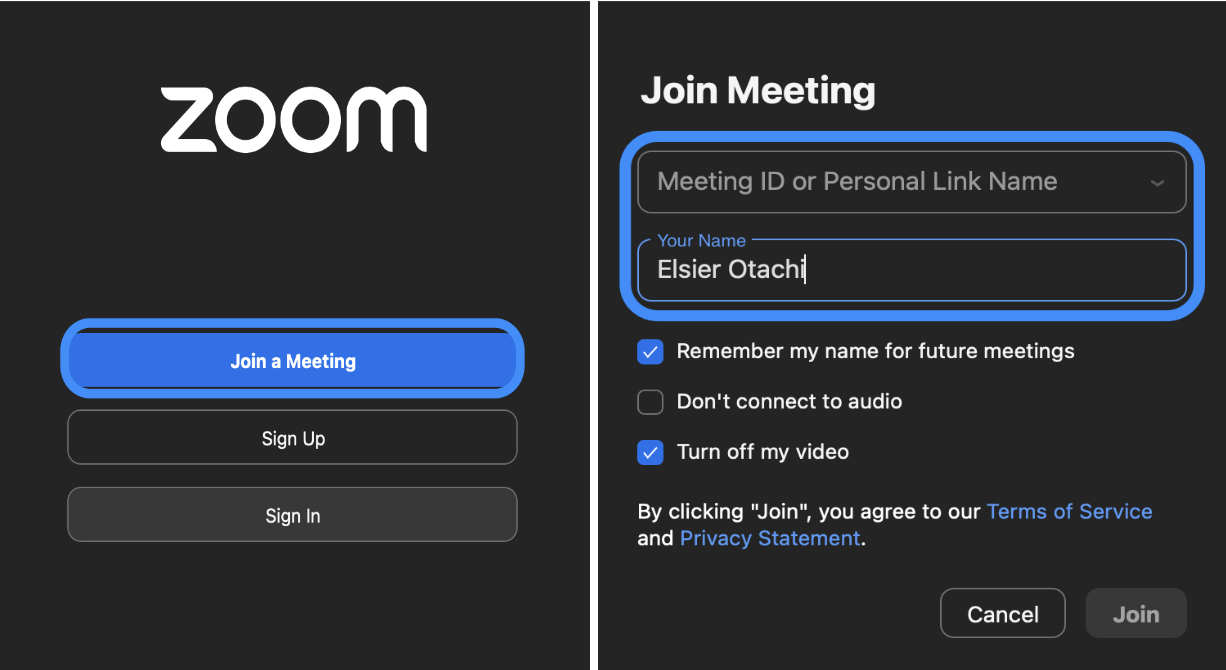
Select Join with computer audio when prompted or select the Join Audio icon to connect your audio. Click the video icon to turn your camera on.

3. Select recording options
Check your recording settings on the Zoom web portal or desktop client.
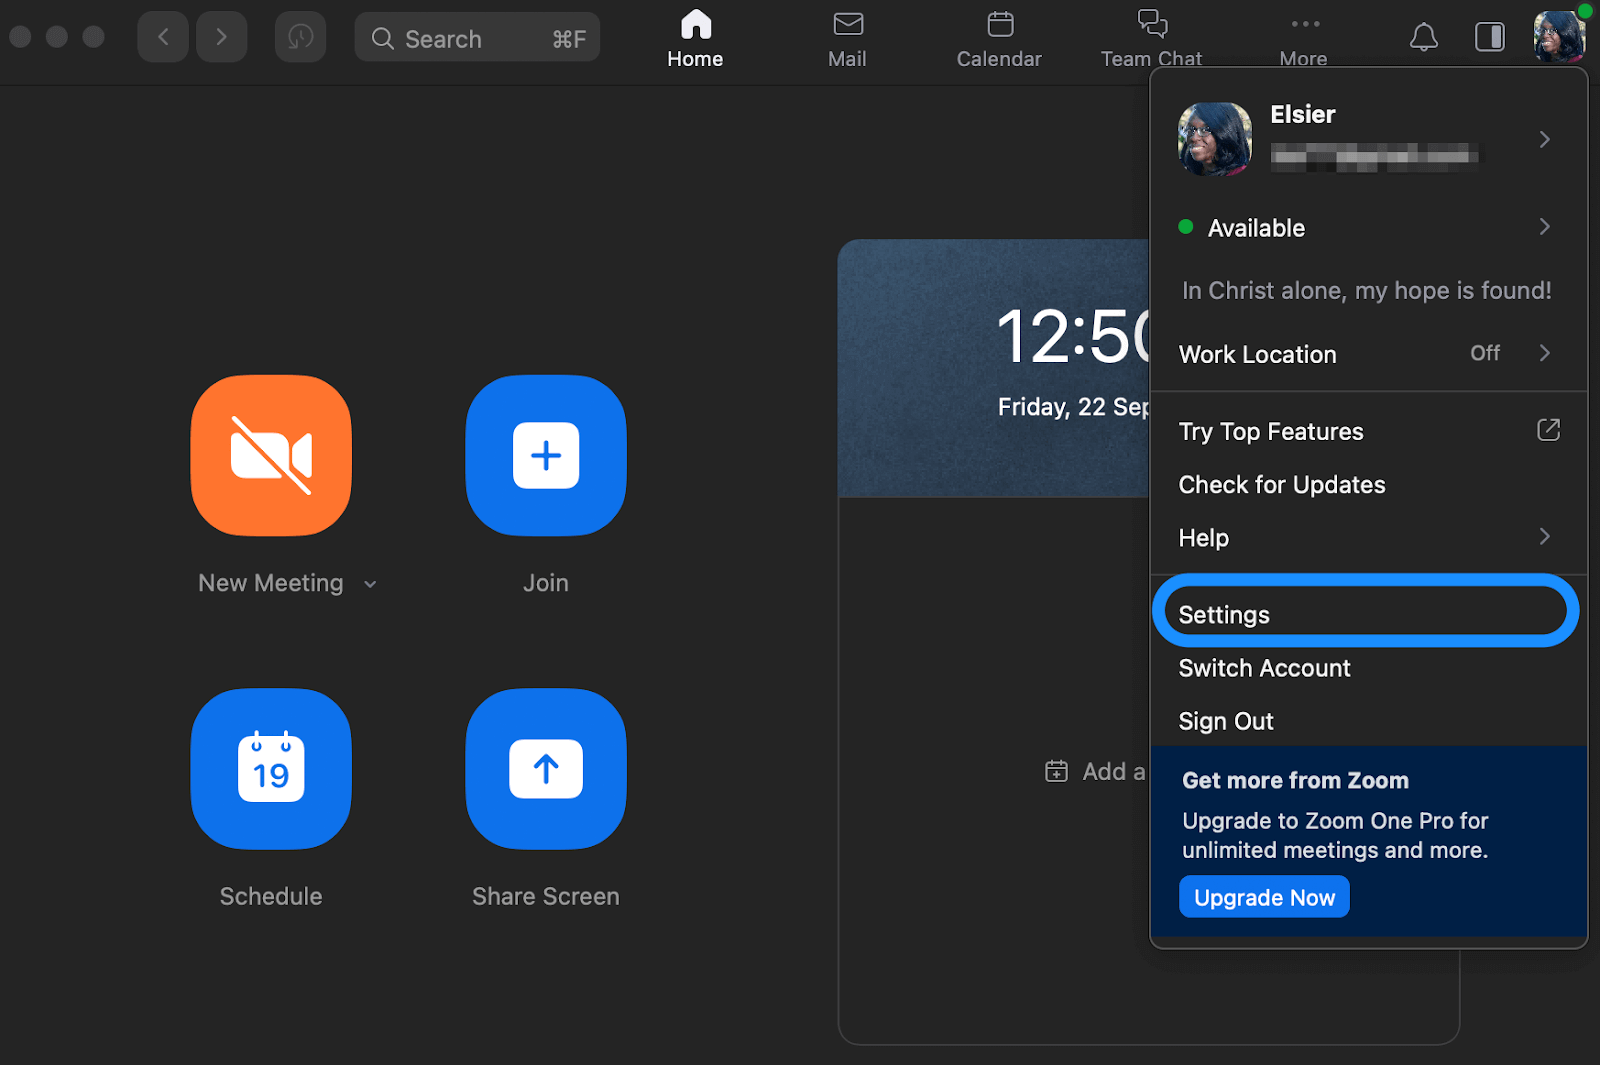
Click your profile picture and select Settings.
Select the Recording tab to access the recording options.
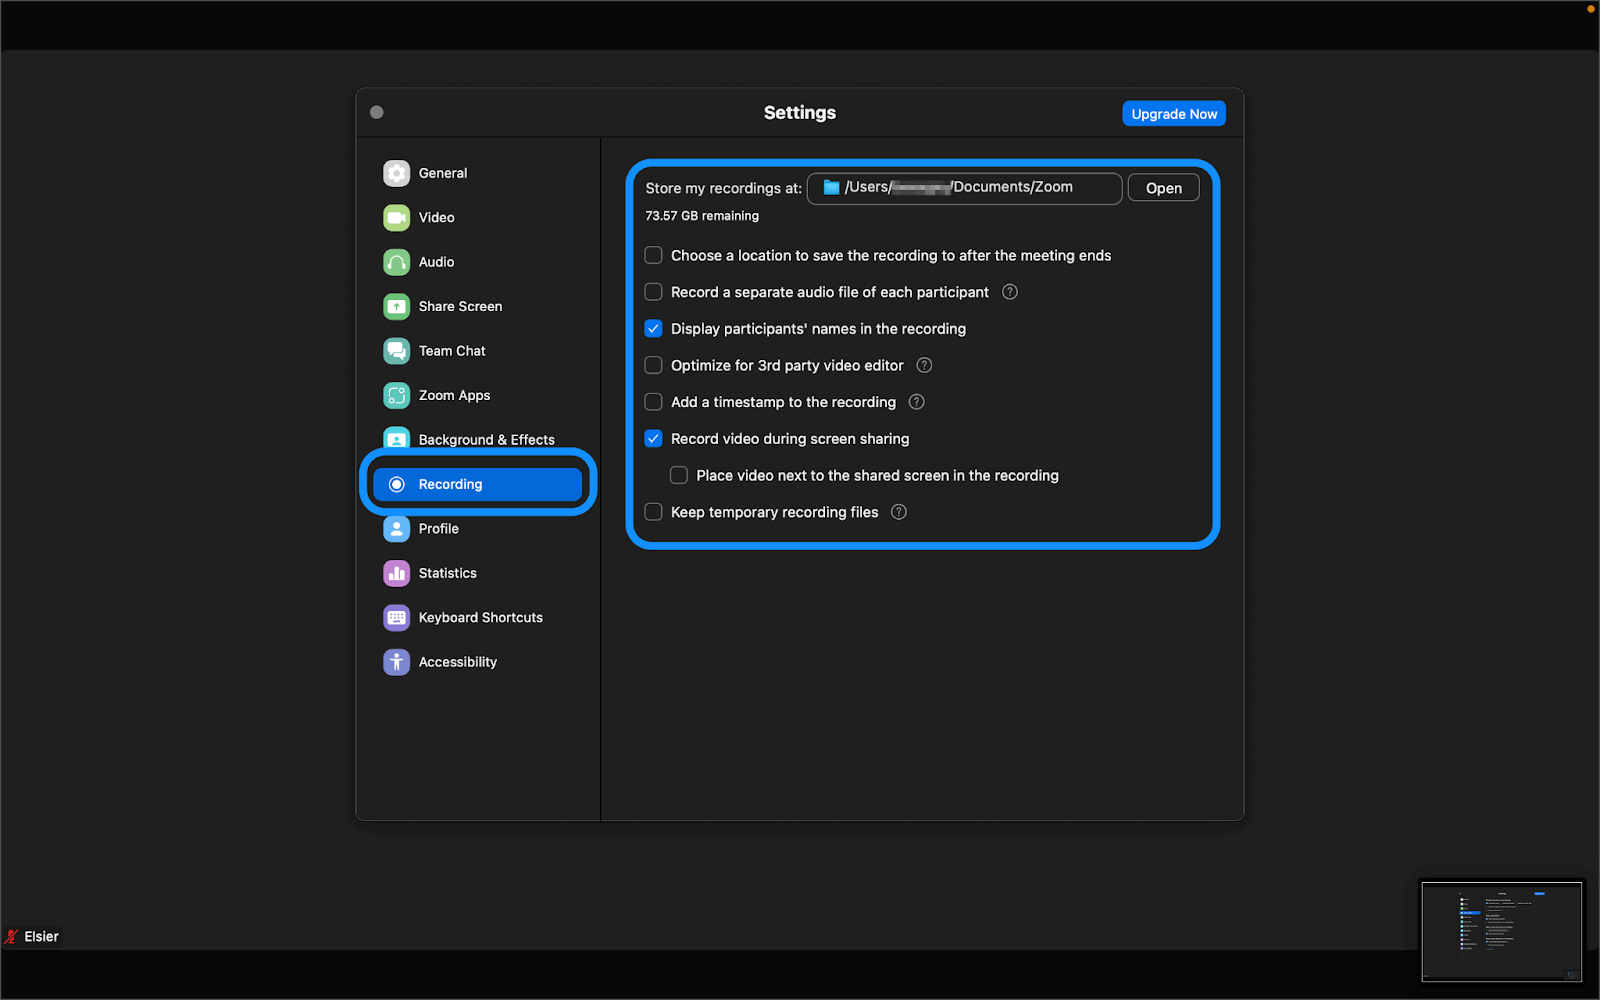
Before you return to your meeting, select where you want to store your recording files and adjust other relevant meeting recording settings.
4. Start recording
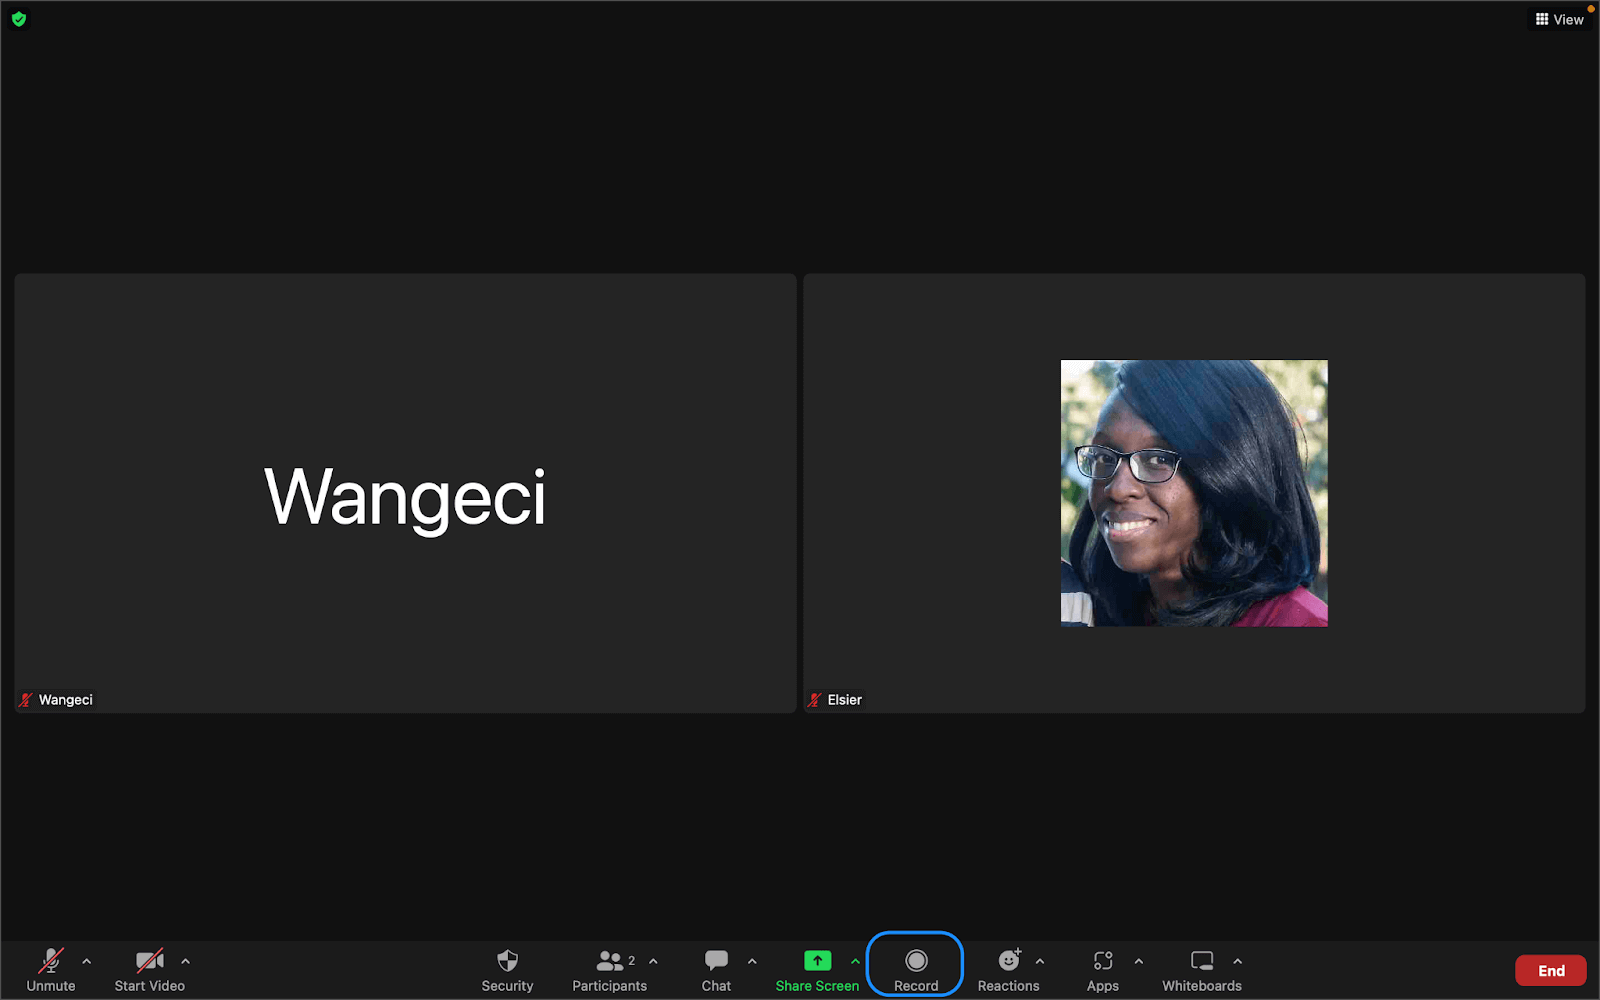
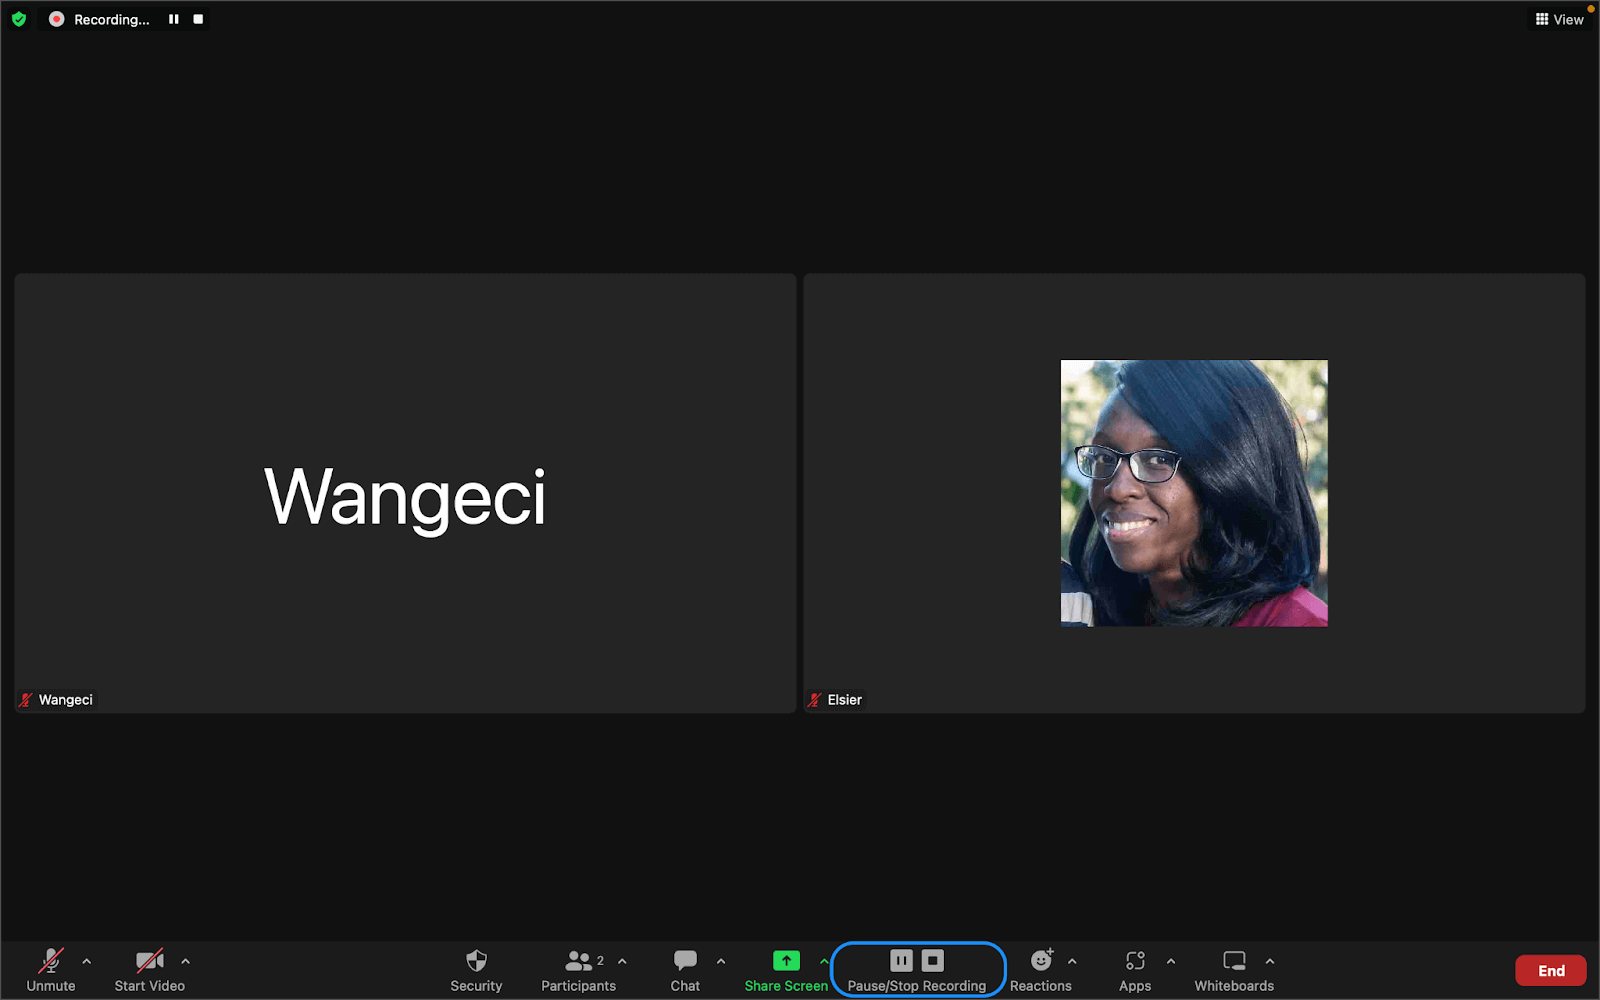
Select the Record button to start recording.
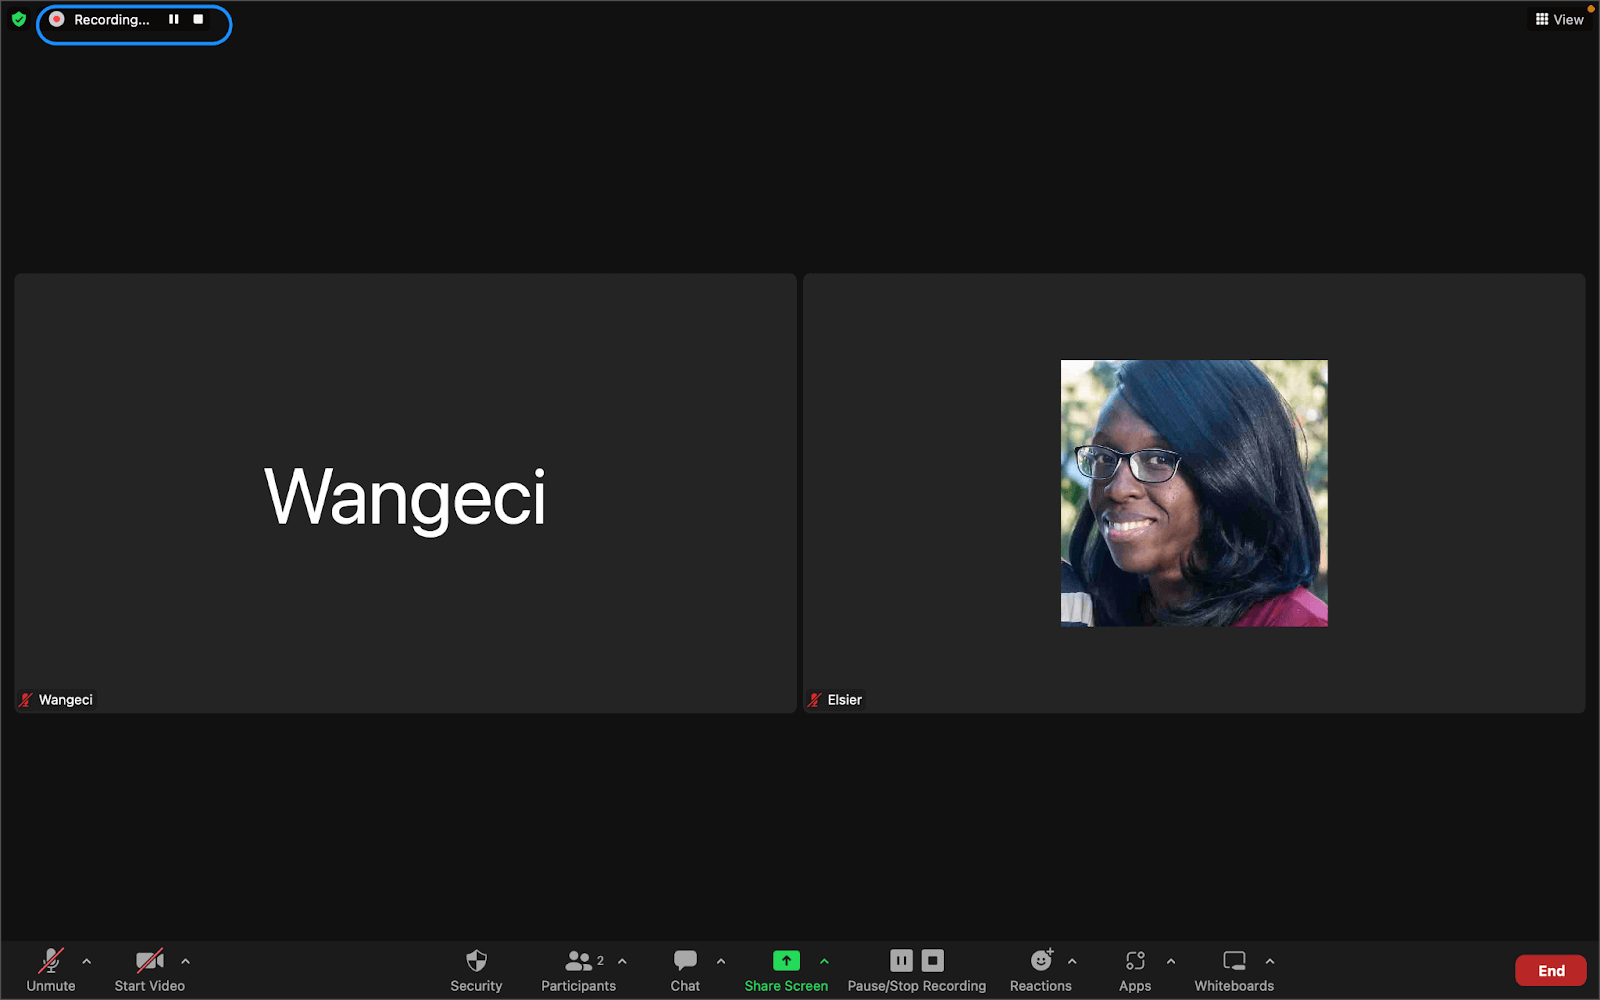
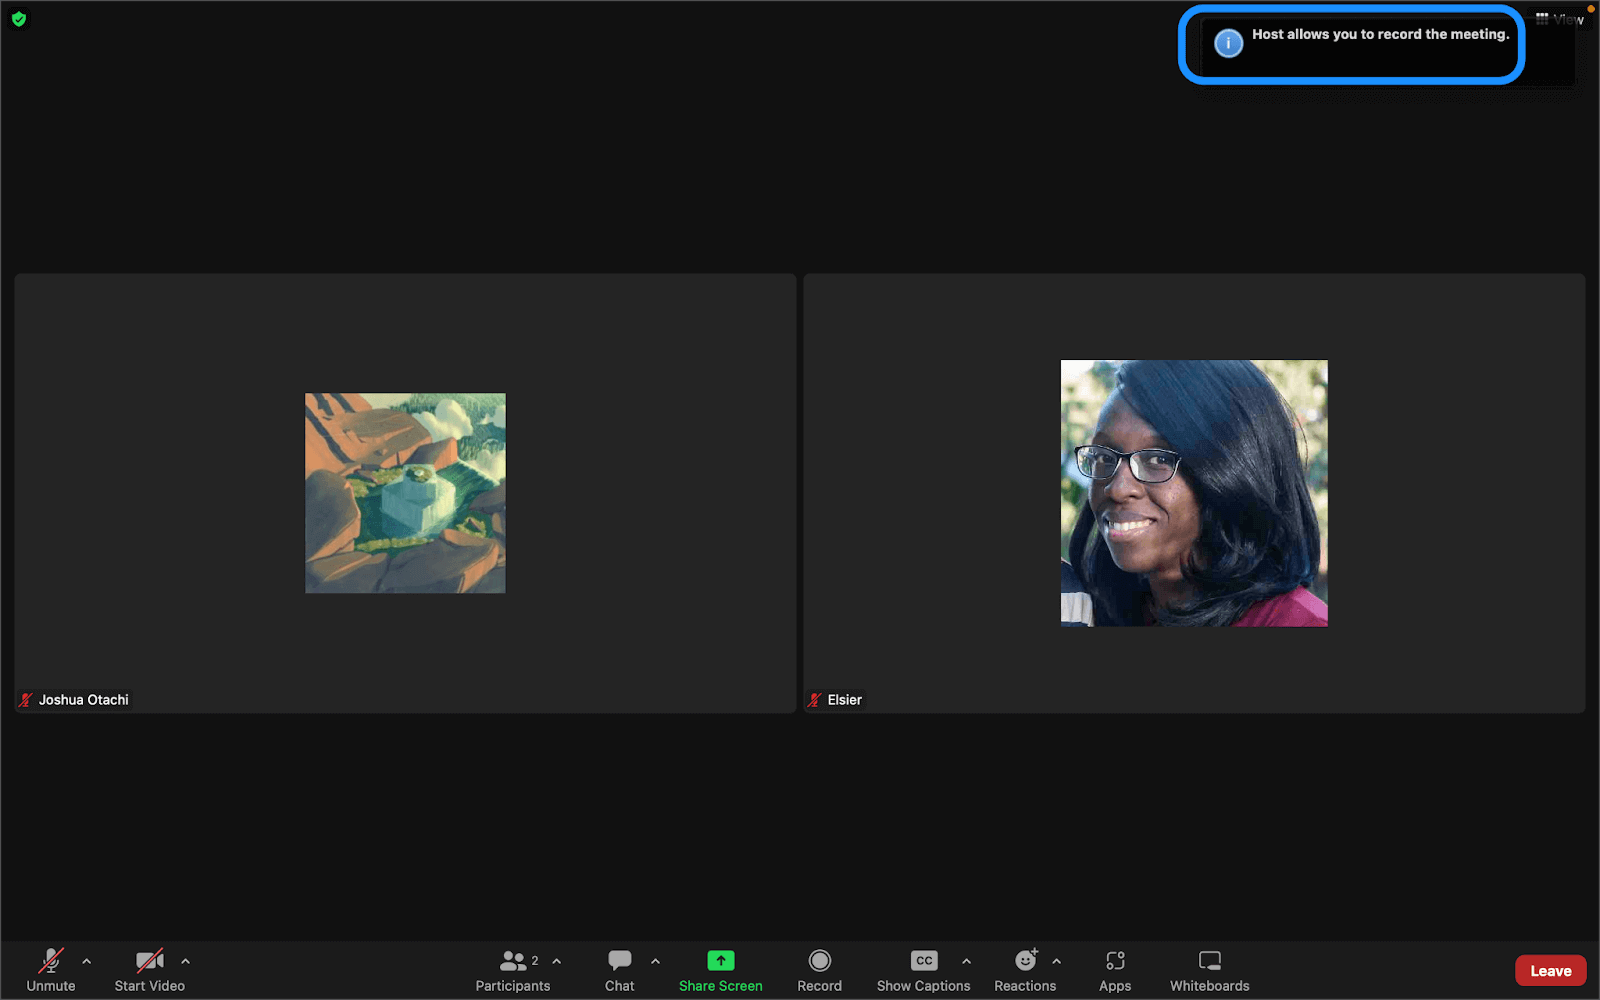
A recording indicator will appear in the upper left corner of the screen. Meeting participants will hear a message informing them that the meeting is being recorded.
Note: A participant can’t record a Zoom meeting without permission from the host. Once the meeting host joins, they can give you recording permission or set you up as an alternative host.
5. Stop recording
Select Stop to stop recording the meeting.
6. Access and share recordings
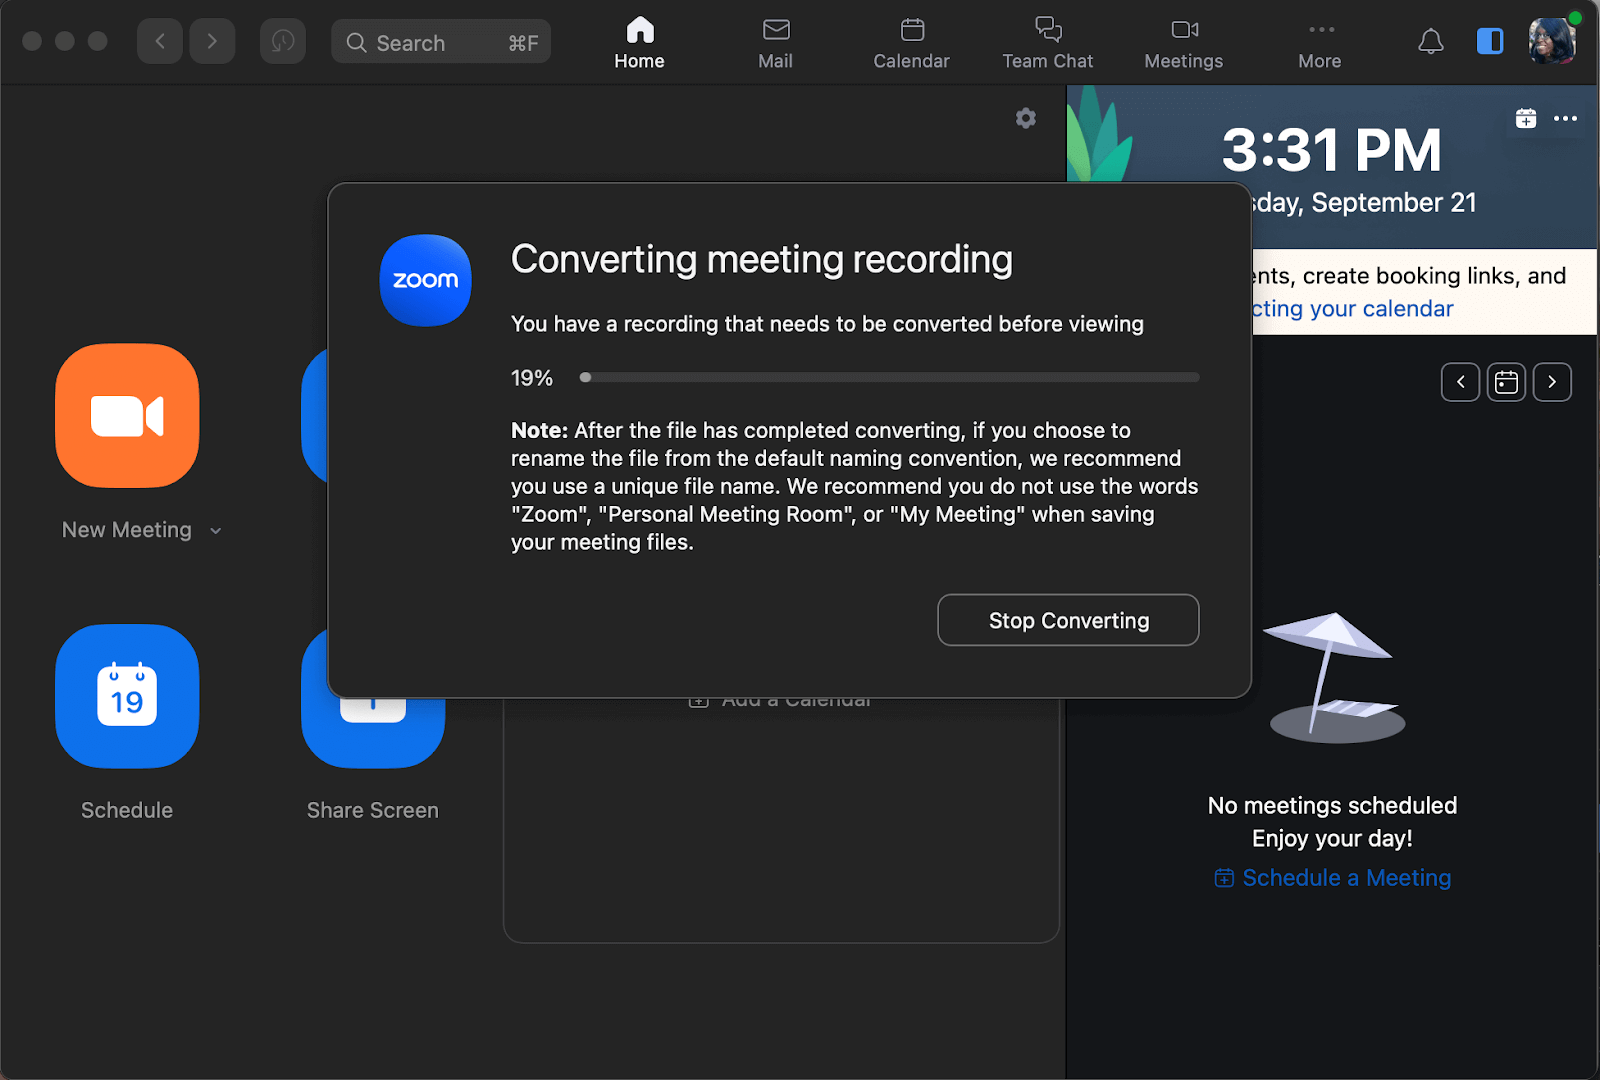
After the meeting ends, Zoom will convert your recording to audio and video file formats and save them in the default location or the storage space you provide.
If you chose local recording, Zoom will save your files in the Documents folder as follows:
- Windows: C:\Users\[Username]\Documents\Zoom
- Mac: /Users/[Username]/Documents/Zoom
The folder containing the file will open and you can share the recordings with others. It’s not possible to upload a local recording to the Zoom cloud, but you can upload it to Google Drive, Dropbox, or other third-party cloud storage to share it.

Cloud recordings are stored in the Zoom cloud and accessible through the Recording tab of your Zoom web portal. You can copy the shareable link and email it to other participants to view the video clips.
How to record a Zoom meeting on your phone
If you’re using an iOS or Android device, you can use the Zoom mobile app to record your meeting, then access the recording files from the Zoom cloud.
1. Install Zoom mobile app
Install the Zoom mobile app for iOS (iPhone/iPad) or Android devices.

💡 NOTE: You can only record a Zoom meeting or webinar on your phone to the Zoom cloud if you have a Zoom Pro, Business, Education, or Enterprise account, and have host or co-host privileges for the meeting. Cloud recording is automatically enabled for all paid subscribers.
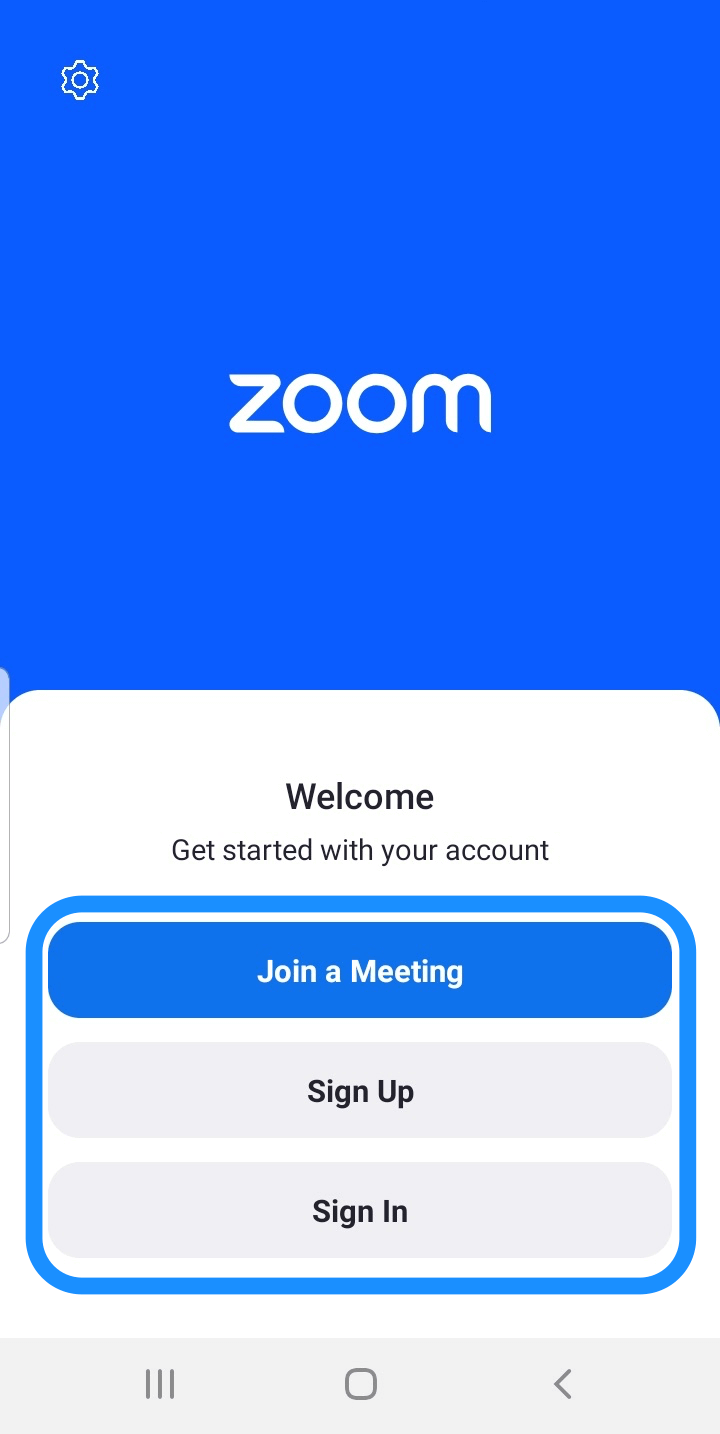
2. Log in or sign up
If you don’t have an account, select Sign up and follow the prompts to register and set up your account. Then tap Sign in to log in with your Zoom login credentials.
3. Join or host a meeting
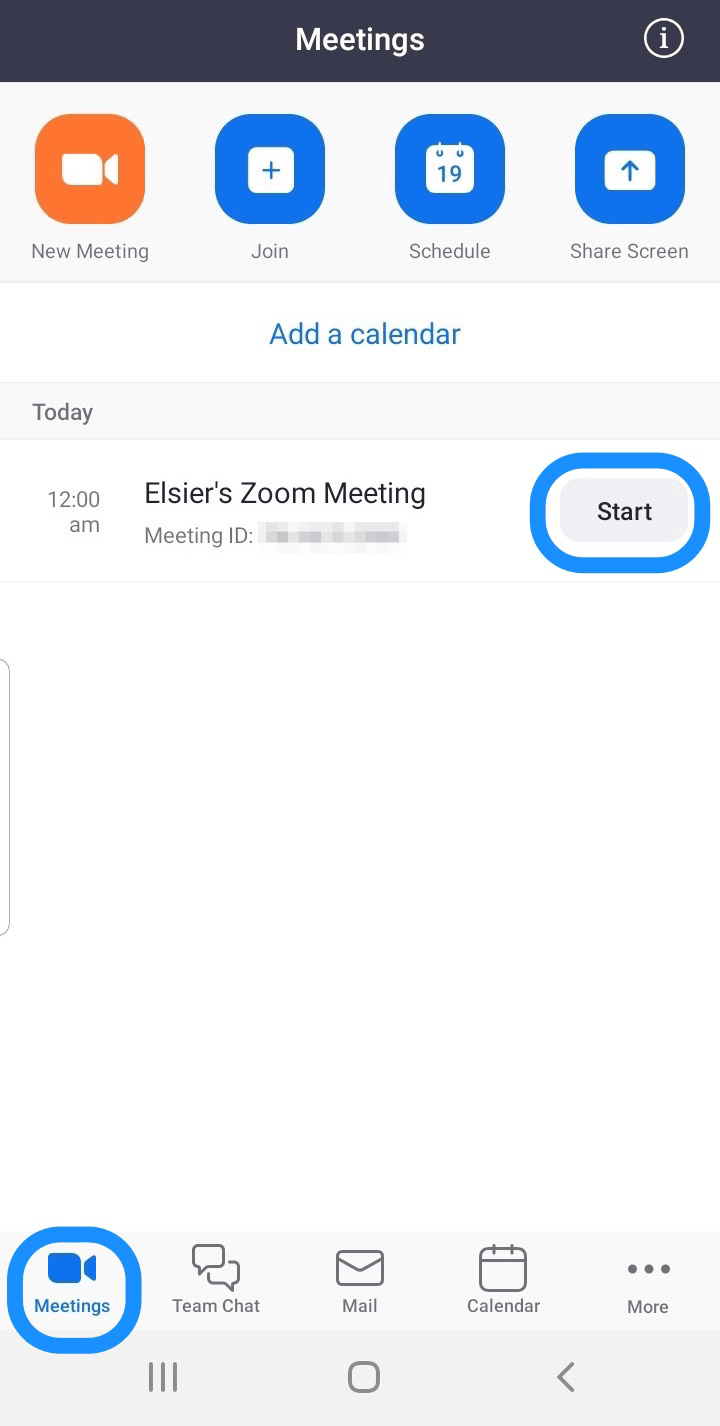
If you’re the meeting host, select New Meeting to start an instant meeting or Start Meeting to start a scheduled meeting. To view your scheduled meetings, select the Meetings tab, then select Start.
If you’re a meeting participant, click the meeting link provided to join the meeting. Alternatively, enter the meeting ID, your name, and passcode to join, then wait for the meeting host to admit you to the meeting.
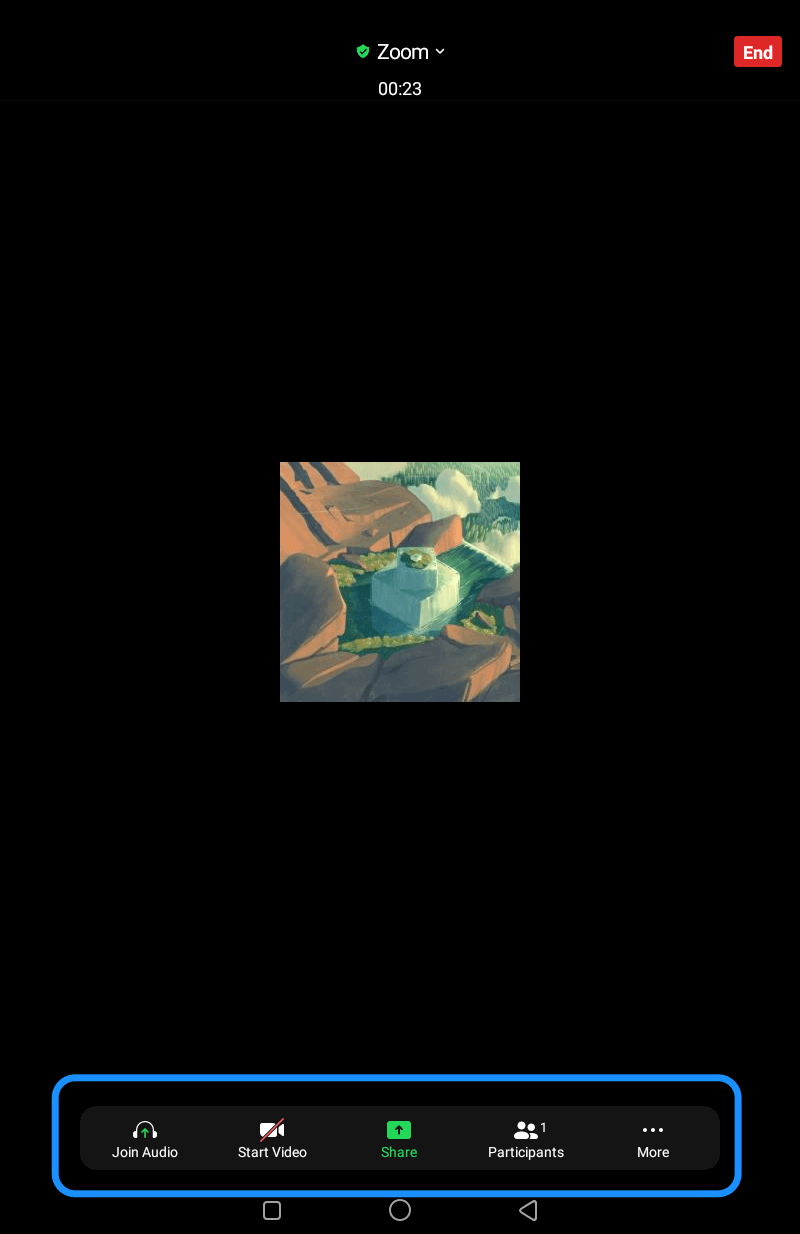
4. Access meeting controls
Check the meeting controls in the toolbar at the bottom of the screen. These include the Join Audio/microphone icon, video icon, share screen icon, participants button, and More (three dots) for additional settings.
Note: The Record button is only available to licensed Zoom users or Zoom Pro, Business, Education, and Enterprise paid subscribers. If your account was downgraded to a Basic (unlicensed) plan, upgrade to a paid plan to access the recording feature or recording files.
5. Start recording
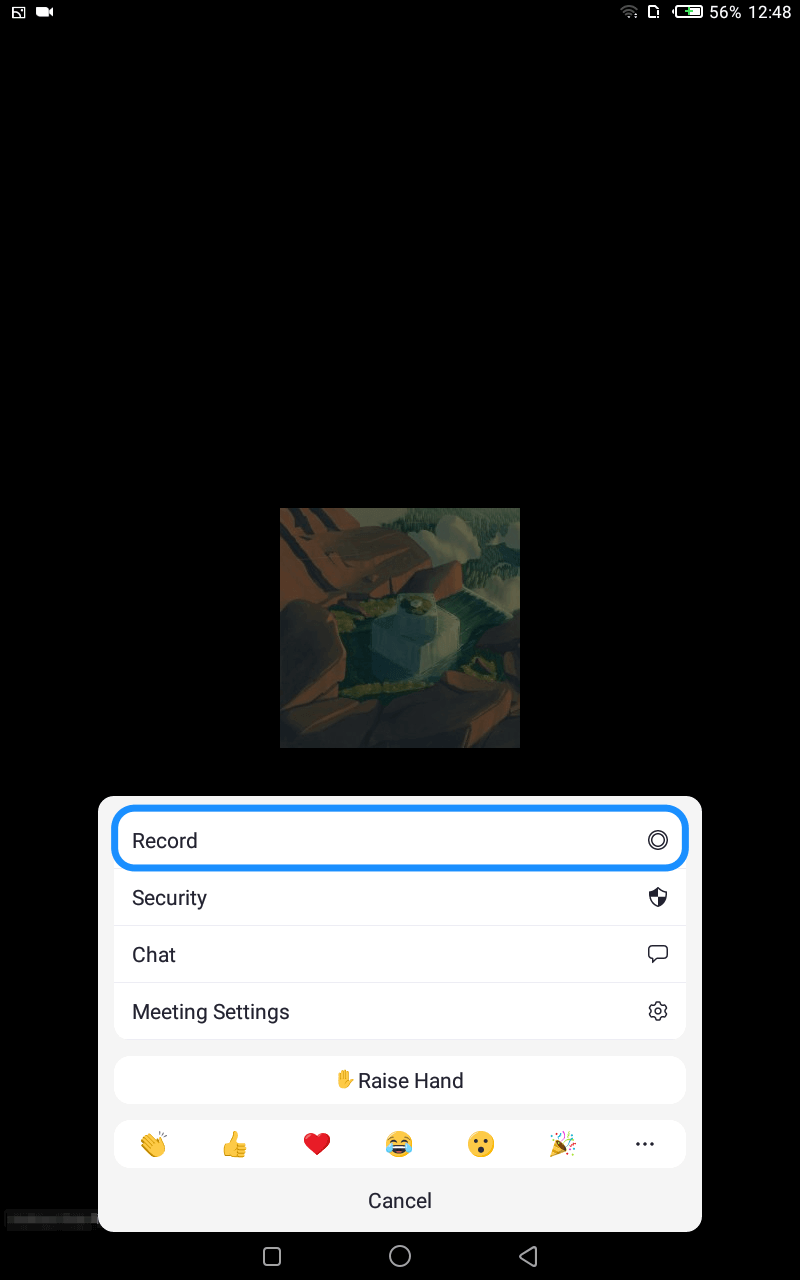
On an Android phone, tap More > Record to record the Zoom meeting.
For iOS devices, tap More > Record > Record to the cloud > Start Recording to record the meeting.
The recording indicator will appear in the upper left corner of the screen.
Tip: You can tap the Record button once to pause the recording, then tap it again to continue recording.
6. Stop and save the recording
Select the Stop button to stop recording.

When you end the meeting, the recording will process and you’ll get an email notification with the link to your Zoom meeting recording. You can also sign in to the Zoom web portal and check for your recording files in the Recordings section.
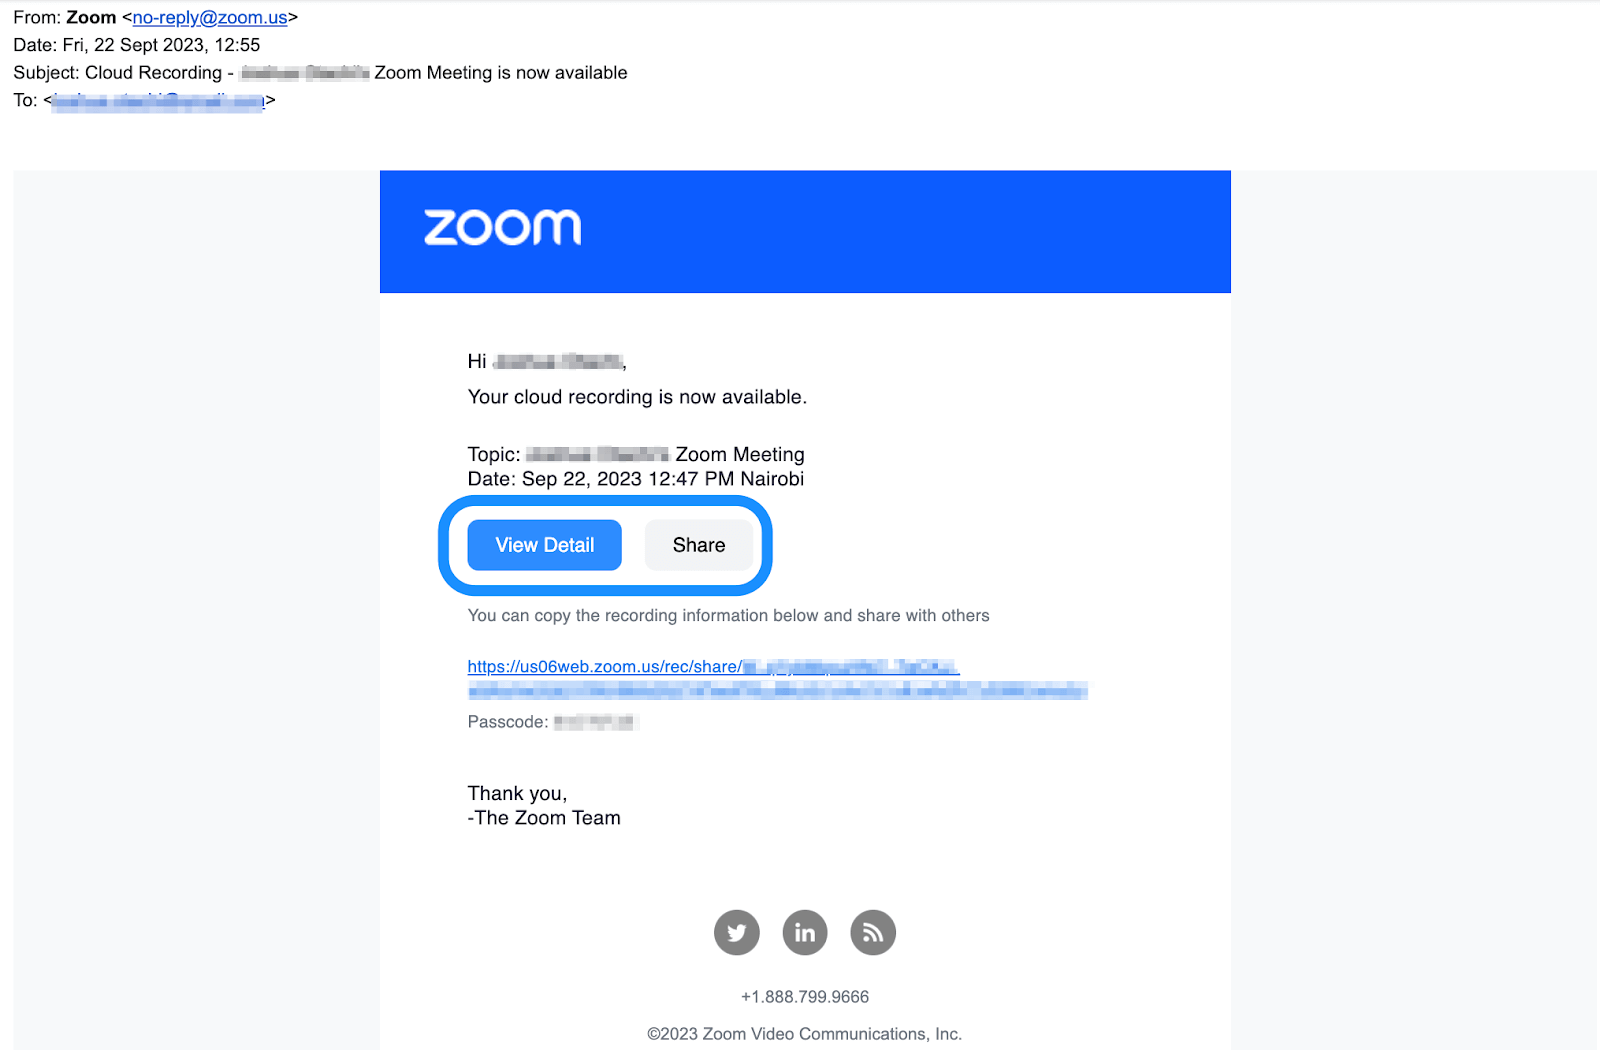
Open the email containing the link to your Zoom video recording and audio-only file. Click View Detail to access the recording files in the Zoom cloud or Share to copy the shareable link with others.
How to record a Zoom meeting as a participant
You can record a Zoom meeting as a participant. However, you’ll need host permission. The host can also make you an alternative host with recording privileges.
1. Join the Zoom meeting
Sign in with the Zoom link provided to you or the meeting ID and passcode to join the meeting.
2. Request recording permission
When you tap the Record button, a pop-up will appear, prompting you to request permission to record the meeting. You can also use the in-meeting chat or unmute to request recording permission from the host.

💡 NOTE: This option will work if the host enables the Hosts can give meeting participants permission to record locally setting in their account.
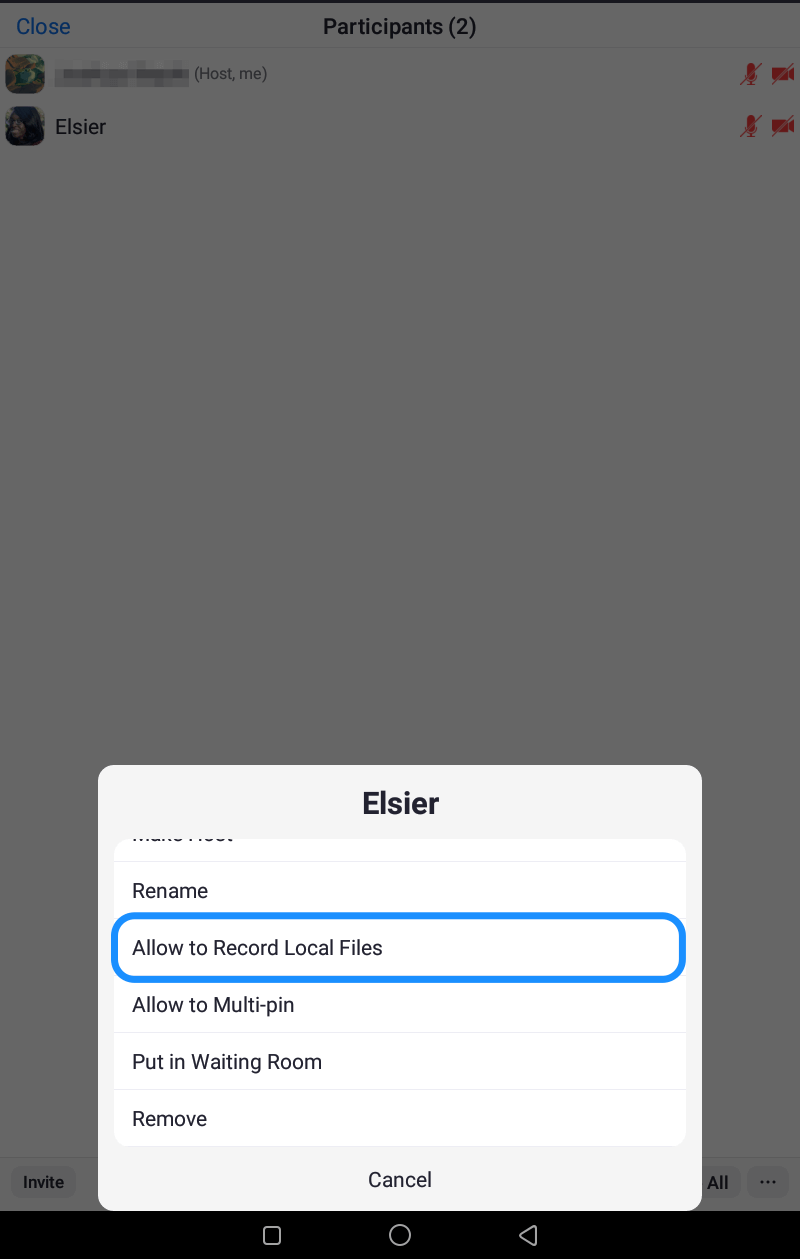
3. Host grants permission
The host can also make you an alternative host with recording privileges. To do this, the host will select Participants > Participant’s (your) name > More > Allow to Record Local Files.
4. Access recording controls
You’ll get a notification on your screen when the host gives you recording permission and access to meeting controls in the meeting toolbar.
5. Start recording
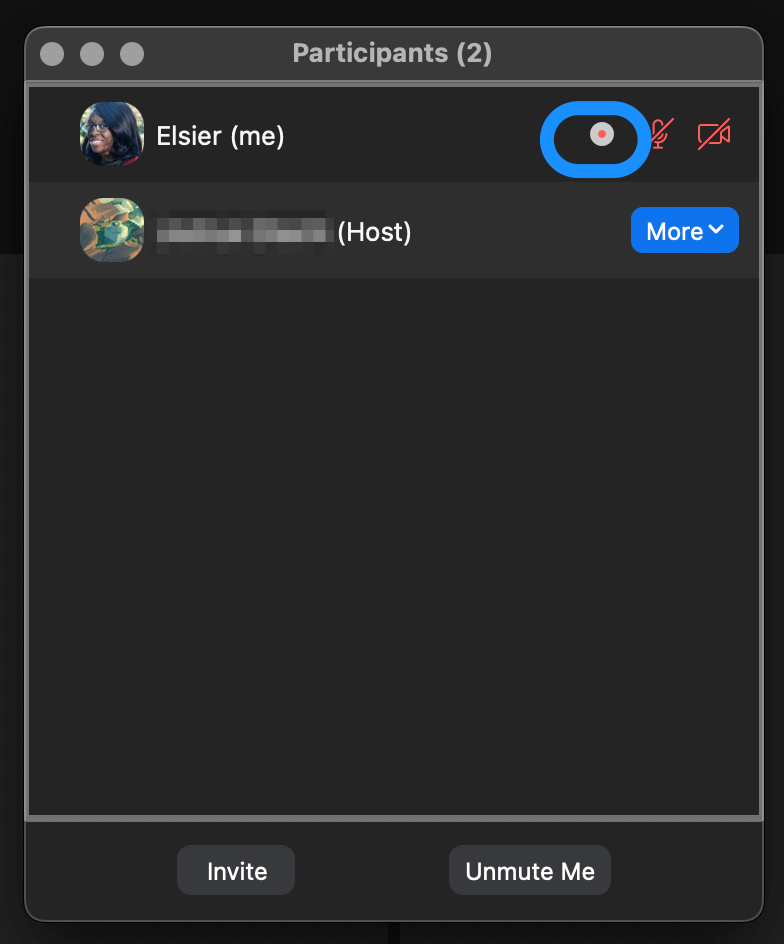
Select Record to record the Zoom meeting locally on your computer. A recording icon will appear next to your name in the participants menu.
6. Stop and save the recording
Select Stop to stop recording. The recording will process and save the files on your device.
How to edit a Zoom cloud recording directly in Descript
Descript is integrated with Zoom, which means that you can go from "end meeting" to editing your recording in just a few clicks. If you plan to edit your Zoom recording in Descript, make sure you've used the Cloud Recording option and checked the settings we recommend above under "How to record a Zoom meeting on your laptop."
Next, before you record, follow the steps below—you only need to do this once:
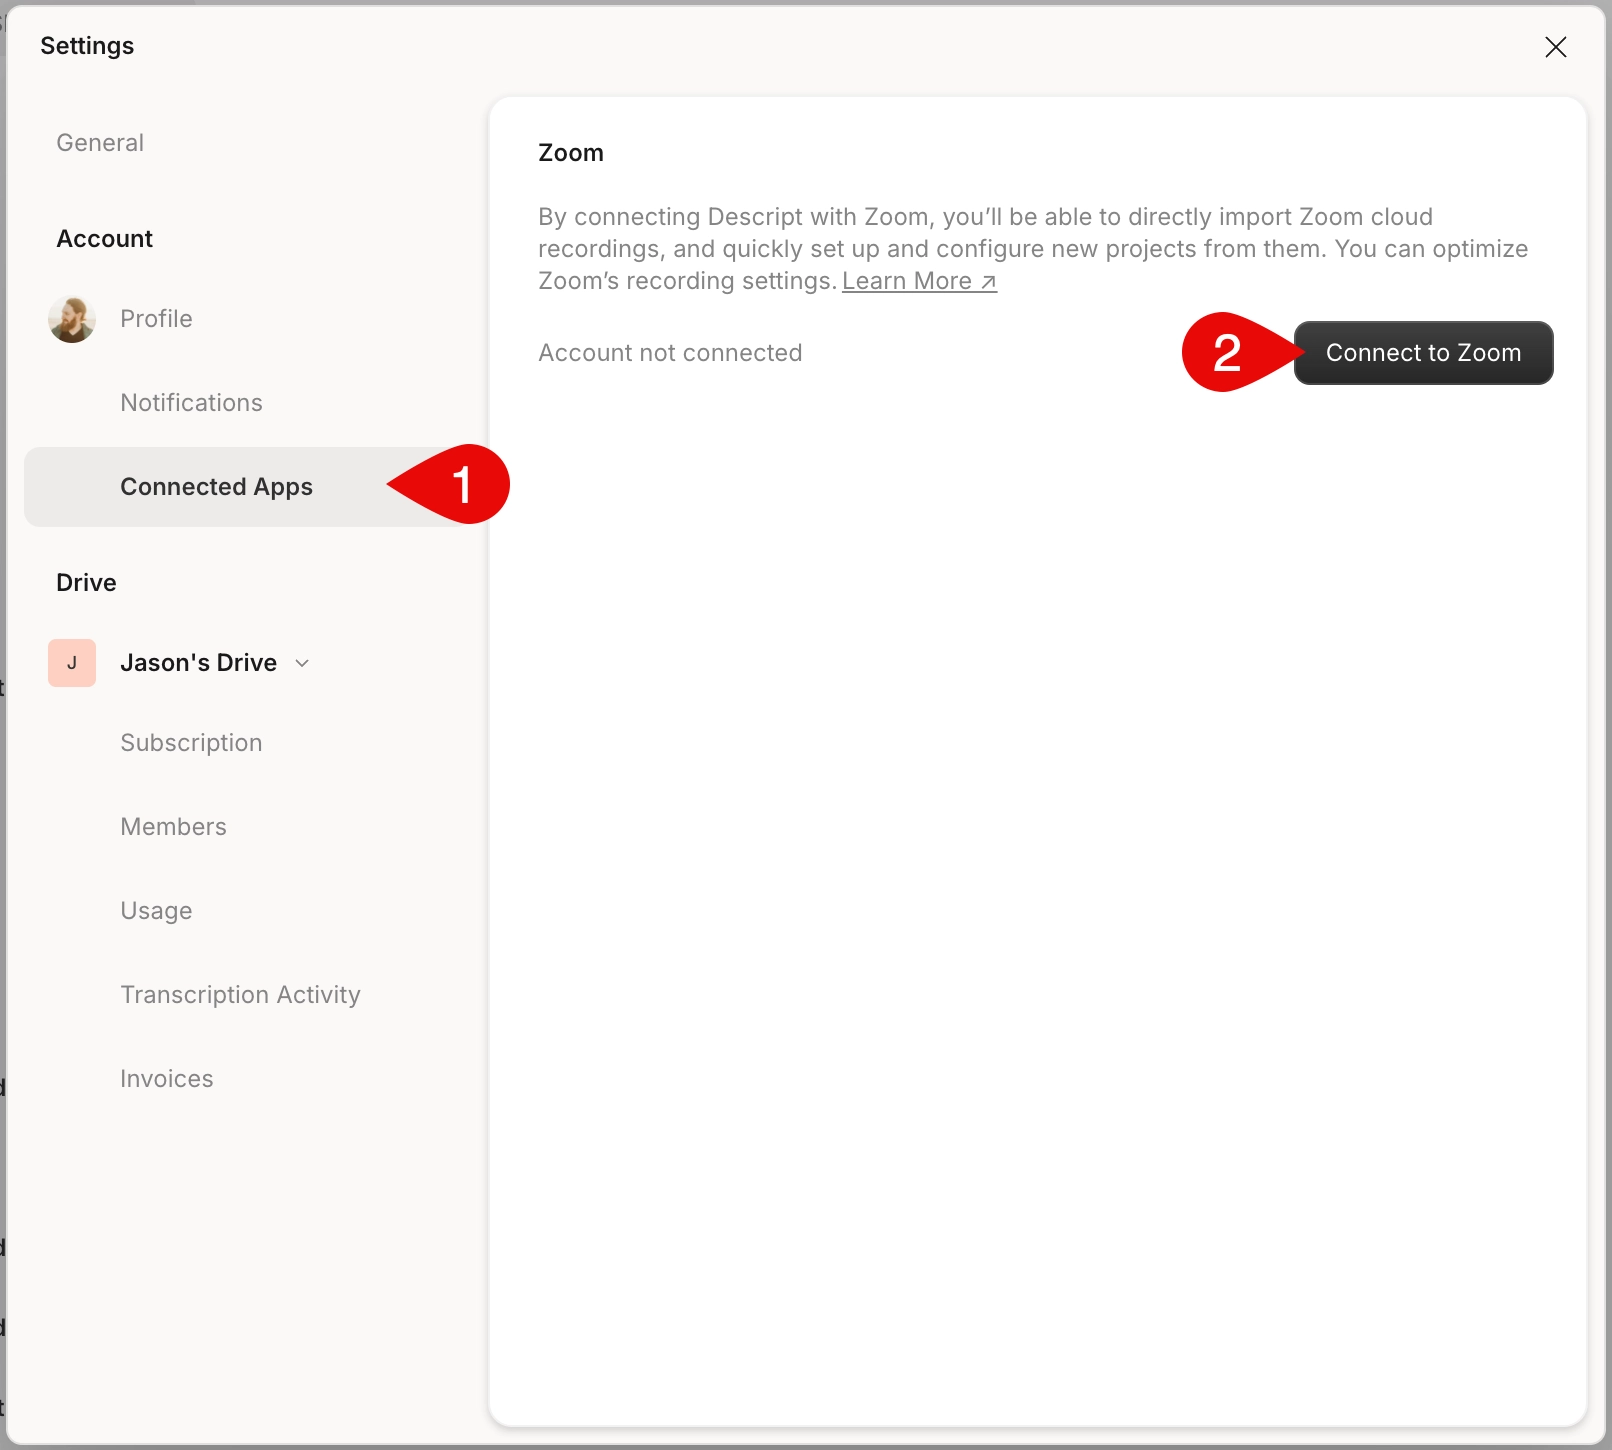
1. Open Descript and navigate to Settings
2. Select Connect with Zoom. This gives Descript access to import files directly from Zoom.
Then, record your meeting as usual, either on your laptop or your phone. Afterward, follow these steps.
1. In Descript, create a new project and select Import from Zoom in the script.
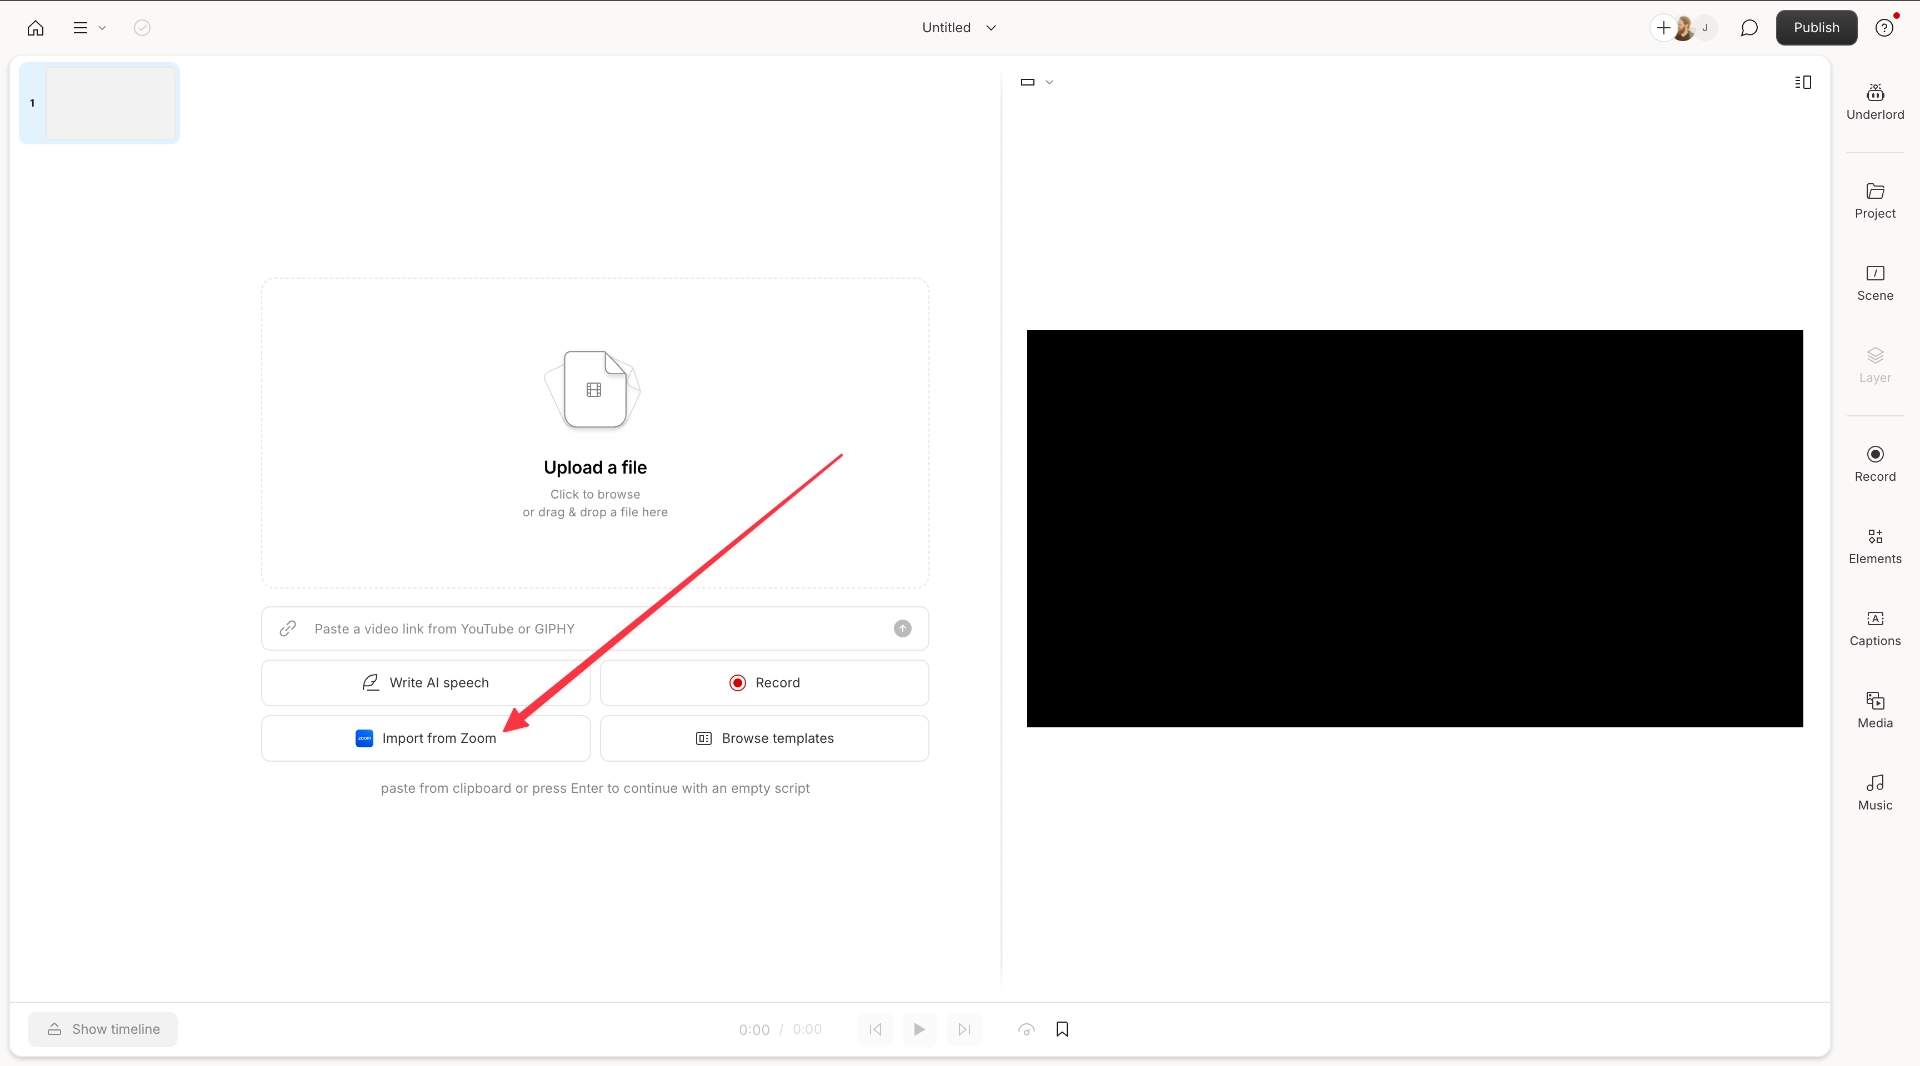
2. A list of available Zoom recordings will be displayed and labeled with the title of the meeting. Select the recording you want to import.
3. Descript will import the files and set up your new project automatically. Then you're ready to edit!
For more instructions on how to edit Zoom recordings directly in Descript, see our Help page here.
How to record a Zoom meeting without Zoom’s record feature
A Zoom meeting recording captures participants’ names, voice, and/or physical appearance. Notifying the host that you’d like to record the meeting ensures you’re doing the right thing, and allows other participants to consent or opt out.
But sometimes, that’s not possible. If you want to record outside of Zoom’s native record feature, here are three options.
Use screen recording software
Without Zoom meeting host privileges, you can’t access Zoom’s recording feature.
But you can use a third-party screen recording app to record the Zoom meeting. These include:
- Xbox Game Bar for Windows
- QuickTime Player for MacOS
- Your phone’s built-in screen recorder or screen-recording app
- Descript’s screen recorder
With Descript’s screen recorder, you can record a Zoom meeting with each participant and get a full transcript of the conversation.
Then, edit your Zoom screen recording, publish it, and export it in different file formats to YouTube or various podcast hosting platforms. For example, you can use Descript to record a remote interview in Zoom and enable high-fidelity mode for high-quality audio.
Virtual camera software
Virtual webcam software like Open Broadcaster Software (OBS) Studio allows you to record or livestream a Zoom meeting.
Once you connect Zoom to OBS, create a scene and select the Zoom window you want to capture. Besides recording your screen, you can add filters, customize your background, or stream multiple video sources at the same time.
Use a secondary device
If you have another laptop or mobile device, you can use it to record a Zoom meeting and access the recording files from the device or Zoom cloud.
Ensure both devices are running the latest version of Zoom and meet the prerequisites for local or cloud recording.
When you sign in to the Zoom meeting on both devices, your name will appear twice in the participants list. Use your device’s built-in screen recording app or a third-party screen recorder to record the meeting.
Edit all your recordings and videos with Descript
Descript is an easy-to-use audio and video editing tool. It installs on your computer as a native desktop app, but you can also use it in your web browser to edit and create content.
Record your Zoom meeting to the cloud or iuse Descript’s online screen recorder to capture your Zoom meeting. Then, let its AI transcription feature transcribe the recording and give you a complete, ready-to-edit file.
Once you wrap up your video recording, polish it in Descript’s video editor. If you stumble over filler language like “uh,” “um,” or “you know,” you can delete them in your transcript manually or let Descript’s AI filler word-detection tool do it for you. It automatically detects common filler words in your transcript, making editing a lot easier.
If you’re happy with the recording, publish and export it in your preferred format for any project. You can also publish the video on your YouTube channel or create a shareable link and email it to your team for comments and feedback.
How to record a Zoom meeting FAQ
How long can you record on Zoom for free?
Zoom offers a free, full-featured plan with a 40-minute time limit. You can record a meeting locally and access recording files in the Documents folder on your computer. To record Zoom meetings to the Zoom cloud from a computer or iOS or Android device, upgrade to a Zoom Pro, Business, Education, or Enterprise account.
How do I save audio only in Zoom?
After ending a Zoom meeting, the recording will be processed and saved as a separate audio-only (M4A) file. Zoom also saves audio and video together as an MP4 file. Local recording files are available in the Documents folder on your computer. If you recorded the Zoom meeting on your phone, you can access the recording files in the Zoom cloud once you end the meeting.
How do I download a Zoom recording to my phone?
Before downloading a Zoom recording, ensure your phone has sufficient storage space, then do the following:
Step 1: Open the Zoom web portal in a browser and sign in with your Zoom login credentials (username and password).
Step 2: Select the Recordings tab in the portal.
Step 3: Select the Cloud Recordings tab.
Step 4: Click on the meeting recording you want.
Step 5: Select Download to download the files to your phone.