


It’s easier than ever to start making videos from home, but making good videos is a different story. Today’s consumer webcams and USB microphones allow even amateur videographers to easily create and distribute content on platforms like YouTube, but there’s a lot more that goes into making professional-quality videos.
What do we mean by “professional” quality? We’re talking about videos that not only sound good and look good, but are also well-written, well-structured and presented in an engaging way that flows naturally from start to finish. In other words, videos you want to watch. But how can you achieve pro-level results at home?
Whether you’re a vlogger trying to grow your audience, a marketer looking to leverage the power of video or a startup making an explainer video for a product or service, this article is for you. These tips will help you make professional videos at home, right from your living room — or your office, bedroom, garage, or wherever your studio happens to be.
Start with a plan
Video production starts before you ever turn on your camera or plug in your microphone. Planning out your shoots from action to wrap is a key step that will not only help you get the results you want, but also save you a ton of time editing later.
Start by writing an outline of what you want to cover in your video, along with the accompanying shots you’ll need to film. This will serve as your guide throughout production, so spend some time refining it to make sure you cover everything you need to cover, without adding unnecessary filler content.
A great piece of advice from our recent interview with YouTube videographer Amanda Horvath is to “shoot for the edit.” In other words, structure your shots in the order you plan to edit them, with minimal downtime in between. This way, instead of sifting through reams of footage and piecing your video together after the fact, you can simply trim the beginning and end of each clip and stitch them into a finished product. This also helps avoid continuity errors that can crop up when you shoot out of sequence.
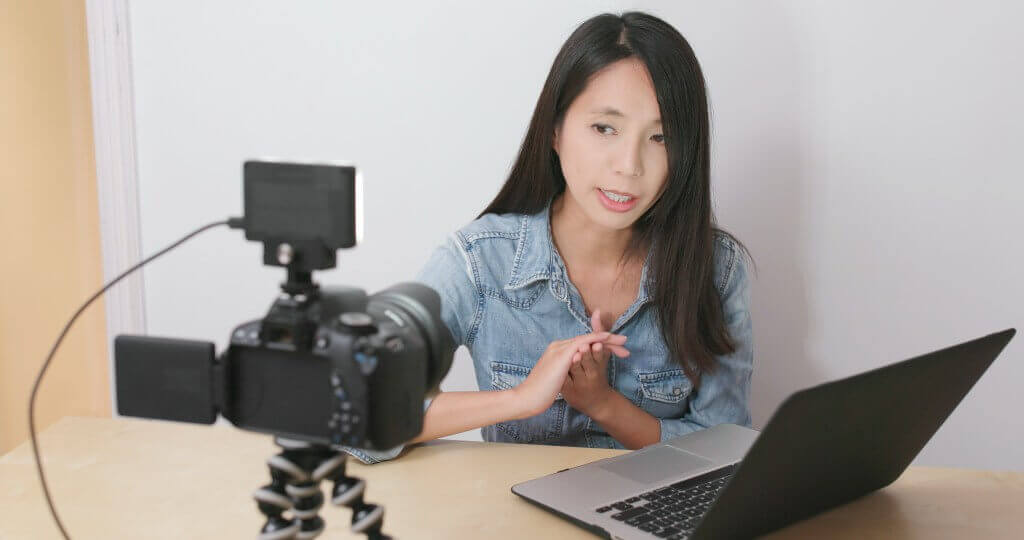
Amanda Horvath covers the benefits of working from an outline rather than a full script.
If you have trouble speaking off the cuff, try writing out a full script for your video. Read aloud as you’re writing, because written words don’t always sound natural when spoken. As you write, you’ll often find better, more natural ways to say things that may not have occurred to you before. As you become more comfortable speaking on camera, move towards speaking from an outline instead of a script, as Horvath explains in her video above.
Finally, don’t forget to shoot B-roll footage to intersperse with your main content. B-roll is supplemental or alternative footage related to your primary subject: Think different camera angles, background shots, or close-ups. To capture useful B-roll, plan out your shots so you can always cut to footage that’s relevant to what you’re talking about. Depending on the video you’re making, this might mean close-ups of features on a product you’re reviewing, establishing shots of a place you’re visiting, or action shots of you practicing a craft.
Practice speaking on camera
Speaking in front of an audience is tough, but it’s an essential skill for making good videos. It’s important to enunciate clearly, pace your speech and nail the right tone. Speaking in front of the camera will feel challenging and unnatural at first, so don’t be hard on yourself — it’s a skill, and skills are meant to be practiced!
Here are a few warm-up exercises to help you get more comfortable on camera:
- Talk out loud in front of a mirror. Yes, this will feel remarkably awkward at first, but this is an up-close-and-personal method to see what your audience will see.
- Use your phone’s voice recorder to record yourself speaking. Without visuals, you’ll be more aware of your speech patterns, revealing inflections and mannerisms you weren’t even aware of. Check your filler words: Are there certain filler words or phrases you rely on? If so, take note of them to help prevent overuse.
- Have someone record you on-camera as you give a tour of your home. Discussing something you’re intimately familiar with — like your living room — is a great way to practice non-speech aspects like body language.
- Try speaking to different imaginary audiences using different tones, as if you were speaking to a close friend, a stranger on the street, or in a packed lecture hall. This will help you find the right tone for your videos and discover how you’re most comfortable speaking.
After some practice getting into your comfort zone in front of the camera, here are some tips to refine your delivery:
- Maintain eye contact with the camera as much as possible. This keeps you connected to your viewers, whereas glancing around as you speak can make you seem distracted and less engaging.
- Be conscious of your inflections. Often, when people are nervous or uncertain, they end their sentences with an upward inflection, which can be off-putting to viewers. To sound more confident and purposeful, practice ending on a downward inflection.
- Use hand gestures purposefully. Gesturing is such an unconscious part of speech that it can be challenging to change your habits, but working on this will pay huge dividends. Try to save gestures for when you need to get a point across, rather than just keeping your restless hands busy.
- Before you publish, film a test video and ask a trusted friend to watch it and provide feedback. An honest outside perspective can help reveal any unclear language, distracting mannerisms, or unconscious biases you might have missed.
No matter how comfortable on camera you are, remember that even the pros still make mistakes. Descript allows you to fix those mistakes easily, and with Overdub, you can even change words or add whole new sentences in your own voice without re-recording voiceover.
Get smart about editing
Solid editing is the final element of professional-quality videos. Even if your concept and footage are top-notch, subpar editing will bring the whole production down. Editing video might seem like a major headache and a huge time sink — but it doesn’t have to be. That’s where Descript comes in.

Descript lets you edit your videos simply by editing the transcript. Need to cut something out, move footage around, or splice two different sections together? Cut, paste, and delete from your transcript however you like, and Descript will edit your video to match. Even if you’ve never touched professional video editing software before, you can transform raw footage into a tightly edited final work just by organizing and editing text.
When you trim content from the middle of a video clip, the resulting edit is what’s known as a “jump cut” — a type of edit where the camera angle doesn’t change, but the video suddenly jumps forward in time. While uncommon in TV and film, they’re everywhere in vlogs, on YouTube, and in social media videos. Used in moderation, they’re definitely OK.
Too many jump cuts, though, can turn off your viewers, and there are a couple of ways to hide the seams. One commonly used tactic is to simply add some B-roll footage over it. (Remember when you planned out relevant B-roll capture before you even shot any footage? Here’s where it comes in handy!) This way, you can edit your voiceover until it flows naturally, and then use as much B-roll as needed to mask the choppy video edits. For example, you can cut to a screen recording, a still image, or an alternate camera angle (if you captured one) during an edit, to add interest or draw attention away from an edited audio monologue.
YouTuber Gerald Undone explains his strategies for dealing with jump cuts — both while shooting and in the edit.
You can also hide sporadic edits by quickly cutting to a close-cropped shot of your face with a Zoom and Pan cue in Descript — this works best when you’re working with 4K video, since you won’t notice the difference in resolution.
Finally, add some visual interest to give your video flair and professional polish. Descript allows you to easily add titles, captions, images, transitions, zooms, and more. Not only will these visual elements help you tell your story more effectively, they’ll also ensure your videos are accessible without sound.
And … Action!
Now that we’ve given some tips on how to make pro-level videos, there’s no better time to get started! Remember: Plan your video thoroughly, practice speaking on camera, and learn a few editing tricks first.
For more resources to help you make better content, including how to make your videos look professional, check out our blog, YouTube channel and help section.


