Have you ever watched a well-produced livestream and wondered how they did it? Those many camera changes, high-res video sources, and fancy lower-thirds letting you know exactly how to spell “TheGrefg”? It might surprise you to know that the tool many streamers depend on for their livestreams is completely and utterly free.
That tool is Open Broadcaster Software (aka OBS Studio). It’s a free, open-source software that makes high-quality livestreaming and screen recording easy.
It’s not the most intuitive software in the world, though. Don’t worry: this guide covers everything from the initial setup to advanced recording techniques with OBS.
How to install OBS Studio for recording
|
OBS Studio stands out as solid recording software because it's free. This opened up streaming and screen recording to a much wider audience.
There’s still a learning curve, but OBS Studio is designed to be accessible. As soon as you install OBS Studio, you'll get preconfigured settings for streaming and recording that can be used as-is or as a starting point for further customization.
It also lets users customize almost every aspect of their recording and streaming setup, from audio input sources to video resolution and beyond. Here’s how to install OBS:
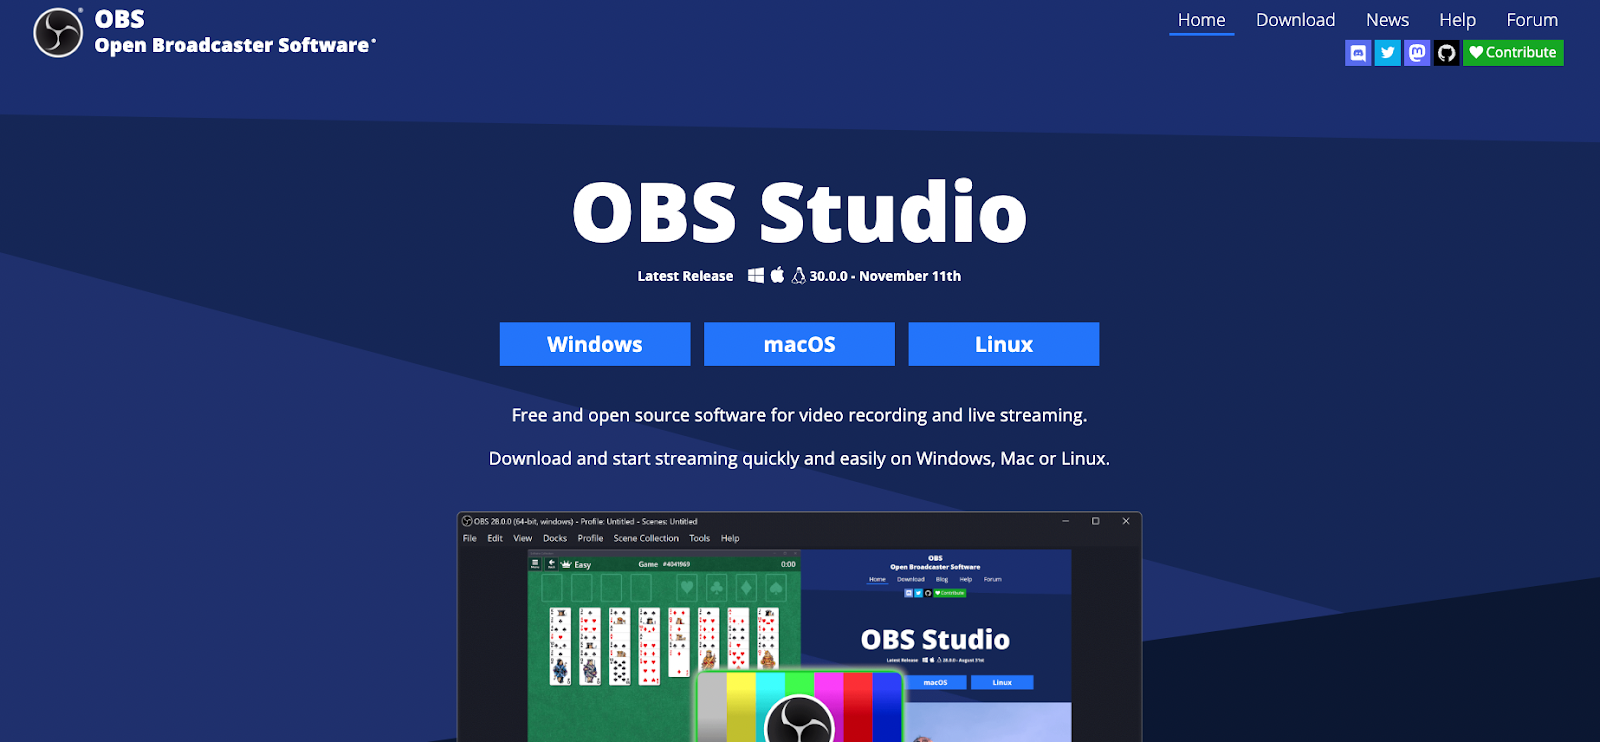
- Visit the OBS website: The OBS Studio website is at obsproject.com..
- Choose your operating system: OBS Studio can be used on Windows, MacOS, and Linux operating systems. Select the version that corresponds to your device's operating system to ensure compatibility.
- Download and install: After selecting your operating system, download the installer. Once downloaded, run the installer and follow the on-screen instructions to complete the installation process.
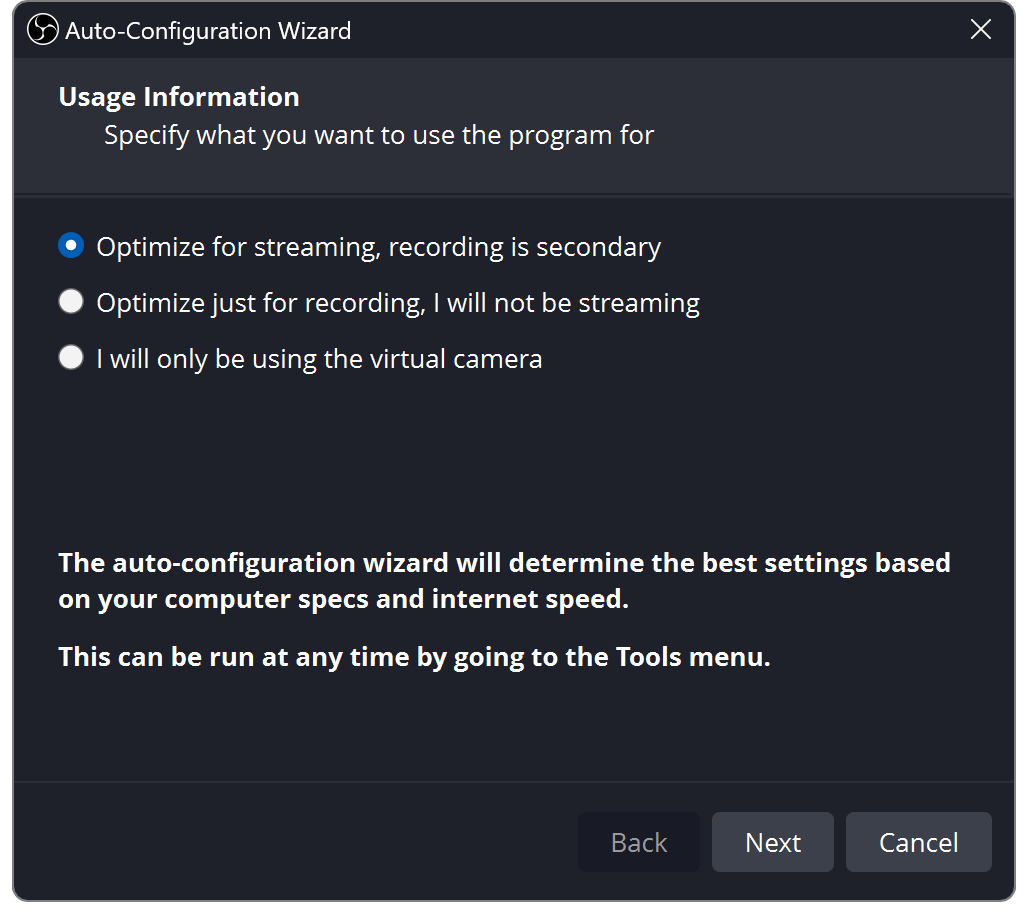
- Customize your settings: Once you launch it, OBS Studio prompts you to configure its basic settings. This step is important because it’s where you tailor OBS to your specific recording needs, like resolution and bitrate. You can always adjust these settings later as needed.
Pro tip: If you’d like to capture your system audio but don’t want to hear it while you record, plug in headphones or a simple audio splitter and set your computer’s sound output to that device. This way, OBS can still capture the audio feed, but it won’t play out loud and distract you.
 |
How does OBS work? Features and interface.
As noted, OBS Studio is versatile and powerful for live streaming and screen recording. It combines an excellent feature set with a user-friendly interface, making it popular among creators.
Here’s a breakdown of its key features.
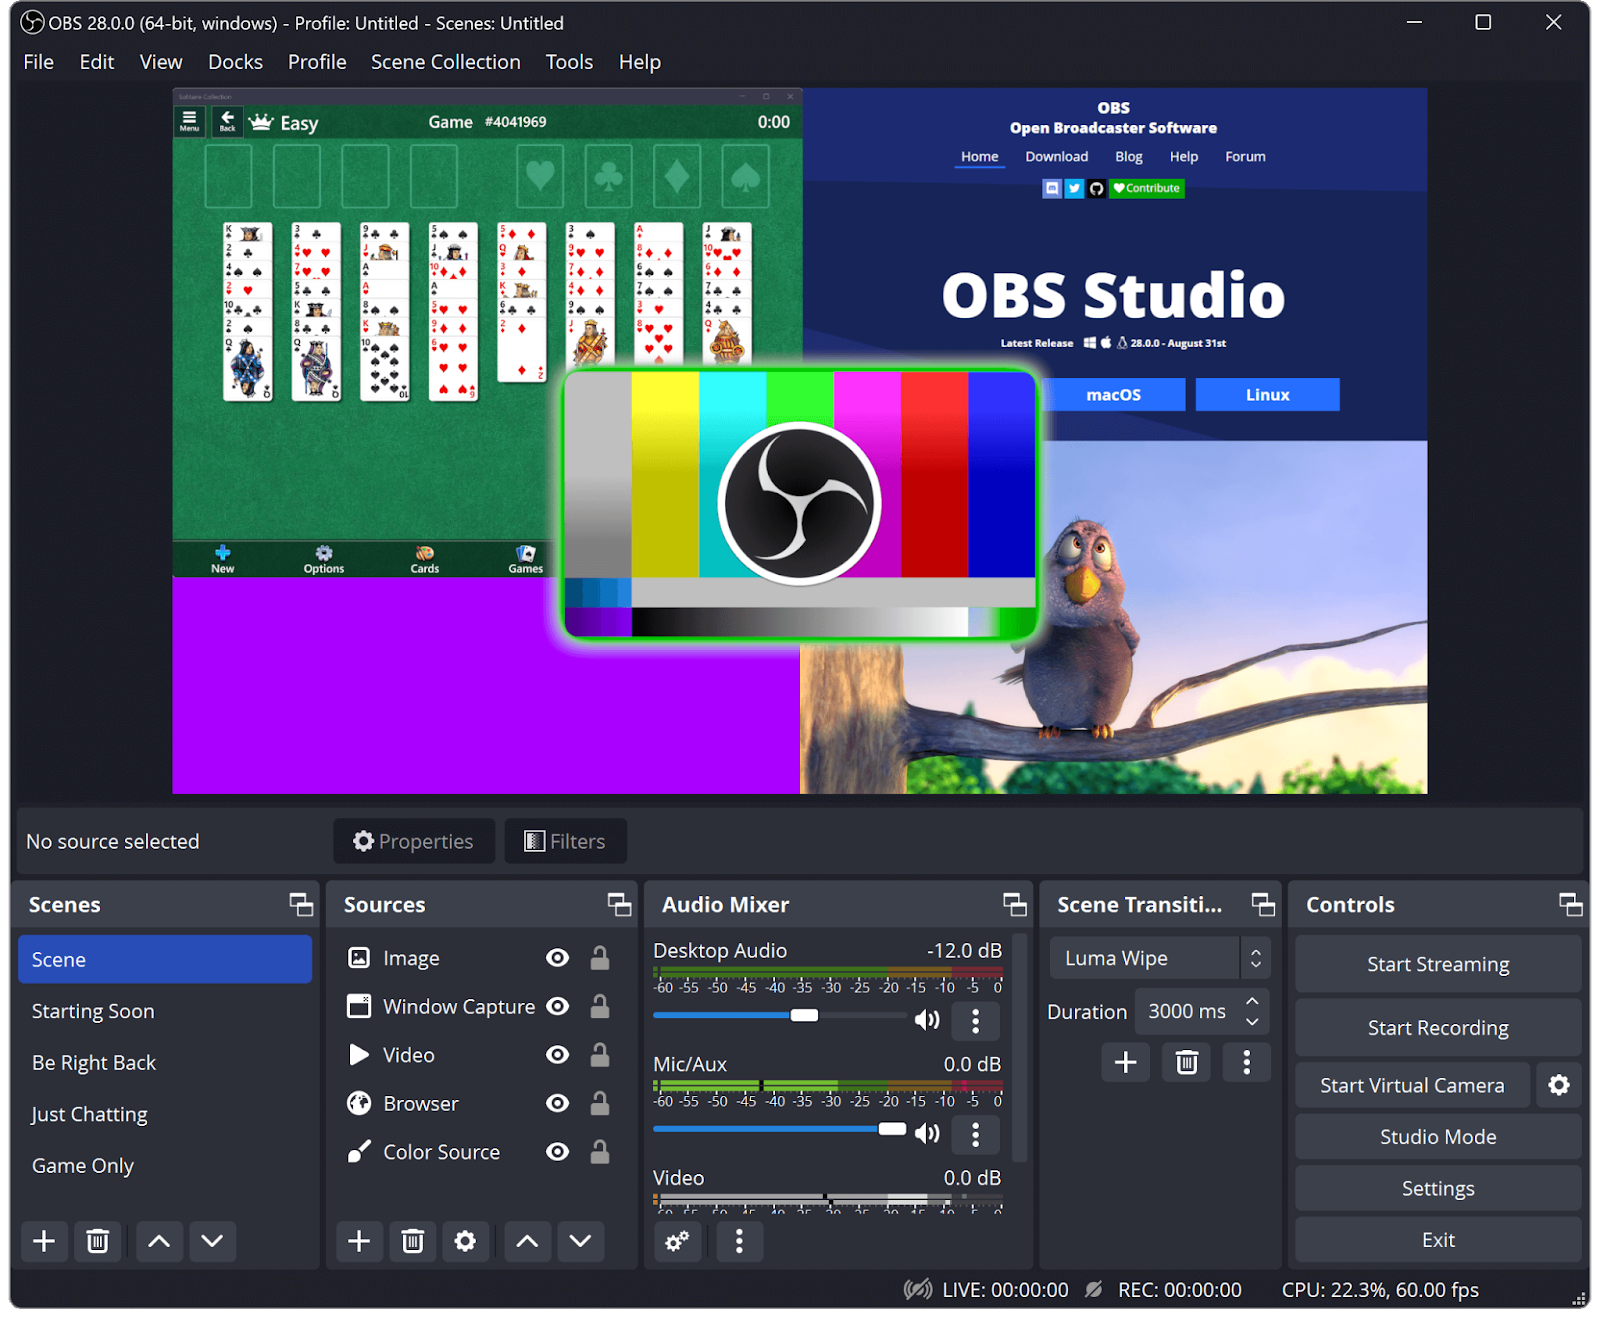 |
Scenes and sources management: You can create and customize multiple 'scenes', each with its own media sources like game capture, webcam feeds, images, and browser windows.
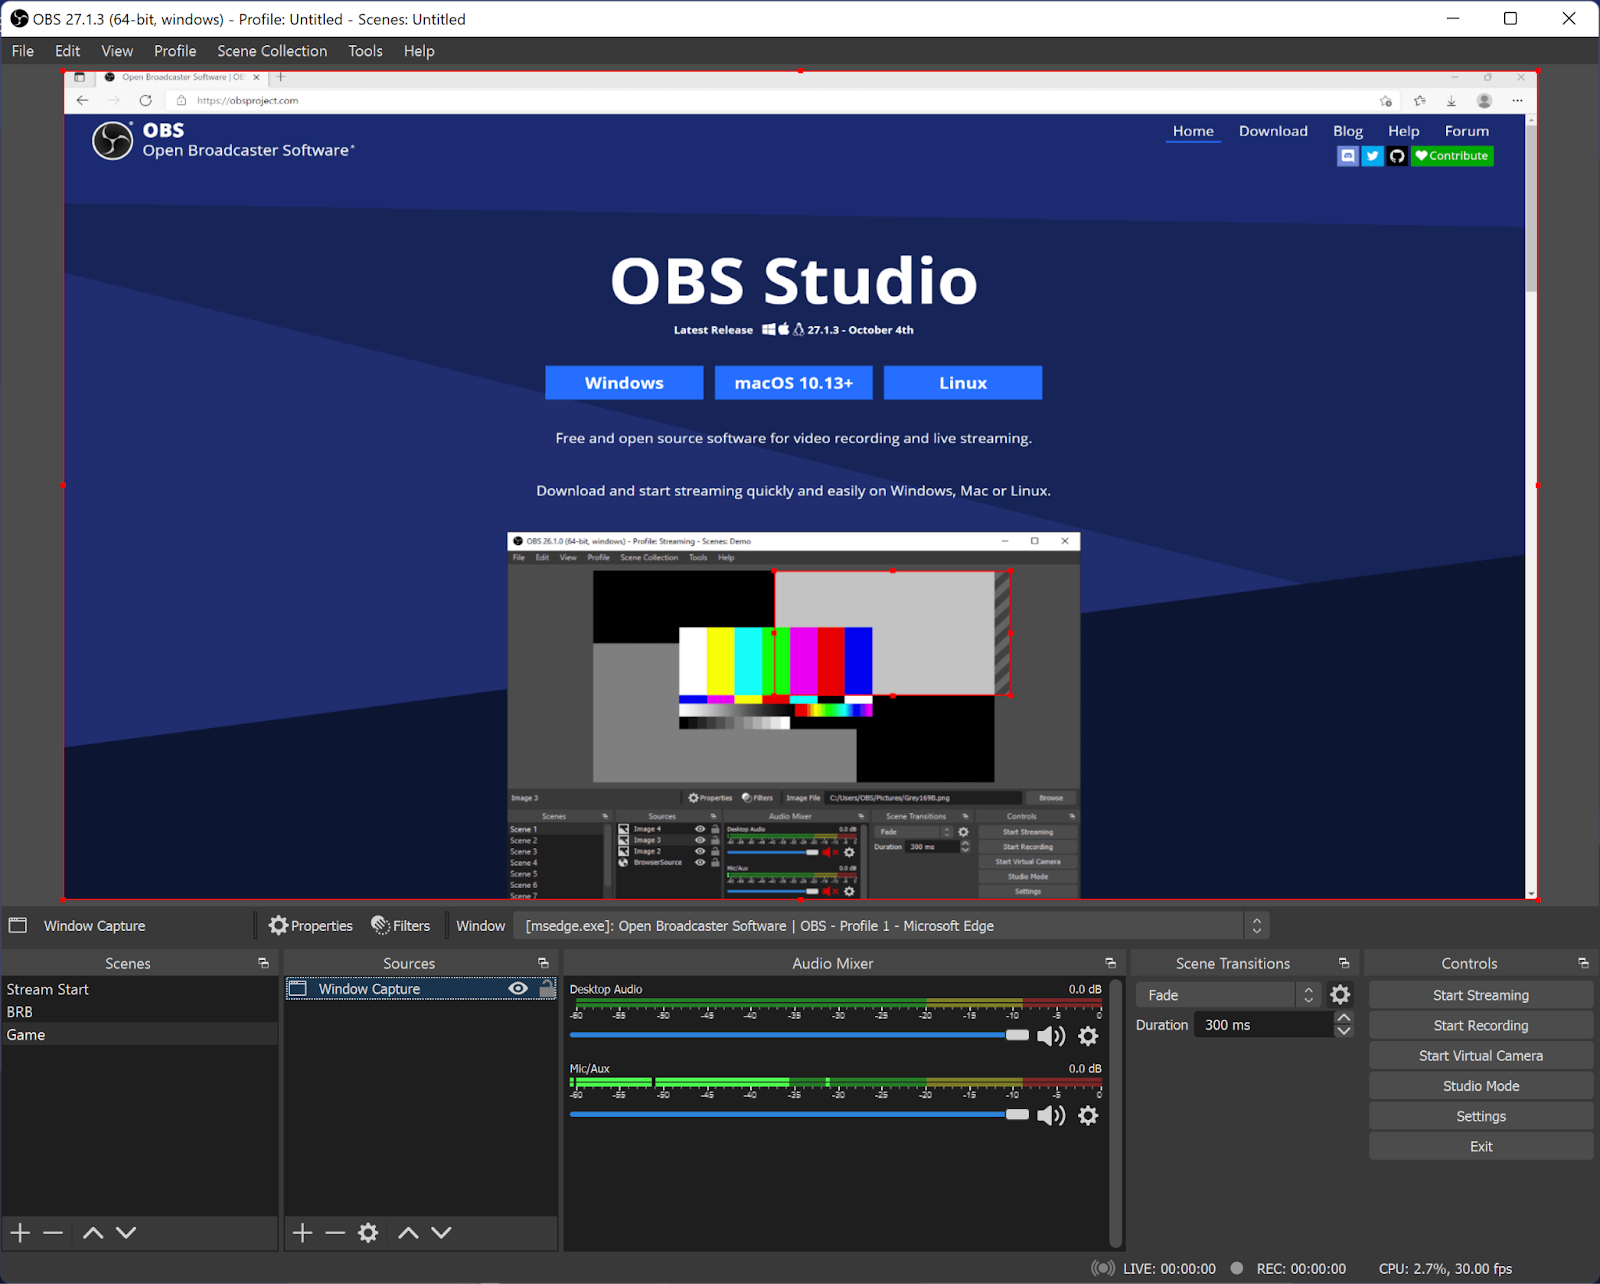 |
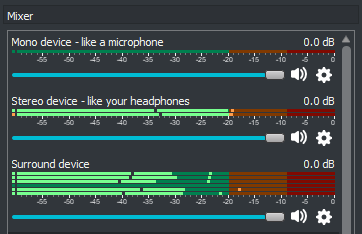
Audio mixer: Includes a multi-track audio mixer with per-source filters like noise gate, noise suppression, and gain, which gives you more control over audio inputs and outputs.
 |
Video mixing and transitions: Makes real-time video mixing and transitioning between different scenes easy with customizable transitions like fade, cut, and stinger transitions.
Streaming and recording: Offers simultaneous streaming and recording capabilities with adjustable quality settings, supporting popular platforms like Twitch, YouTube, and Facebook Live.
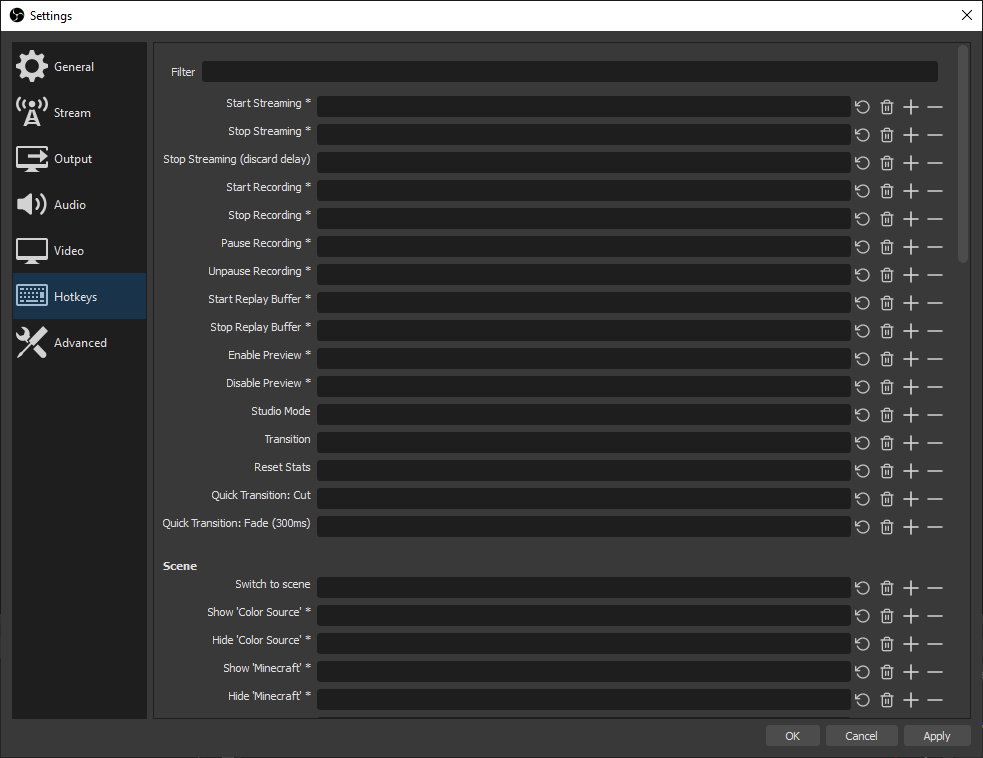
Customizable hotkeys: Lets you set up hotkeys for almost any action, including starting/stopping streams or recordings, muting audio sources, and switching scenes.
 |
Advanced audio properties: Offers advanced options like audio delay and syncing audio with video.
Real-time audio/video capturing: Captures and mixes high-quality audio and video in real-time, a key requirement for live streaming and professional recordings.
Encoder options: Supports various encoders, including x264 and hardware encoders, so you can optimize your stream or recording based on hardware capabilities.
|
Customizable user interface: Features a flexible UI you can arrange and customize to suit your workflows and preferences.
Filters and effects: Offers a variety of filters and effects for sources, such as chroma key (green screen), image masking, color correction, and more for enhanced production quality.
Multi-view: Easily monitor and switch between multiple scenes, which is helpful for complex live productions.
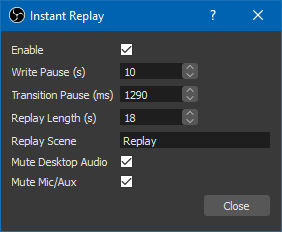
Replay buffer: Save short segments of live video to create instant replays or highlights during live broadcasts.
 |
Advanced configuration options: Includes a range of advanced settings for video bitrate, frame rate, resolution, and stream delay to tailor your streaming and recording setups.
OBS also includes easy access to plugins and FAQs, which is great for beginners trying to learn their way around the system. An OBS Discord community is yet another perk of using OBS. It’s filled with thousands of users and you can join for free.
 |
How to set up OBS for recording
The best way to record with OBS Studio is to adjust a few key settings. Here's how:
Video settings: Go to the 'Settings' menu and click on 'Video'. Set the base (canvas) resolution to the resolution of your monitor if you're doing full-screen recording. For the output (scaled) resolution, you might choose a lower resolution for a smaller file size. Set the downscale filter to 'Lanczos' for high-quality scaling and choose an FPS value (commonly 30 or 60 fps) based on the smoothness you want in your video.
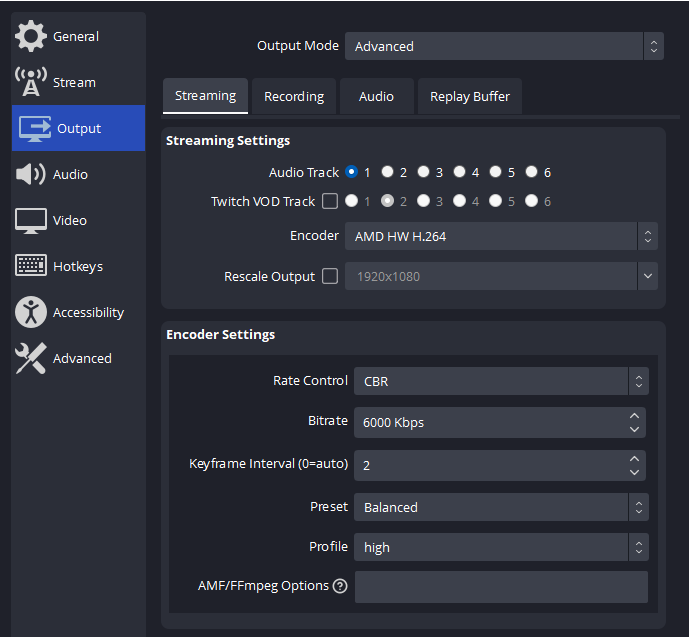
Output settings: In the 'Output' tab, you’ll find options for streaming and recording. Focus on the 'Recording' section. Choose an output mode: 'Simple' for beginners or 'Advanced' for more control. Select your recording path and the folder where your recordings will be saved. Adjust the recording format (like mp4 or mkv) and choose an encoder. If your GPU can handle it, opt for a hardware encoder like NVENC (for Nvidia GPUs) or AMF/VCE (for AMD GPUs) to reduce CPU load.
Camera and audio settings: Add your webcam as a 'Video Capture Device' source. Adjust the camera's resolution and FPS in its properties window. For audio, add sources like 'Audio Input Capture' for microphones. In the 'Audio Mixer' section, you can balance and adjust the levels of your audio sources.
Plugins: OBS supports plugins for added functionality. You can access plugins from the OBS website and install them via the drop-down menu in OBS. Choose ones that enhance your recording needs, like audio processors or scene transitions.
OBS maintains a handy list of 202 plugins in their community forum you can filter through and download for your projects.
 |
Best OBS recording settings
For the best possible OBS settings:
- Video Settings:
- Resolution: Full HD (1920x1080) or higher is recommended for quality performance balance.
- Frames Per Second (FPS): 60 FPS is ideal for smooth motion, especially in content involving fast-paced action, while 30 FPS may suffice for standard videos but can result in choppier playback for dynamic content.
- Output Settings:
- Bitrate: A higher bitrate, such as 10,000 kbps, leads to higher quality video, but also larger file sizes. The balance between quality and file size is important, especially considering bandwidth and storage capacity.
- Encoder:
- Software encoders like x264 offer a good balance between quality and compression and are suitable for various scenarios. Hardware encoders like NVIDIA NVENC and AMD VCE use the graphics card for faster, more efficient encoding.
- Audio Settings:
- Adjust parameters such as sample rate (44.1 kHz or 48 kHz), audio channels (stereo or mono), and audio bitrate (e.g., 128 kbps) for clear and professional audio. Audio noise suppression can also be enabled to improve audio quality, especially in noisy environments.
- Recording Format:
- MP4 is widely used due to excellent compatibility and compression, while formats like FLV might be better for specific platforms or older systems. You can also choose MKV if you’re concerned about preserving a partial recording in the event of a system crash — OBS includes a “Remux” option to convert MKV files to MP4 later if needed. The choice of video format affects the ease of sharing, editing, and playing across various devices and software.
As a starting point, these settings might need to be tweaked based on your specific recording situation and hardware capabilities. The goal is to balance quality with performance for smooth recordings that sound and look great.
How to record your screen with OBS on desktop (Windows & Mac)
Screen recording with OBS Studio on both Windows and Mac is straightforward. Whether you’re recording a quick tutorial or capturing short snippets of a live stream, here are the key steps to get you started:
Step 1: Install OBS. Ensure you've installed OBS Studio by following the step-by-step guide for your operating system, whether it's Windows or MacOS.
Step 2: Set up a scene. Open OBS and click the '+' button under 'Scenes' to create a new scene. Name it something relevant, like 'Screen Recording'.
Step 3: Add your sources. Click the '+' button under the 'Sources' window. To capture your entire screen, select 'Display Capture', then choose the display you want to record.
If you want to include webcam footage, add a 'Video Capture Device.' Sources can include multiple elements like images, text, videos, webcam footage, gameplay, and even desktop. Additionally:
- Display capture: Use 'Display Capture Source' and 'Window Capture Source' for Windows and Linux, or 'macOS Screen Capture Source' for macOS. This is ideal for capturing your entire desktop or a specific window.
- Game capture: For Windows users, 'Game Capture' is optimized to capture 3D games with high performance.
- Video capture: To record from your webcam or capture cards, utilize the 'Video Capture Source'.
Step 4: Set up your recording settings. Navigate to 'Settings' and then 'Output'. Here, set your recording path, select the video file type (such as MP4 or MKV), and choose your encoder settings to balance video quality with file size.
Step 5: Start and stop recordings. Back in the main window, click the 'Start Recording' button when you're ready. To stop recording, click 'Stop Recording'. Your video file will be saved to the recording path you set earlier.
Each step in OBS is designed to be intuitive, from installation to managing your recording settings. With practice, you'll be able to record videos swiftly.
How to screen record with OBS on iPhone and Android
To use OBS Studio for screen recording on mobile devices, you'll need to use your smartphone as a webcam. Here's a revised and accurate approach:
Step 1: Install a compatible app. For both iPhone and Android, install an app that supports streaming your phone's camera to a PC. Options include:
- Camo: Supports iOS and Android; connects over USB or Wi-Fi.
- DroidCam: For iOS and Android; connects via Wi-Fi or USB; supports Windows and Linux.
- EpocCam: Specifically for iOS; connects to Windows and macOS via USB, Wi-Fi, or NDI.
- HX Camera by NDI: Works with iOS and Android; streams your device as an NDI source, captured in OBS using the NDI plugin.
Step 2: Connect OBS on your desktop. Open OBS Studio and create a new scene for mobile recording. In the 'Sources' window, add your phone as a 'Video Capture Device', depending on the app you're using.
Step 3: Start mirroring on mobile. Activate the mirroring or camera streaming feature on your mobile app. Ensure your PC and mobile device are on the same network for a smooth connection.
Step 4: Record the Screen with OBS. Once your mobile camera feed appears in OBS, you can position and resize it as needed. Then, click 'Start Recording' in OBS to capture your mobile screen. Click 'Stop Recording' to end the session.
This approach captures your phone’s camera feed, so it’s great for vlogs, tutorials, or showing how an app works. Just note that it typically won’t capture internal audio on iPhone or Android unless you use a specific integration or plugin. Make sure your phone is positioned on the content you want to record.
How to record audio and sound with OBS
Capturing clear audio is crucial for creating impactful recordings. Here's how to set up your audio in OBS Studio:
Step 1: Configure your audio sources. Open OBS and click on 'Settings', then 'Audio'. Add your devices under 'Desktop Audio' for system sounds and 'Mic/Auxiliary Audio' for microphones.
Step 2: Next adjust audio levels. Use the 'Audio Mixer' window to manage the volume of your audio sources. Ensure your levels aren't peaking to avoid distortion.
Step 3: Choose your recording format. In 'Settings' under the 'Output' tab, pick an audio format. AAC is common for its balance of size and quality.
Step 4: Start recording. With your audio levels set, click 'Start Recording'. Your audio will be captured along with your video.
For recording multiple tracks, you can adjust advanced settings:
- Right-click in the 'Audio Mixer' section and select 'Advanced Audio Properties'.
- Here, you can assign different audio inputs to separate tracks for more post-production control.
- When recording a podcast with OBS, consider using multiple audio tracks to record each speaker separately. This allows for individual volume and noise reduction control during the editing process.
Keep in mind that good audio recording starts with quality hardware and a quiet environment. OBS Studio provides the tools to capture audio effectively, but it's up to you to ensure the source audio is as clean as possible.
Where to find OBS recordings
Once you click 'stop recording' in OBS Studio, the video file is automatically saved to your computer. The default recording path depends on your operating system.
However, you can find or change where OBS saves your recordings by opening the software, clicking on 'Settings', and navigating to the 'Output' tab. There, in the 'Recording' section, you'll see a field labeled 'Recording Path'. This is where OBS stores your recordings. You can click 'Browse' to change this location or simply note it to find your files.
Suppose you're having trouble locating your recordings. In that case, you can always right-click the 'Start Recording' button in the main OBS window and select 'Open Recordings Folder, ' and a window will pop up showing all your saved video files. OBS typically saves files in MKV or MP4 format by default, depending on your specified settings.
The best screen and audio recording software for high-quality recordings
All in all, OBS is a hefty recording solution that requires you know at least some technical know-how around audio and video. In other words, it isn’t the easiest recording solution out there.
If you find OBS a bit intimidating — and let’s be real, it takes some know-how — Descript gives you a simpler way to capture your screen and audio. Don’t mistake simple for basic: Descript’s powerful editing tools (and AI features) mean you can polish your videos without sifting through a maze of settings. If you’re ready for a more intuitive approach, take a tour of Descript.
Descript combines screen recording and advanced audio features in one package, streamlining the post-recording process. It's particularly handy for creating tutorials or recording high-quality video content without a need for a separate video editing solution.
Frequently asked questions
How do I record a video with OBS?
To record a video with OBS, choose or create a new “scene,” then add a Video Capture or Display Capture source. Make sure your audio sources are set—like your mic or desktop audio—then press Start Recording. When you’re finished, click Stop Recording, and your video file will automatically save to the folder you configured in Settings > Output.
Is OBS good for recording?
Yes. OBS is a free, open-source tool that many creators use to capture high-quality video and audio. It supports multiple sources, including your desktop and camera, making it versatile for screen recordings, presentations, and gameplay.
Can I record my screen using OBS?
Absolutely. To capture your screen, add a Display Capture source to your scene. OBS then records anything shown on that display. You can also add multiple sources and customize your layouts, which is helpful for tutorials or demos.
Does OBS Studio automatically record?
By default, you need to click Start Recording for OBS to record. However, you can enable automatic recording when you start streaming by checking Automatically record when streaming in Settings > General. If you prefer local-only recordings, just click Start Recording whenever you want, and OBS will handle the rest.
Thousands of video creators already rely on Descript for high quality screen capture and video editing. If you’re ready to join them, take a tour of Descript today.