


Making a podcast on an iPhone means recording, editing, and publishing episodes with the phone's mic or an external one and a recording app. It works well for starting out, since a quiet room and a clip-on mic close most of the gap with a desktop setup. Descript records and edits podcast audio on mobile and desktop, clearing noise and filler in one place.
Getting sweet new gear is one of the best parts of starting a hobby, podcasts included. But the costs to get that new gear can be daunting. Luckily, the barrier to entry for podcasting is pretty low—you probably have everything you need to record a podcast in your pocket.
As technology in iPhones and Android devices continues to improve, it’s become easier than ever to capture high-quality sound and audio on a smartphone. With the right podcast apps, you can also edit and publish your show straight from your phone.
Of course, you’ll always get the best sound quality and have access to the widest array of editing tools if you record on a computer. But sometimes that’s not an option.
Sometimes, you’ll bump into your dream guest at the coffee shop or (more likely) the truck stop and want to get the interview right there. Or maybe you’re not sure about this whole podcasting thing yet, and you want to try it out before you set up a home studio and start a podcast in earnest.
Whatever your situation, here’s a step-by-step guide on creating a podcast on an iPhone or iPad.
What you need to start a podcast on an iPhone
If you’re in a pinch to record some great, off-the-cuff content for the pod, or just want to dip your toes in the podcasting waters without investing too much in equipment, you can do most podcast recording right from your iPhone.
Here’s what you’ll need.
iPhone
Ask ten audiophiles which smartphone records the highest-quality audio and you’ll probably get ten different opinions. Your best option is probably whatever iPhone you currently have. If you’ve had that phone for a while, though, starting a podcast might be the perfect excuse to upgrade to something with a faster processor and more space for all those recordings.
External microphone
An external microphone will drastically improve the quality of your audio recording and reduce the distracting background noise that your phone’s mic picks up.
If you’re not ready to commit to an external mic, the microphone on your phone will do fine, as long as you keep it about 6 inches from your guest or—if you’re recording solo—just hold it to your ear like a phone. But if you’ve got it in your budget, we’ve got three popular mics for iPhones below:
- The Shure MV88 is a tiny, unobtrusive mic that’s easy to use and plugs directly into an iPhone via a Lightning connector. You can configure the mic to record in a stereo, cardioid, or bidirectional pattern, and you can adjust the mic itself up to 90 degrees. It also has an advanced recording app that allows you to monitor your audio levels and use five different audio presets.
- Røde VideoMic Me-L, the Lightning-connected version of the Rode VideoMic Me. It’s durable and portable, features a directional cardioid pickup pattern (meaning that it hones in on the sound it’s pointed at), and comes with a fuzzy windscreen to reduce air noise. You just plug it in and start recording.
- If you need to keep your hands free and your movements unrestricted, check out a lavalier (or “lav”) mic like the Movo WMIC50 2.4GHz Wireless Lavalier Microphone System. Lavs are small and clip onto your clothing unobtrusively. Some connect directly with a phone via a wire, but the wireless Movo WMIC50 communicates with a receiver plugged into your phone’s 3.5mm headphone jack.
Note that these mics take up the only port on modern iPhones (the Lighting port), but luckily, they come with a 3.5mm headphone jack so you can still monitor your sound while recording. (You won’t want to use Bluetooth, which we’ll explain in the next section).
⚡️ Pro tip: You don’t need the best microphone to get the best audio. Upload your audio file into Descript and turn on Studio Sound. It uses artificial intelligence to remove unwanted background noise and make your podcast crystal clear.
Headphones
Headphones are crucial when recording a podcast on your iPhone (or any device) as they allow you to monitor your audio levels while voice recording without getting distracted by background noise or the proximity of your own voice.
For the best sound isolation, you should go for closed-back headphones. For the best quality, you should aim to get something wired (versus Bluetooth, which compresses audio and often introduces a delay). There are thousands of different headphones on the market at just as many price points, but here are a few to consider:
- Sony MDR 7506 headphones are cheap (coming in at around $100), wired, closed-back headphones. Unlike some headphones designed more for listening to music (we’re looking at you, Beats by Dre), these are very neutral, meaning you’ll get a clear sound in all frequencies. These come with a quarter-inch plug and a 3.5 mm adapter, so you can use them with a mobile microphone or a more professional-level setup.
- Beyerdynamic DT770 Pro are wired, closed-back headphones that deliver high-quality sound at a good price (around $160). Beyerdynamic has a reputation both for the sound quality their headphones deliver, and for the quality of their build—these headphones will be a good friend for a long time. Just know that the cable is pretty long (at almost 10 feet).
- Apple AirPods might just be the headphones you already happen to have, which inherently makes them a great option. Granted, these are in-ear headphones (not closed-back) and they are wireless, meaning the sound quality isn’t going to be as good as a wired pair. But if you’re on the go or your mic doesn’t have a separate 3.5mm jack (or you aren’t ready to leap into a new pair of headphones), AirPods are a great wireless option.
Tripod or phone stand
Recording and editing app
The easiest way to record audio on your iPhone is with the native Voice Memos app. It’s very limited in its editing features—you can trim audio files, and that’s about it. But you can sync your Voice Memos to your Mac (or transfer them to a PC) and use more sophisticated software like Descript to create a studio-quality podcast on your laptop.
If you’re interested in recording, editing, and publishing exclusively from your phone—maybe you’re live streaming or don’t have access to your computer—there are a number of Android and iOS apps available in the App Store that allow you to do just that.
- Podbean, a podcast hosting service, created a free podcast-making app for both iOS and Android. You can live-cast and coordinate recording with up to eight co-hosts or guests. However, it doesn’t support video recording, has minimal editing capabilities, and you will have to log on to the Podbean website to update your RSS feed.
- Spreaker, an all-in-one podcast creator app, enables you to track your analytics and has some good built-in audio features, like mic controls, and auto-ducking. But you can’t record remote guests, and you’ll have to pay for anything more than five hours of storage.
- Spotify for Podcasters (formerly Anchor) is Spotify’s free, multi-platform podcast creator app. Its primary draw is the ability to easily add background tracks, transitional music, and other audio additions. But it doesn’t support video podcasts and you cannot livestream using Anchor.
How to start a podcast on iPhone in 5 steps
No need to get overwhelmed at the thought of starting a podcast. Here’s a simple tutorial to help you publish your own podcast on an iPhone.
Step 1: Decide what you want to talk about
Before you ever hit record, you first need to decide what you want your podcast to be about. Some things to consider are:
- What goals do you have for the podcast?
- Who’s your ideal listener? (Industry experts? Beginners? etc.)
- How long do you want this podcast to run? (Do you want to create multiple seasons, or will this just be a few episodes?)
Whatever topic you choose, make sure it’s something you’re either an expert in already or a topic you’re passionate about researching. Because you’re going to be spending a lot of time with this topic, and if you don’t enjoy it, that’s going to make this process really suck for you.
Step 2: Research the market
After you’ve chosen a topic, look at other podcasts that address either the same topic or similar ones. This can help you see what perspectives are missing in the market, give you ideas on what to do and not to do, and help you figure out what sort of format you want to use for your show. You can also use this research to connect with other podcasters and find experts in the field of your topic.
Step 3: Practice
Once you know what niche you want to fulfill with your show, it’s time to start crafting the show and practicing. There’s going to be a learning curve when recording your first podcast because you never know how something will sound until you record it and listen to the playback.
The format you thought was perfect could end up dragging too much, or maybe you’re talking way too close to the iPhone mic—making the audio unintelligible.
And if you’re creating a podcast with a script, there’s a big difference between writing for the eye and writing for the ear. Even writing a good podcast script, which you can do inside Descript, will take some practice. Descript’s AI Script Generator can even help you create a script instead of starting from scratch.
 |
Step 4: Choose an app to record and edit your podcast
Now it’s time to choose how you’re going to record and edit your podcast. If you’re not looking to add music or do any fancy production with your podcast, iPhones come standard with the Voice Memo app. This app does a good job capturing audio; you can even do some basic editing through the app.
But if you’re looking to create a show with a little higher production value, recording software like Descript makes recording and editing audio fast and easy. It has a ton of AI features that will automatically regenerate audio, auto-remove silence or filler words, and even Overdub text to speech.
Step 5: Find a place to upload your podcast so people can listen
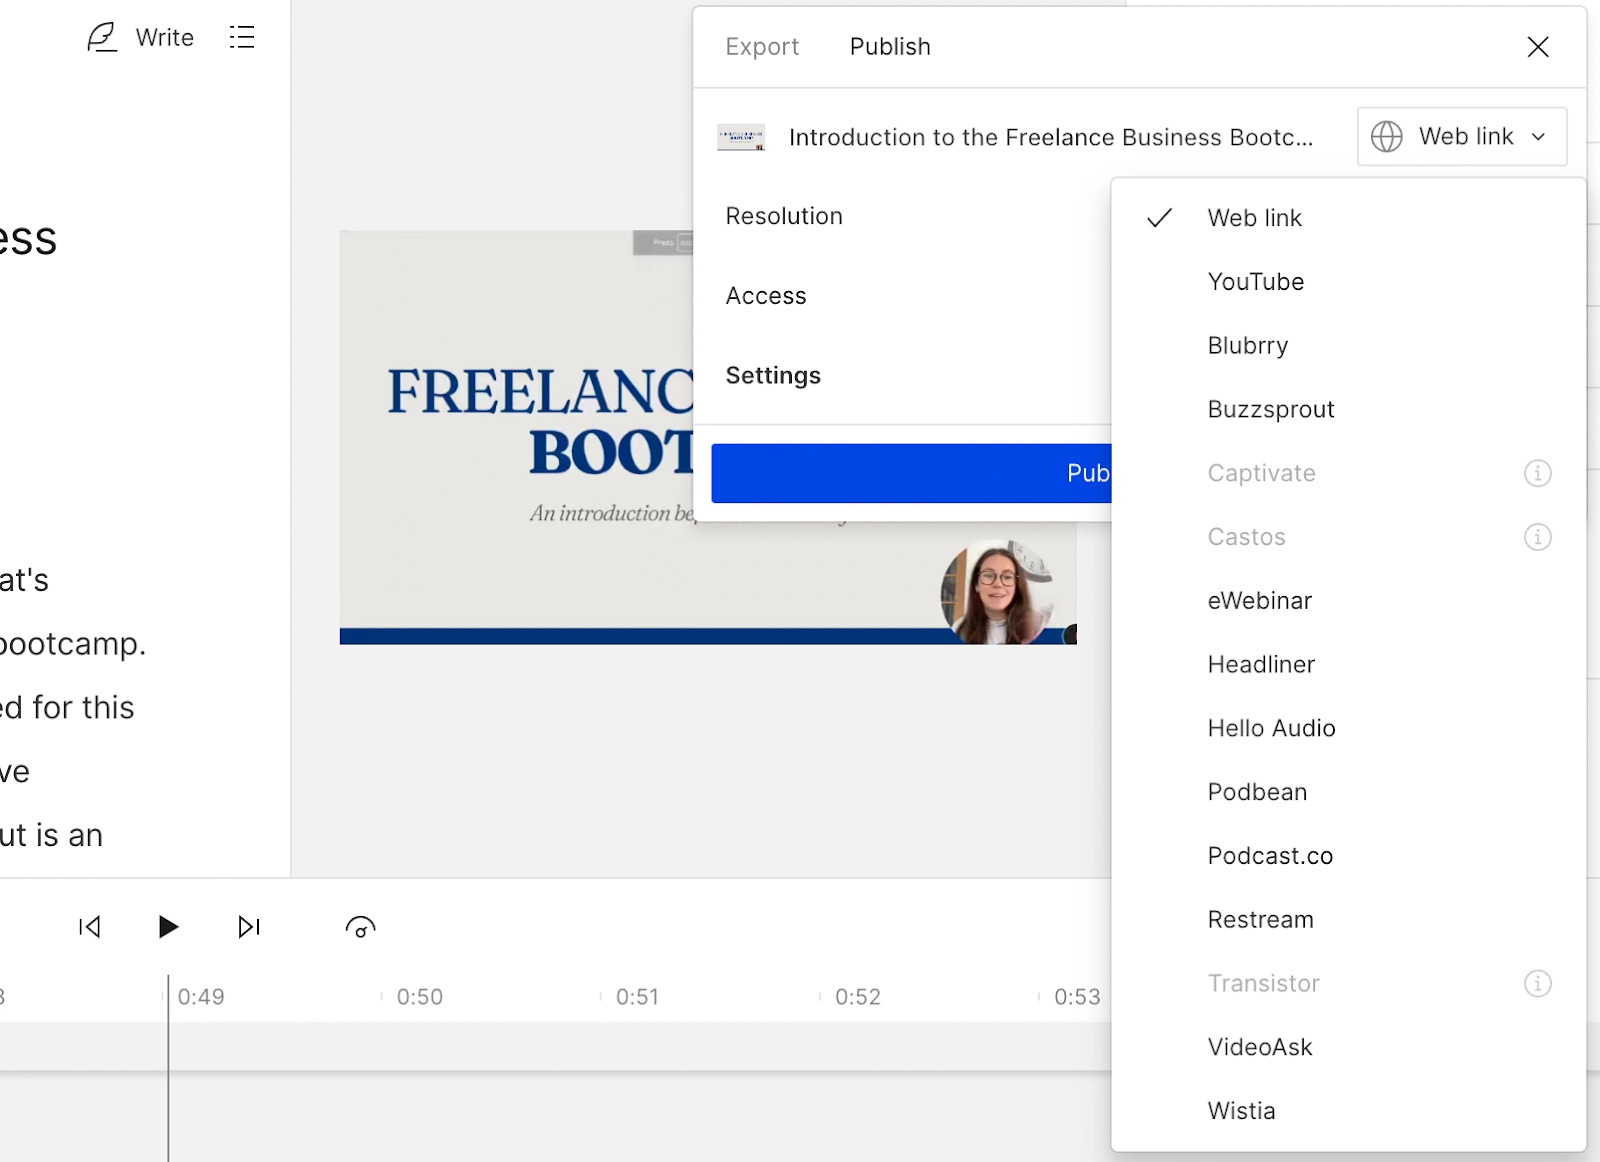
To publish your podcast in a way that will push it out to all the major listening apps, you’ll need to sign up for a podcast hosting platform, which is where you’ll manually upload your file when you’re done editing. Programs like Descript will actually allow you to record, edit, and publish your podcast to all the most popular listening platforms all through the program—Blubrry, Buzzsprout, Captivate, and Podbean included.
 |
How to record a podcast on iPhone
With the advances of technology, it’s more than feasible to record a podcast on your iPhone—in fact, sometimes it’s your best option. Podcast equipment can get expensive. And if you’re a beginner and not sure that you want to stick with this new podcast venture, you probably don’t want to sink a lot of money into your podcast setup.
Using your iPhone cuts down on costs, makes you highly portable, and still allows for great podcast audio. Plus the voice memos app, which comes standard with iPhones, even has basic audio editing features built-in.
And if you want to step your audio quality up even more, you can also use an audio editor like Descript, which will allow you to Overdub mistakes, Regenerate awkward edits, and even auto-remove filler words and pauses in your audio clips.
3 tips for creating a great-sounding podcast on your iPhone
Once you’re ready to start recording podcast episodes on your iPhone, there are a few things to keep in mind that will help you create the best possible show:
- Prioritize audio quality. If there’s one thing an audience can’t forgive, it’s bad audio—and that applies to video podcasts too. Choose a quiet place to record where there isn’t much echo and do what you can to reduce background noise as much as possible, then turn on Studio Sound in Descript.
- Check your phone settings. Before you begin recording, turn on Do Not Disturb Mode and Airplane Mode to eliminate possible noise from notifications. But be sure to leave your WiFi turned on, as some podcast apps require an internet connection. You can also save your battery by turning off all other apps and making sure none are running in the background.
- Test everything before you record. Test the recording app to make sure you’re using it correctly, test the recording capabilities to ensure that you’re actually capturing audio, and test the audio levels. You’ll save yourself a headache in the editing stage if you’re overcautious before recording.
How to create your podcast with Descript
The best way to create a podcast on your iPhone is to record audio on your phone, transfer it to your computer, and use a desktop digital audio workstation (DAW) like ProTools, Adobe Audition, or Descript to edit and polish it into a podcast.
We’re biased, but we think Descript is the best podcast suite for modern creators. Here’s how to use it to edit audio you’ve recorded on an iPhone:
- Connect your external mic and headphones, if applicable.
- Open the Voice Notes app on your iPhone. Close all other apps and turn on Do Not Disturb and Airplane Mode.
- Hit the recording button and launch into your narrative just as you would if you were in the studio.
- Transfer your audio files to your computer. This is easier than it sounds: your Voice Notes app will sync with other Apple devices, so if you have an Apple computer, you’re golden. iPhone users with PCs will have to manually transfer their audio files to a laptop via cable or online file transfer.
- Now it’s time to open Descript. Since you aren’t recording directly in Descript, you can simply create a new, blank project.
- Import your recording into Descript by dragging your audio files directly into your project from their location on your hard drive. Descript will automatically begin transcribing all imported audio and prompt you to label the different speakers.
- Time to edit your audio. As with any project in Descript, you can edit your recording by changing the transcribed text. Delete your “ums” and unnecessary pauses. Use the AI-powered Overdub feature to change any misspoken words. You can also add music and audio effects, insert ads, fade in or out, trim the tracks, and adjust audio volume until your podcast is perfect.
- Finally, you’ll need to manually upload the finished product to your hosting service, and if necessary, manually submit your RSS feed to directories like Apple Podcasts and Spotify.
Thousands of popular podcasts like Planet Money and FreakonomicsRadio use Descript to produce their shows. Want to join them? See how Descript can help your own podcast.
How to start a podcast on iPhone FAQs
Can you start a podcast with just an iPhone?
Yes, you can use the Voice Memos app to record and edit audio on your iPhone. But because your built-in microphone might not be the best, import your audio file into Descript and turn on Studio Sound.
Is podcasting on iPhone free?
Podcasting on iPhone can be free, as long as you use the built-in microphone, a free podcast editor like Descript, and a free podcast hosting service like Spotify for Podcasters.
How do I start a podcast for the first time?
- Define your target audience
- Choose a podcast niche
- Name your show
- Write your podcast script
- Record the first episode
- Edit your episode
- Upload it to a podcast hosting platform
- Promote your new show
What is the best way to record audio on an iPhone?
Use the Voice Memos app on your iPhone for a quick start, or try a dedicated recording tool like Descript for enhanced features. If you want to upgrade your sound, plug in an external mic and record in a quiet space. Apps like Descript can help you remove filler words, trim dead air, and polish your audio. Once you’re done, export your file to a podcast host or share it on social media.
How do I record a video podcast on my iPhone with Descript?
You can capture high-quality video directly on your iPhone, then import it into Descript to edit. For the best results, record in a well-lit setting, and consider using a tripod or phone mount. Once your footage is in Descript, you can remove filler words, fix jump cuts, and add captions—then export the final video for sharing.


