Streaming on Twitch takes an account, broadcasting software like OBS or Streamlabs, a stream key, and enough upload bandwidth to hold a stable bitrate. Most first-stream problems are settings problems: bitrate too high for the connection, or audio sources routed wrong. Descript records and edits the VOD afterward, which is where most of the clip-worthy material ends up.
Twitch has come a long way since launching in 2011. With millions of active users, it’s a huge part of online gaming and streaming communities.
And it’s not just for gaming anymore. For example, music channels get around 35,000 average monthly viewers. Twitch has become the go-to platform for gamers, creative enthusiasts, musicians, podcasters, and other video content creators.
Want to get on Twitch? Learn how to create a Twitch account, set up streaming software, and how to go live in this guide.
What is Twitch?
Twitch is an online live streaming platform that primarily focuses on broadcasting video game content, but also includes various other categories like creative content, music, and more. Creators can use it to stream games, music, podcasts, and other exciting content, and viewers can tune into those live streams to catch the action in real time.
Twitch users who tune in to live streams can interact with streamers through live chat and support them financially with donations or subscriptions. The platform has evolved into a thriving Twitch community where content creators and viewers unite over shared interests and passions.
At any given moment, Twitch typically has around 2.5 million active viewers. In the third quarter of 2022 alone, viewers watched 5.71 billion hours of live streamed content on Twitch. It’s a huge platform with a large potential audience and many opportunities for monetization.
Why stream on Twitch?
There are many benefits to streaming on Twitch, including to:
Build a community
Because it’s live and interactive, Twitch provides a unique opportunity to build a dedicated fanbase. Consistent streaming and viewer engagement can help you foster a strong community around your content. The live nature of the two-way interactions on Twitch feel more personal and intimate, and that can forge stronger connections with each individual in your audience.
Monetize your streams
Twitch is a great place to monetize your passions or hobbies.
As a streamer, you can earn income through various avenues including donations, subscriptions, sponsorships, and ad revenue—though only 8% of Twitch viewers report making a purchase after seeing an ad on the platform. It’s a great channel for creative entrepreneurs to consider. The best way to monetize is to hone in on a niche, maintain a consistent streaming schedule, and interact with your audience.
Another way to get paid for streaming: become a Twitch partner or affiliate. Twitch partners generally attract big audiences, stream all kinds of content, and offer paid subscriptions to their fans. Twitch affiliates might have smaller communities but can still earn revenue by encouraging their loyal supporters to subscribe or sign up. Whether you’re going big or keeping it cozy, these programs can help turn your Twitch hobby into a paycheck.
Engage your audience
Live engagement with your audience is one of the quickest and most authentic ways to foster strong relationships. Twitch's live chat functionality allows real-time interaction with your viewers, creating a more engaging and dynamic experience than traditional video uploads.
How to create a Twitch account
If it’s your first time using Twitch, you’ll need to create an account. To get started, follow these steps:
1. Visit the Twitch website
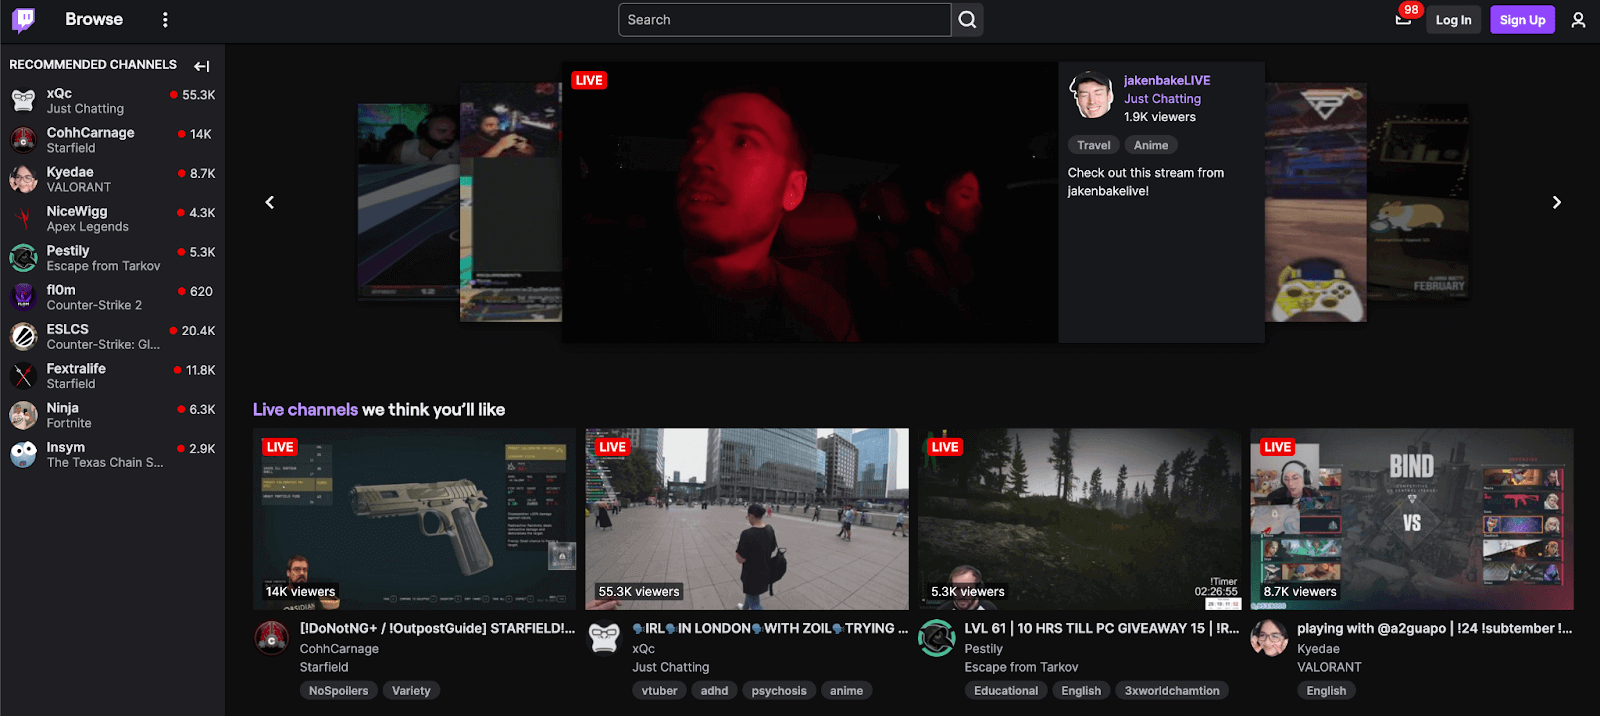
Head over to www.twitch.tv to get started. You’ll see top streams and popular channels on the homepage.
2. Click on Sign Up
Look in the upper right corner of the screen and click the purple “Sign Up” button, located next to the gray “Log in” button.
3. Select a username and password
A pop-up window will appear with a short form for you to enter your desired login credentials.
First, you’ll be asked to select a username and password. You can customize your username however you see fit, as long as it isn’t taken by someone else already and falls within Twitch’s community guidelines. You can change it later if you want.
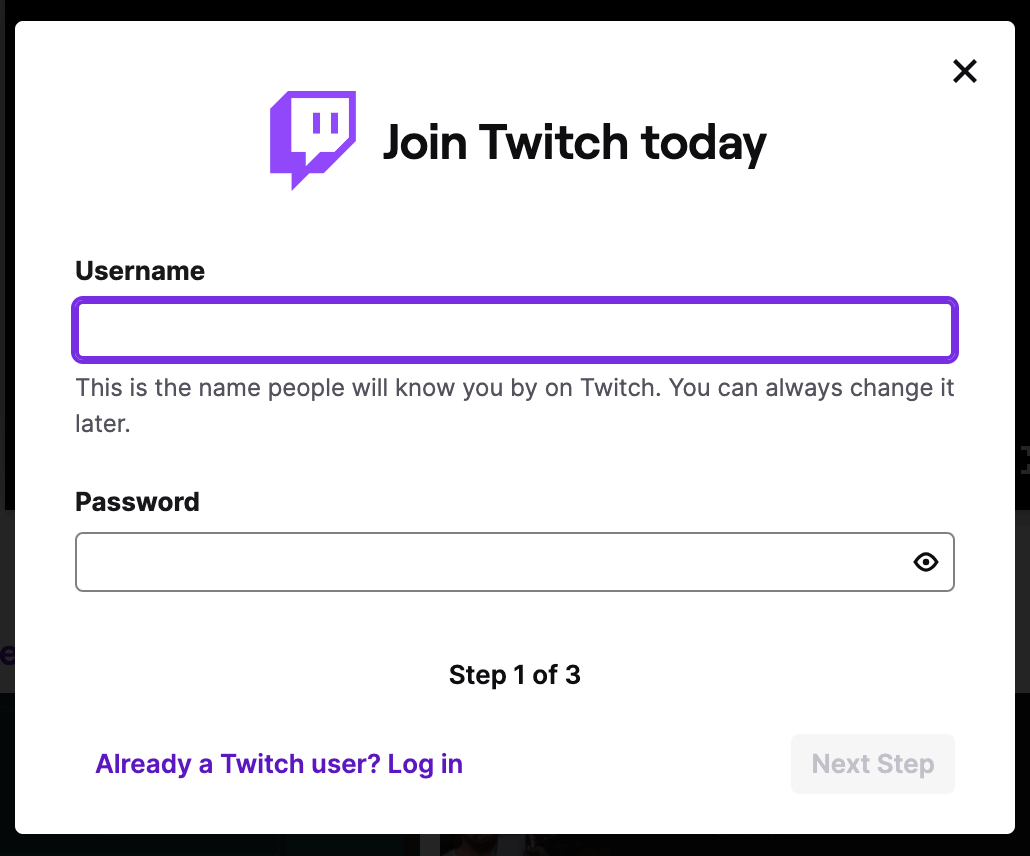
Once you enter a username and password, click the purple “Next Step” button.
4. Set up two-factor authentication (2FA)
Now, you’ll set up your account verification. This helps keep your account secure. You can choose to use your phone number or email for two-factor authentication.

NOTE: Once you set up two-factor authentication, you can set up a Twitch stream key. Your broadcasting software will need this stream key, which essentially gives it permission to stream to your Twitch account.
Enter the corresponding information and click the purple “Next Step” button again.
5. Enter your birthdate
As the final account creation step, you’ll be asked to enter your date of birth. That’s because Twitch users must be at least 13, and some content is age-restricted.
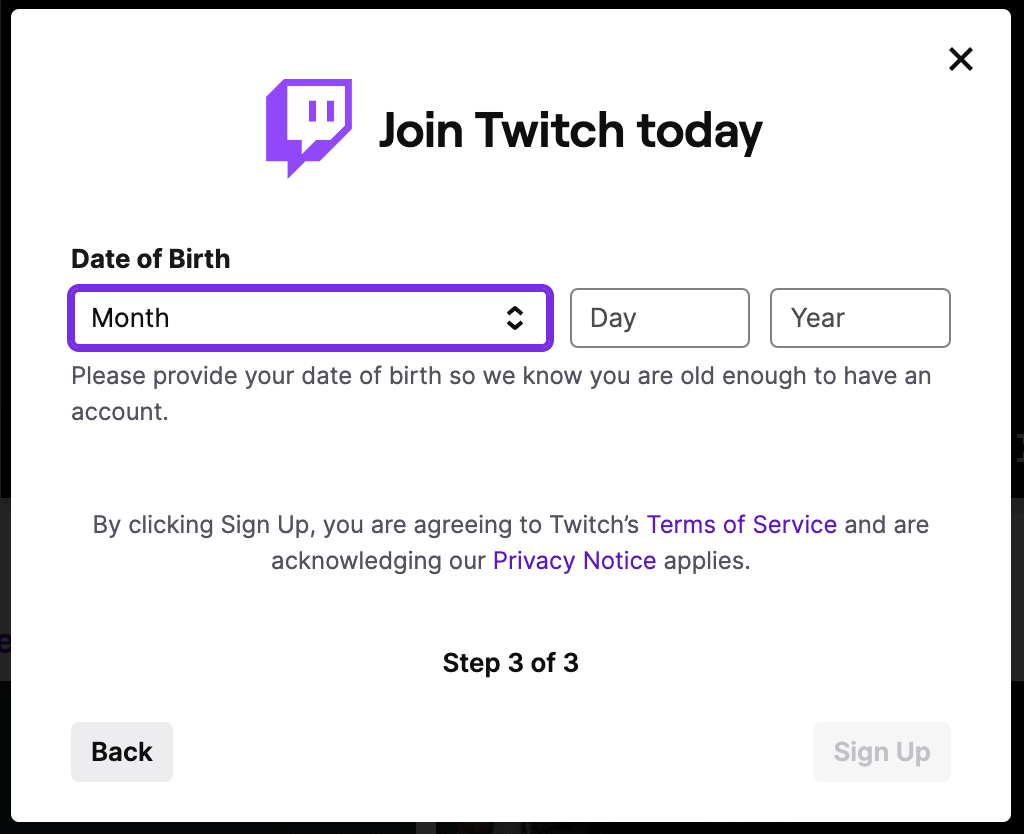
Once you enter your birthday, click the “Sign Up” button.
6. Verify your account
Twitch will send you an email or text message asking you to verify your account. Follow the instructions provided, and you’ll be good to go!
How to stream on Twitch from a computer
If you’re using a desktop computer to facilitate your Twitch live streaming, use the following steps to get started:
1. Choose open broadcaster software (OBS)
To go live on Twitch, you need broadcasting software (a.k.a. open broadcaster software). You can use the platform’s own Twitch Studio or check out third-party options like:
- OBS Studio: A free, open-source platform for Windows, Mac, and Linux.
- Streamlabs OBS: A comprehensive software suite for live streaming and monetization.
- XSplit: A live streaming and video-mixing program meant for capturing gameplay for live streaming or video recording purposes.
- Restream Studio: Another comprehensive broadcasting platform with built-in business tools.
Learn: Streaming software: What it is and which ones we recommend
2. Connect your Twitch account
Once you’ve installed your broadcasting software, connect it to your Twitch account. Each platform has its own process to accomplish that.
3. Configure stream settings
Your stream settings dictate how you present yourself. Customize your settings according to the following guidelines:
- Stream resolution (1080p is recommended).
- Frame rate (50fps–60fps is recommended).
- Keyframe interval (2 seconds is recommended).
- Bitrate (3,000 Kbps–6,000 Kbps is recommended).
- Audio bitrate (up to 160 Kbps is recommended).
- Encoding (opt for CPU encoding like NVIDIA NVENC instead of x264).
- Captions.
- Screen overlays.
Learn: How to livestream your podcast and engage your audience
4. Capture sources
Various inputs or content types can be captured and displayed on your Twitch stream. Whether it's your gameplay, camera feed, or even a specific window on your computer, these sources shape your broadcast's visual and audio content.
Imagine setting up a virtual stage for your audience. Each capture source is like a different prop or set piece — a Game Capture for the main act (your game), a Video Capture Device to show your live reactions, plus Text or Image sources for branding banners. Don’t forget about alert or chat overlays; they highlight new followers, subscribers, and give viewers a chance to see chat activity on screen.
If you want to get fancy, try adding scene transitions or using a stream deck for quick access to sound effects and overlays. Look for the '+' button in your streaming software at the bottom of the 'Sources' panel. From there, you'll see a list of source types to add (like Game Capture or Window Capture).
Once added, you can click and drag each source to position them on the canvas. Resize if necessary to fit them within your streaming frame.
💡TIP: Test each source. Play a game, talk into your mic, and play music to ensure everything’s capturing. Adjust volumes or sizes as necessary. The beauty of streaming is the ability to customize and make the experience uniquely yours. Experiment until you find what works best for you and your audience.
5. Set up audio
Remember to account for all audio sources, not just the mic. This means configuring audio sources like game audio, instruments, and whatever else is involved in your Twitch stream.
6. Preview and go live
Before going live, it’s best to preview what your stream looks like so you can work out any kinks. Pay extra attention to audio and video quality when doing your preview.
If everything checks out, you’re ready to go live! You can hit the “Go Live” button to start broadcasting to an audience.
Gear and streaming requirements
A quality Twitch stream is dependent on the equipment and technology you use. So, while technically speaking, you can stream with just a mobile device, you’ll want to invest in better quality gear to monetize your efforts.
For a quality Twitch streaming setup, you need the following:
Powerful computer
A robust computer or gaming laptop is essential for smooth streaming. Twitch streaming is a high-bandwidth activity, so you need a machine that can keep up.
Consider the following specs:
- Memory: Look for at least 8GB of RAM, though more is better. You’ll need memory to download programs and save content.
- CPU: This is your computer processing power—you’ll need at least six cores to avoid lag or crashing. You could try an Intel core processor with at least i5 CPU.
- GPU: This is your graphics card if you want to broadcast gameplay—it shares the work with your CPU. Twitch recommends the PowerGPU, though there are many other suitable ones available.
- Operating system: Your computer should run either Windows or macOS. Make sure to check out the software you plan to use and confirm it’s available for the operating system of your choice.
Stable internet connection
High upload speeds and a reliable connection are crucial for reliable Twitch streaming. A strong internet connection will facilitate uninterrupted streams, high-quality audio, and high-resolution video while mitigating buffering. At a minimum, look for 3–6 Mbps. Many professional Twitch streamers like to have even more Mbps.
Microphone and headphones
Good audio quality enhances the viewer experience. Find noise-canceling headphones that minimize background noise, and a microphone that delivers crisp, clear audio. Both wired and wireless headphone options can work—just ensure you keep them fully charged if you’re going the wireless route.
When searching for a microphone, you’ll typically choose a dynamic mic instead of a condenser one—the latter is more sensitive to background noise.
Aim for the following when it comes to your microphone:
- Frequency response: 20Hz–20kHz
- Connection type: USB will work; XLR offers better quality
- Polar pattern: Cardioid, super-cardioid, or hyper-cardioid; bidirectional if you’re conducting interviews on one mic
- Sample rate: 44.1kHz–48kHz
- Bit depth: At least 16-bit/48kHz
Another option is a headset. This won’t block your face, and it’s a two-in-one piece of equipment. The drawback is that the audio quality isn’t as high.
Webcam
Your webcam is another important part of your Twitch streaming setup. This lets viewers see you in real-time, creating a more personal experience.
Look for webcams with the following specs:
- Resolution: Full HD or 1080p (2 megapixels), 2K (4 megapixels), or 4K (8+ megapixels)
- Frame rate: At least 60 frames per second (fps)
- Field of view (FOV): 60-degree FOV if it’s just you; 90-degree FOV for capturing a group
- Lens material: Glass lenses offer clearer images, but plastic is less expensive
Check out these best webcams for streaming in 2023 to help you find the right one for your needs.
Capture card (for console gaming)
If you’re live streaming from a gaming console like a Sony Playstation, Microsoft Xbox One, or Nintendo Switch, you might want to look into ways to record your sessions instead. Capture cards can do that.
A capture card is a device that records and streams gameplay, while allowing you to save recordings on a hard drive or SD card. This means you can play it back later, upload it to video platforms like YouTube to broadcast yourself to new audiences, and edit into new videos and content to maximize your investment. Capture cards allow you to make the most of your live streams for other channels like social media, YouTube, or your website.
Related: Best recording software — Everything you need to know
Broadcasting software
Like we touched on above, your broadcasting software allows you to go live and share your stream with an audience.
Each broadcasting software has its own features and functionality, so find one in your budget that caters to your unique needs. Make sure you set your platform to the appropriate broadcast settings.
Dual monitor setup (recommended)
While technically not required, it’s a good idea to use a dual monitor setup for Twitch streaming. This makes managing your stream much easier, as you can play a game on one monitor and interact with viewers on the other. You don’t have to toggle between different tabs and windows to fully engage with your stream.
Edit all your live videos and more with Descript
Descript is a simple, powerful, and fun way to enhance your Twitch streaming experience.
With features like automatic transcription, text-based editing, and easy audio/video manipulation, you can extend the life of live streams across Twitch and other channels and turn them into high-quality recorded streams that drive engagement for weeks, months, and even years to come.
How to stream on Twitch FAQs
How do you stream on Twitch with a PS4?
- Choose a compatible broadcasting software.
- Connect your Twitch account.
- Connect your PS4 console.
- Configure your stream settings.
- Capture all sources, including your PS4.
- Set up audio.
- Preview.
- Go live.
Is it free to live stream on Twitch?
Yes. It’s free to create an account and stream on Twitch. All you need is a stable internet connection and broadcasting software like Twitch Studio, OBS, or Streamlabs.
How hard is it to become a streamer?
It’s easy to become a streamer but a bit more difficult to become a successful streamer as a means of income. To become a streamer, you’ll need to invest in the gear, stick to a consistent streaming schedule, and engage with your audience.
Frequently asked questions
How do I start streaming on Twitch?
First, create a free Twitch account. Then install broadcasting software like Twitch Studio or OBS and connect it to your account using a stream key. Next, add any video or audio sources you want your viewers to see and hear. Finally, click “Go Live” in your software, and you’ll be streaming on Twitch.
How do I stream on Twitch from a PC?
To stream on Twitch from your PC, download and install a streaming tool such as OBS Studio. Log in to Twitch and copy your stream key. In OBS, open Settings, then Stream, select Twitch, and paste your key. Add your camera, microphone, and other sources to OBS, then select “Start Streaming” to go live.
How do I stream on Twitch from my phone?
You can stream on Twitch by using the free Twitch mobile app on iOS or Android. Just open the app, tap your profile picture, then tap Go Live. Customize your stream title, choose the right category, and start broadcasting from your phone’s camera. While the built-in mic and camera will get you started, consider using external gear (like a clip-on mic) if you want better production quality. Mobile streaming can be a quick, on-the-fly way to share your content with an audience.
How much can I earn streaming on Twitch?
There’s no guaranteed amount. Some streamers make a modest side income, while others earn enough to go full time. Income can come from subscriptions, donations, sponsorships, and ad revenue. Growing and engaging an audience is key to higher earnings.