


That perfect video shot you captured? It's probably being undercut by mediocre audio. This isn't just being picky—when viewers struggle to hear what's being said, even the most visually stunning content gets abandoned.
Built-in camera and phone mics are notoriously bad at their one job. They pick up scratching, hissing, rustling, and background noise while making everyone sound like they're speaking from across the room—because they are. The microphone is physically distant from your subjects, creating that hollow, unprofessional sound.
Recording audio separately fixes the quality problem but introduces a synchronization challenge. Even slight misalignment between audio and video—mere milliseconds—creates that weird dubbed-movie effect that subconsciously irritates viewers. They may not identify exactly what's wrong, but they'll feel it immediately.
This guide walks through three practical methods to sync audio and video properly, with options for different production setups. Whether you're a TikTok creator working solo or a podcast host with a multi-camera setup, you'll find a straightforward approach that actually works.
Why syncing audio and video is important
Before we dive into the tutorial of how to sync audio and video recordings, let's explore why it's something you should think about when producing online content. Proper audio-video synchronization is essential for creating professional-looking videos that keep viewers engaged.
- Improved viewing experience. Videos are easy to watch when viewers don't have to think about what they're consuming. That's possible when audio and visual footage sync up perfectly. There's no second-guessing what your subject said; their voice is in time with what people see on-screen.
- Enhanced content quality. While you can get by with middling video quality in a movie or TV show, bad audio makes the viewing experience next to unbearable. Recording your audio separately gives you better sound quality—especially if the microphone is closer to the subject.
- Increased emotional impact. It's not just vocals or voice-overs that you can sync with video footage. If you're producing a movie and there's a sad scene, you can add audio—such as gloomy background music—to build a more emotional impact in post-production.
How frame rates and codecs affect sync
Even if you've done everything right behind the camera, mismatched frame rates can sabotage your audio-video alignment. Using a camera that outputs 30 frames per second while your audio device is set to 48 kHz doesn't inherently create conflict, but drifting can happen when software tries to reconcile the differences if not managed properly. Additionally, some codecs introduce latency by processing frames or audio data at different speeds which can lead to subtle desync. Sticking to widely supported codecs and consistent frame rates across your devices can minimize post-production headaches. You’ll also want to verify that your audio sample rate (48kHz is common for video) remains consistent throughout to avoid drift across lengthy recordings.
Why audio and video get out of sync
If you've replayed your video and noticed that the audio is out of sync, there are a few potential culprits.
The first: there was an issue with the recording device you used. If you're recording a live stream and your internet connection drops, for example, the recording software might compress the video into a lower quality file. The audio still plays as-is while your video changes resolution, which causes the two to become out of sync. This is a common technical challenge when frame rates or codecs don't match properly.
Issues can also arise if you're recording the audio and video footage separately—especially if you don't use a clapper to set a consistent start point. You'd have to go back through both recordings and line them up. This is particularly challenging in multi-camera setups where maintaining sync across different angles is crucial.
Leveraging automated syncing features in advanced editing software
Many modern video editing tools now include automatic syncing features that rely on timecode references or waveform matching to align audio and video with minimal hassle. Adobe Premiere Pro, Final Cut Pro X, and DaVinci Resolve can detect overlapping audio spikes in separate tracks and sync them almost instantly. These automated methods are especially valuable for multi-camera shoots since they reduce the tedium of manual alignment for each angle. However, it’s wise to do a quick visual check after relying on automated features—occasionally, slight discrepancies can still happen. When advanced editing software handles the heavy lifting, you’re free to spend more time perfecting creative storytelling elements rather than fighting with off-sync clips.
3 easy ways to sync audio and video
How to sync audio and video with Descript
You can easily sync audio and video using the visual waveforms in Descript's video editing tool. This automatic synchronization feature helps align your tracks precisely. Here's how:
Step 1: Import your audio/video clips
If you haven't yet, download the Descript app for your Apple iOS, MacOS, or Windows computer, and then install and open it.
Create a new project by clicking the blue “+ New” tab in the upper right-hand corner of the Drive view and choose “Project.” Choose a name for your project and click “Create Project.”
To add your source audio and video files, press the Files tab in the top navigation bar. Select the files from your computer, or just drag and drop your audio and video clips into Descript.

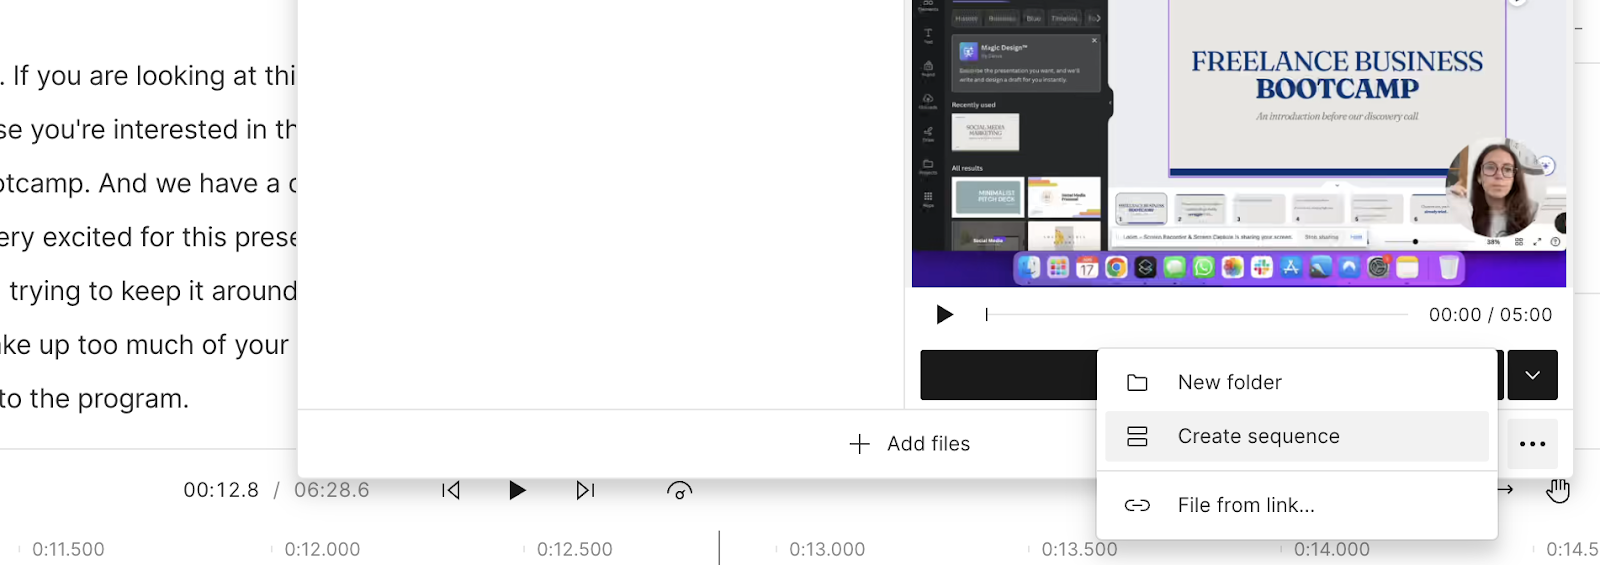
Step 2: Create a sequence
As soon as your audio and video clips have been imported into your Descript project, create a new sequence by going to “Files”, clicking “Add new…” and then “Sequence” from the drop-down options.
Now, highlight whichever audio and video clip you need by checking the boxes next to each file.
From there, click on the ellipsis to the right of one of the clips to access the dropdown options. Choose “Create Multitrack Sequence.”
Your Descript editor should show one track with the video clip and the corresponding audio and audio waveform, and one track with the externally recorded audio and the corresponding audio waveform.
Step 3: Sync audio with video in Descript's timeline
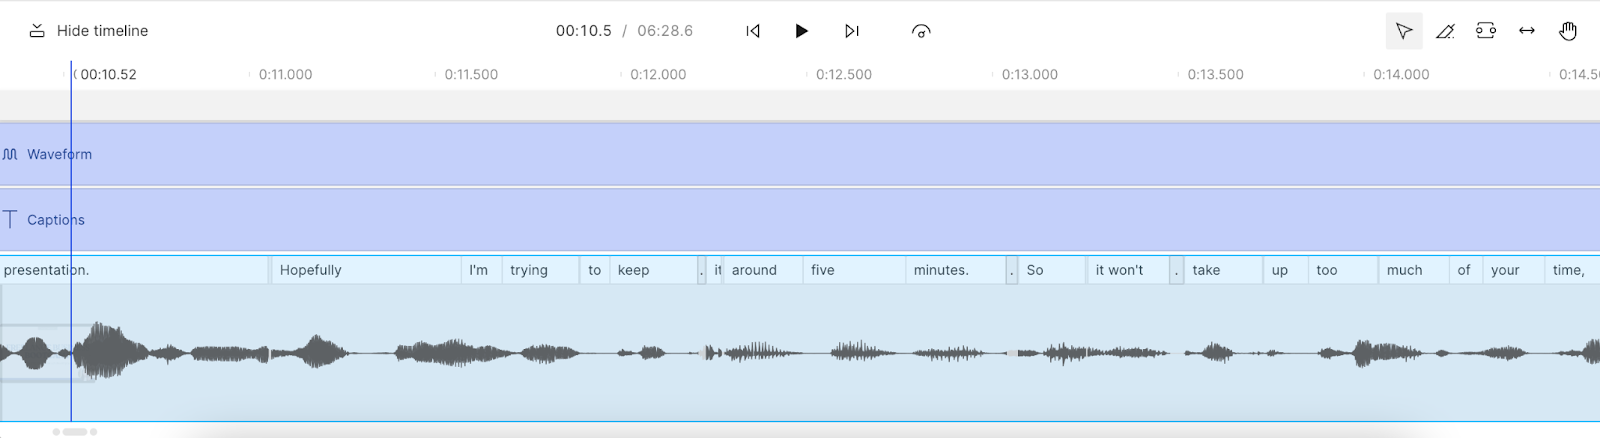
Next, find the mutual sync point in the video and audio clips—which is the moment at the beginning of a take when you clapped either your hands or a clapboard to create a point of synchronization. This visual and audio spike creates a clear reference point for aligning your tracks.
Find the sync points one at a time, which you can do by muting one track (clicking the "M" to the left of the track) and listening to the other track and making note of the sync point when you find it. Then mute your second track and listen to track one to listen for that track's sync point. You can also see the sync point visually: A clapper usually creates a sharp spike in the audio waveform that's easy to identify.
Once you've located and noted both sync points, go on “Select” mode by clicking the arrow symbol under the video monitor. Click on the track with the earlier sync point and drag it until its sync point lines up with the corresponding clip and track.
Once you've got both audio and video tracks lined up, confirm both are perfectly synchronized by playing the video at a handful of random points along the timeline. Then export your video in your preferred file format.
How to sync audio and video with VLC Media Player
If you want more control over how your audio and video footage lines up, here's how to sync them manually using VLC Media Player.
Step 1: Look for the VLC Media Player app
VLC Media Player is a free editing app that's available for both Windows and Mac devices (including iPads and iPhones). It's basic in terms of functionality, but has the essential tools you'll need to bring your video and audio back in sync. VLC supports most common audio and video file formats, making it versatile for quick sync fixes.
If you haven't already downloaded it for your PC, head to the VLC Media Player website and choose the version that's compatible with your computer.
Step 2: Open your video file
Once you've installed the software, fire up the VLC Media Player and import your video file. You can also import the video directly from YouTube if you're live streaming. Simply head to “Open location from clipboard” and paste the URL of your YouTube live stream.
📹 Start learning: How to edit YouTube videos: 8 tips to grow your channel
Step 3: Adjust the audio delay
Press the “play” button to watch your video file. If you can count how many milliseconds the audio is out of sync, go to “Tools” and “Track Synchronization.” You'll see the option to the number of milliseconds and synchronize your audio.
Don't feel like counting? Experiment with the audio delay by slowing down or speeding up the audio file. The audio sync will shift by 50 milliseconds each time—enough for you to line both files up.
How to sync audio and video with Adobe Premiere Pro
There are different video editing tools that allow creators to sync audio and video—including OBS, PluralEyes, iMovie, and Final Cut Pro. For the purpose of simplicity, we'll go with one of the most popular options for professional video editors: Adobe Premiere Pro.
Step 1: Import audio and video
Premiere Pro is a video editing software that's included in the Adobe Creative Cloud. It has a built-in tool called “Merge Clips” to sync up to 16 audio files with your video footage—without finding the sync point manually. If you haven't already got Premiere Pro, download it from Adobe's website.
Step 2: Add audio and video to timeline
Start a new project and import your video and audio files. Both files will appear on the timeline, ready for you to sync up.
Step 3: Use the "Merge clips" feature
Once your footage has been imported into Adobe Premiere Pro, drag each file into the “Project” panel. Head to “Clip” and select the “Merge clips” option. The software will automatically sync your footage based one of the following:
- In point, e.g. the clapper at the start of your files
- Out point, e.g. the final clapper at the end of your footage
- Timecode, e.g. the timestamp of your clapboard
Step 4: Check the audio and video sync
Before you export and publish your video, replay the footage inside Adobe Premiere Pro and check the audio and footage are in sync. You might need to play around with the “Merge clips” options before it's ready to go out.
4 tips for syncing audio and video
There are a lot of moving parts when recording a video, and even more when you record separate audio. Here are a few tips to keep in mind that will help you get the best quality recording and make it easier to sync both audio and video tracks:
- Invest in high-quality audio recorders. To improve audio quality for the sounds you want to sync, buy (or rent) things like a boom mic, a directional shotgun mic, or a lavalier you clip to your subject's clothing. Unlike smartphone mics, this specialist equipment can record high-resolution audio.
- Use multiple mics. Use both your camera's and external recorder's audio to help you sync audio to video. Even though you might discard the camera's audio entirely in the end, it will have the same wavelength pattern, which will help you line everything up.
- Create a sync point. Once your camera and external audio recorder are rolling, have someone stand in front of the camera, call the scene and take, and then clap—with either a clapperboard or their hands—loud enough that it's caught on both the camera and audio recorder.
- Test your audio levels in your mixing software on every mic, especially the mics used for picking up dialogue (such as a lavalier). In mixing software, you can see the decibel levels on a colored bar that moves between green, yellow, and red. Background noise should be in the green, while a person speaking should stay in the yellow and sometimes touch red so that they can be heard clearly in playback.
📹 Start your show: A video podcast workflow that won't kill you
Frequently asked questions about audio and video sync
How do I fix audio and video out of sync on my phone?
Video and audio can go out of sync if you have a weak internet connection, so try to find a stronger network. If the video you're watching is offline, use a tool like Descript or Adobe Premiere Pro to line up both tracks. For streaming content, consider lowering the video quality to reduce sync issues if your connection is unstable.
How do I sync audio and video online?
- Open the Descript browser
- Create a new project
- Import your audio and video files
- Create a sequence
- Line up the mutual sync point
- Replay your video to check the sync
- Export your video file
Why does audio and video not sync when streaming?
A poor internet connection can cause your audio and video to go out of sync—especially if you're streaming a high-quality video (such as a 4K game). You can line these back up using tools like Descript.
How do you handle multi-camera streaming setups?
Handling multi-camera streaming setups starts with ensuring every camera uses the same timecode to simplify syncing in post-production even in complex workflows. You should also match frame rates across devices so that no single source drifts out of alignment over time. If one camera or audio recorder doesn’t support timecode, use a clapperboard or hand clap to create a universal sync point. Checking your recordings after a short test run helps confirm everything is capturing audio and video in unison. Automated tools in your editing software can take it from there, but consistent setup is key to success.
How do I manage platform compatibility when syncing audio and video?
Platform compatibility issues usually arise from mismatched frame rates, codecs, or sample rates. Always align your settings before recording, making sure each recording device and platform follows standard video-based sample rates (48kHz) to prevent drift. Double-check that your video and audio codecs are universally supported by your editing software to minimize the risk of lag or latency. If problems persist, transcoding your files to a consistent format can help simplify the syncing process. When in doubt, run a short test to see if your workflow holds up before recording critical material.


