Editing videos for YouTube shouldn't be the part that stops you from growing your channel. Yet for many creators, it's exactly where they get stuck.
With over 2 billion users, YouTube is the second-most visited website in the world. Starting a channel and having a presence there is common sense—but the difference between channels that fade into obscurity and those that thrive often comes down to one thing: how well you edit your videos.
This article will teach you two practical ways to edit YouTube videos, share eight actionable tips to help your channel grow, and introduce you to editing tools that won't require a film degree to master.
Leveraging YouTube Create Tools
YouTube offers a suite of creation tools that are perfect for enhancing video quality without additional costs. These tools include filters, effects, and a music library, allowing creators to add a professional touch to their videos. Leveraging these free resources can significantly improve your video's audio and visual appeal, especially for beginner creators. Using YouTube's built-in filters and effects can make your content stand out and attract more viewers.
How to Edit Videos Using YouTube's Editor
If you need to make minor edits to a video, YouTube's built-in editor offers free tools to help. You can trim unwanted sections, adjust your end screen, update info cards, or apply basic enhancements—all without re-uploading your video.
Follow this step-by-step guide to learn how to edit videos inside YouTube.
1. Access YouTube Studio
Start by visiting your YouTube Studio. Log into your YouTube channel, then click on your profile photo in the top right corner.
Select YouTube Studio from the dropdown menu that appears.
 |
Your YouTube Studio is like your channel's internal home base. You can manage your channel and its videos, view your analytics, create playlists, and of course, edit your YouTube videos.
2. Select Your Video
Click on the Content tab in the left-hand navigation column from your YouTube Studio. This will take you to all of your videos, where you can filter by uploads, past live streams, playlists, and podcasts.
 |
Scroll until you find the video you want to change, then click on it. You can also find the video on your public-facing channel and click the Edit Video button under the video player's right-hand corner.
3. Edit Your Video
After selecting your video, go to the Editor tab in the left-hand navigation column to access YouTube’s editing tools. The built-in editor allows you to:
- Trim and cut: Drag handles around your video to trim content off the beginning or end or cut pieces in the middle.
- Blur: Blur sections of your video. There are two options to choose from: face blur or custom blur.
- Audio: Add background music to your video from the YouTube Audio Library. It's filled with free music clips that will level up your content.
- End screen: Add clickable links to the last 20 seconds of your video. This is a great way to create a call-to-action to view more of your content.
- Info cards: Add links to relevant or mentioned videos in the top corner of the video player.
- Ad breaks: Choose when ads play during your video. By doing this, you can ensure ads pop up during transitional periods, rather than in the middle of a sentence.
A video timeline tool at the bottom of the screen lets you quickly navigate to specific areas of your video for editing, including trimming and blurring sections.
 |
YouTube won't allow you to make drastic changes or replace the video. However, even after you've published a video, you can still go in to make some of these minor adjustments.
You can trim sections of your video, adjust ad breaks, blur background visuals, or update your end screen to link to a newer video—all without needing to re-upload your content.
Learn: How to edit videos: A beginner's tutorial (2023)
4. Save Your Changes
Once you're satisfied with your edits, click the Save button in the top right corner of the editor. Your changes will be processed before being applied to your live video.
Clicking Save will prompt this popup to appear, letting you know just what to expect:
 |
Click Save again if you're sure, or Cancel if you've changed your mind about your edits.
5. Preview Your Video
Preview your video to ensure you like the changes you made and nothing else needs to be adjusted. Remember that you can always go back and undo your edits.
6. Publish or Save as Draft
If your video is unpublished, you can publish it now or save it as a draft. If you've edited a published video, your changes will be reflected within a few hours.
Mobile Editing for YouTube Videos
In today's digital landscape, editing videos on the go is more important than ever. For content creators looking to optimize their workflow, mobile editing apps are indispensable. Here are some tips on how to leverage mobile tools for your YouTube videos:
- iMovie: Great for basic edits and transitions on iOS devices.
- Adobe Premiere Rush: Offers advanced features like color grading across iOS and Android.
- Kinemaster: Ideal for multi-track video editing on mobile devices.
How to Edit YouTube Videos on Any Device
YouTube’s built-in editor is great for basic edits and adding essential features to grow your channel. However, for advanced video editing—like adding professional effects, transitions, and high-quality sound—you’ll need specialized software such as Descript.
Instead, you'll need to find another video editing app that will let you import your video clips, stitch different clips together, add sound effects, incorporate text and other elements, and generally create high-quality video content that makes people stick around and subscribe to your channel.
Follow these five steps to get started.
1. Choose Video Editing Software
Finding the right video editing software is the first step. Think about what you plan to do with your video content.
If you're creating long-form YouTube content, you'll need professional editing features like a voiceover generator or video frame rate converter. If you prefer editing on the go, consider mobile-friendly apps like iMovie, Adobe Premiere Rush, or Kinemaster.
Whatever it is, start by selecting the right video editing software for your needs. We've listed five great options towards the end of this article, but Descript's YouTube video editor is obviously our favorite. It has everything you need to create video content your audience will love.
2. Import Your Video
Sign up for and log into your preferred YouTube video editing tool. Then, create a new project so you can import all of your video footage. Give the project a name so you can keep your video content organized.
If you have a video editing laptop, you might have a built-in port for your SD card. Otherwise, connect the video camera to your computer or download your files from the cloud to import your video footage into the editing app.
3. Edit Your Video
Once you've imported all of your footage, it's time to refine your video. You may want to:
- Put clips together.
- Create transitions.
- Add text on screen.
- Incorporate background music.
- Record voiceover.
- Add captions/subtitles.
- Build out intros and outros.
If you're bringing your first YouTube video idea to life, creating a template you can easily follow for similar videos is a good idea. This can make the editing process much more streamlined as you create more and more content.
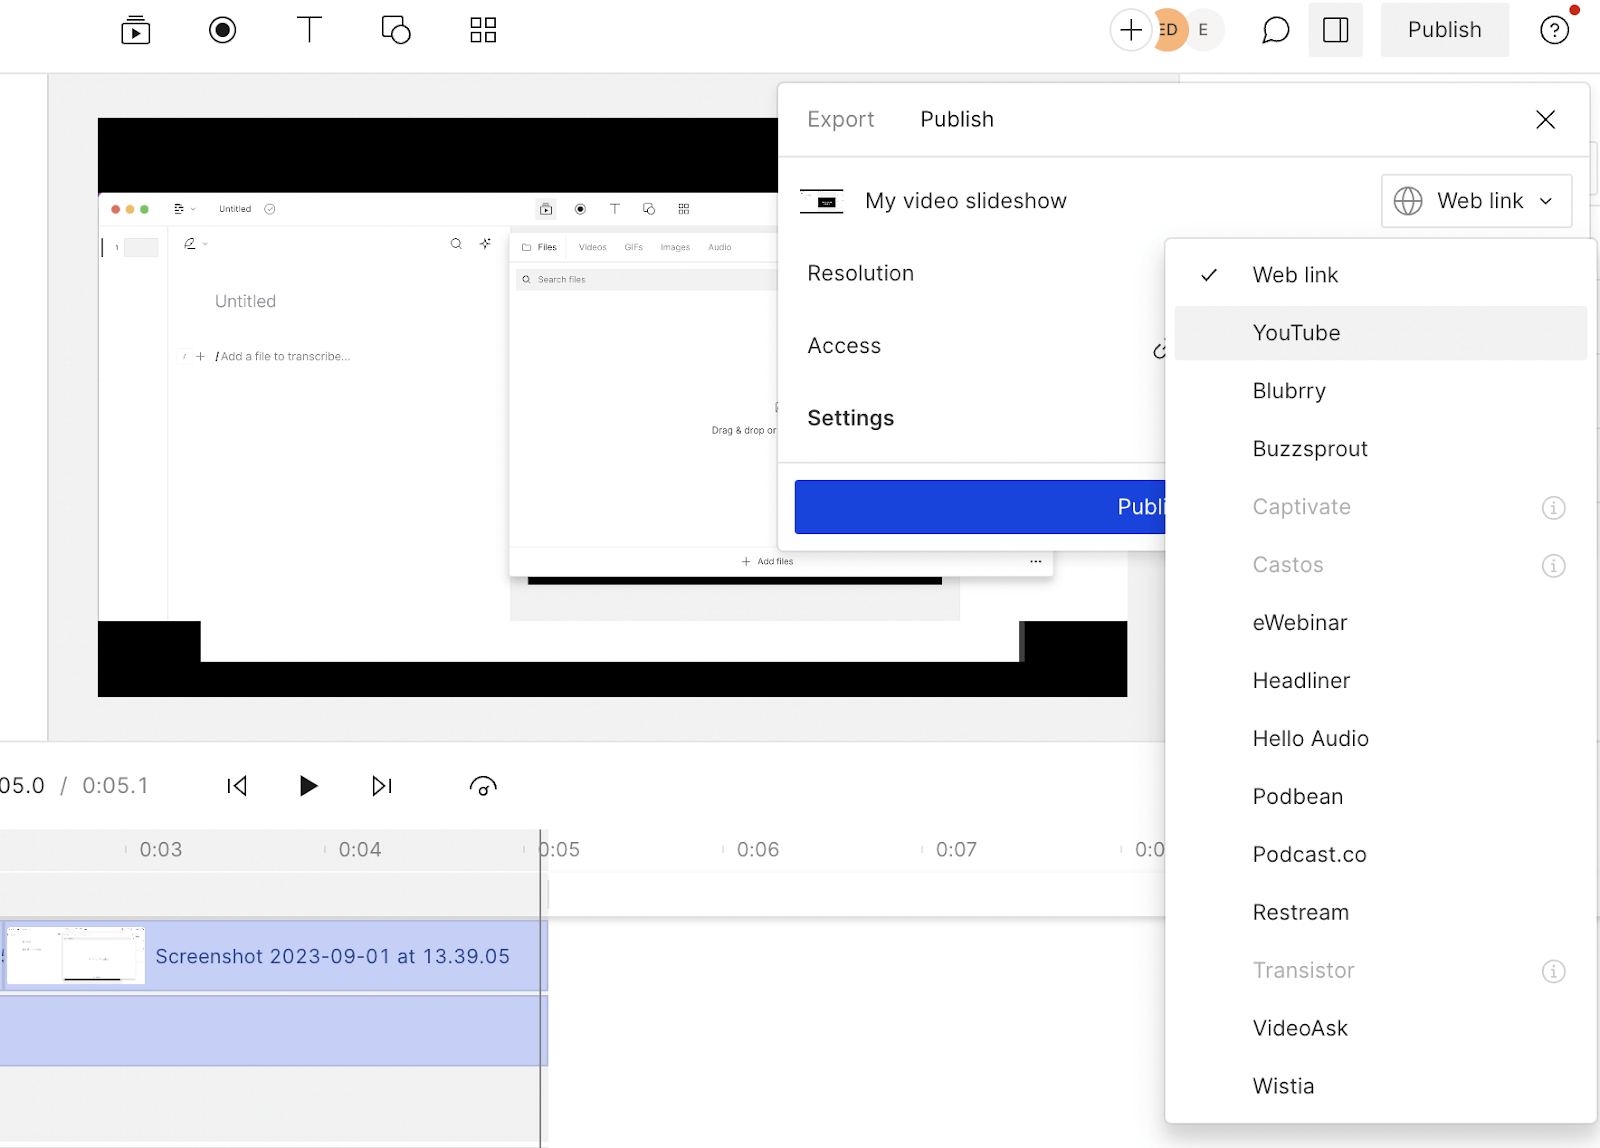
4. Export Your Edited Video
Once you’ve completed your edits, export your video in the best format for YouTube—MP4 with a 16:9 aspect ratio. Ensure your video resolution matches YouTube’s recommended settings, such as 1080p or 4K for the highest quality.
With Descript, you can publish videos directly to your YouTube channel under the Publish menu. Free users can export up to 720p, while Creator and Business users can publish in 4K.
 |
5. Upload to YouTube
Finally, upload your video to your YouTube channel! From here, you'll want to take advantage of the editing features available in the YouTube editor. You can
- Add an end screen that links to a relevant video.
- Set your ad breaks.
- Strategically place info cards.
As part of your upload strategy, craft an engaging title, optimize your description, and use relevant tags to improve discoverability.
8 Best Practices for Editing YouTube Videos
Want to learn how to create and edit YouTube videos that will increase your views? Here are some key tips to grow your YouTube channel.
Keep It Concise and Engaging
Even if you’ve recorded a lot of footage, only include the most valuable parts. Trim unnecessary sections to keep your video concise and engaging.
Whether this is an educational video, a vlog, an interview, or a scripted video, there are still likely some parts that don't need to be included. Keep your video as concise as possible.
This shortens your video and ensures it's as valuable and engaging as it can be. It's better to have a five-minute video packed full of essential information than a 30-minute video with a lot of boring sections.
Here's a great example of an educational video from HubSpot that's both concise and engaging. The host has done a great job sticking to the most critical parts—but the editing here is also key.
Adding text overlays and captions enhances accessibility and viewer engagement. YouTube automatically generates captions, but for accuracy, consider using tools like Descript to refine and upload subtitles.
Learn: How to make money on YouTube: 16 expert tips
Use Good Transitions
Transitions are an important part of the video editing process. Pretty much every video will have some sort of transition. This might be from one topic to another, or it might be between footage sequences.
Transitions help create a smooth flow between scenes. Use techniques like crossfades, jump cuts, or fades to make your video more visually appealing.
Here's a great example of how transitions can be used with animations. This animated video from Drift showcases some amazing, swooping shots between each screen as it jumps through the tutorial.
But you don't have to be that theatrical to have some solid transitions. This video from Keap has great transitions between each point, with jazzy background music to boot.
Consider incorporating special effects to really make your transitions pop. This is another great place to have a premade template, which ensures your transitions are an easy part of your editing workflow and that they fit with the rest of your content.
Optimize Audio Quality
Editing and improving your video's audio is a major part of editing your video content. It can vastly improve the viewing experience, ensuring your audience won't immediately click away from a fuzzy and hard-to-hear online video.
You can easily optimize audio quality with Descript's Studio Sound feature. With just a single click, this tool regenerates your speech, removing background noises without reducing the quality of your voice and other key audio elements.
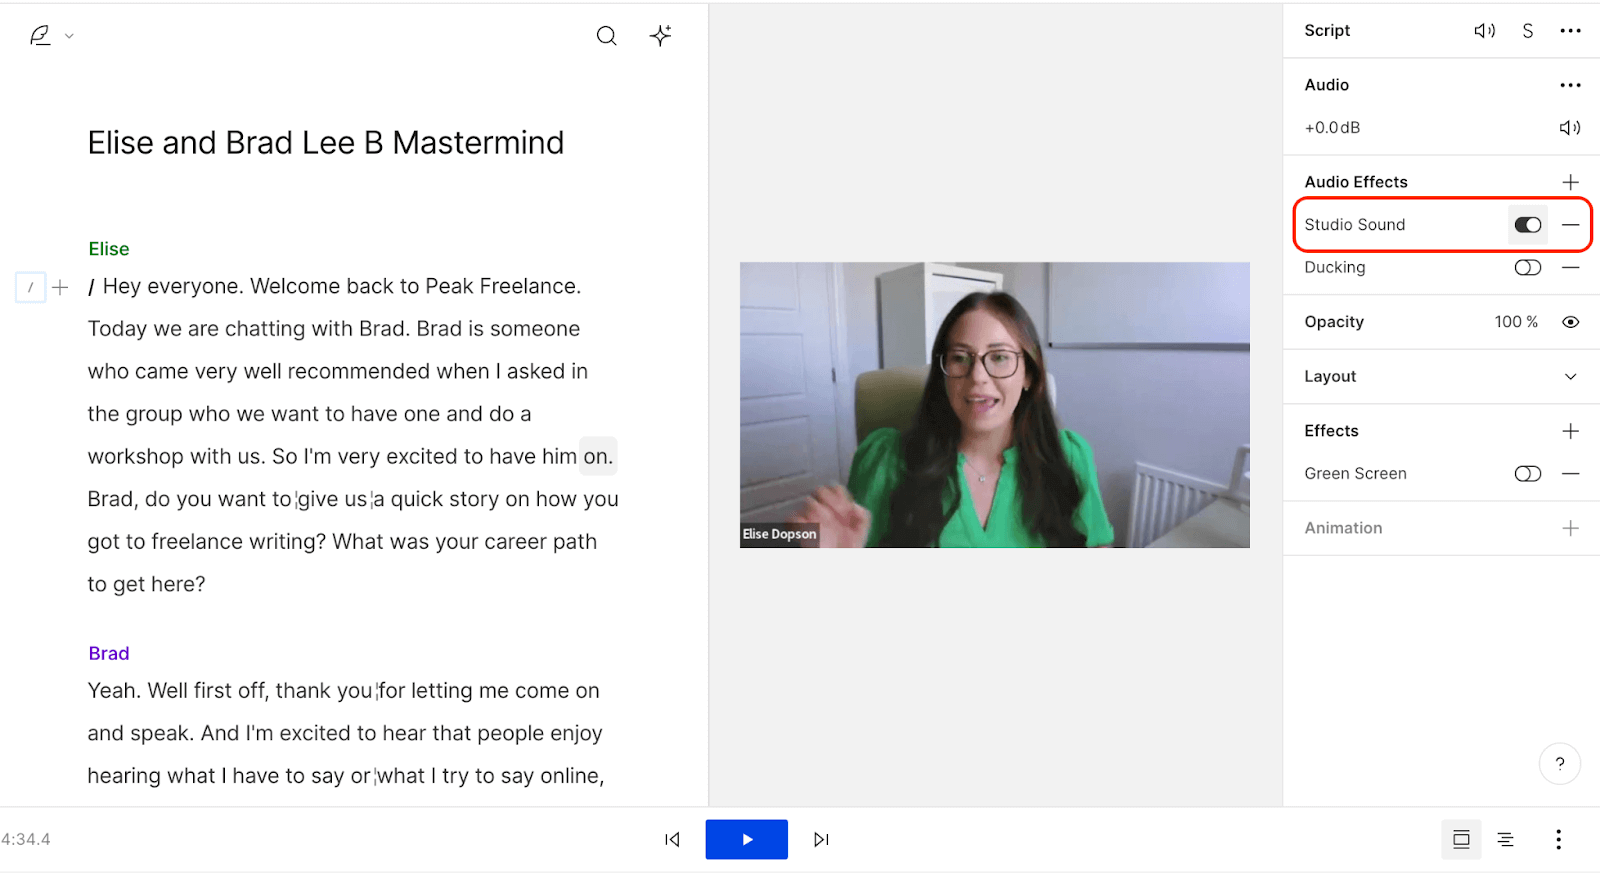 |
Just toggle on the Studio Sound option under the Audio Effects tab in Descript to get started. It may take a few minutes, depending on the size of your video, but the results are worth it.
Incorporate B-roll and Visual Variety
Incorporating a variety of video clips helps improve the overall engagement of your video. No matter how engaging the speaker is, a video of someone talking for 30 minutes will get boring fast.
Incorporating B-roll footage keeps your video dynamic and engaging. Supplement main footage with visuals, overlays, or animations to maintain viewer interest.
Take a look at this video from ConvertKit. It showcases the perfect example of B-roll usage, making this customer interview much more entertaining.
Imagine if all you were watching was the woman speaking the entire time. Even with the same message, it wouldn't be received in the same way. Visual variety is always important. This is why you should record a lot more footage than you expect to need.
Color Correction and Grading
Color grading ensures visual consistency across different clips. Adjust brightness, contrast, and saturation to maintain a cohesive look.
Video filters can be one simple way to adjust your footage to ensure it has the same look and feel. That can make it look like it was all filmed at the same time to avoid continuity errors.
Maintain Branding Consistency
If you're making the video for a company — or even if you're trying to make your personal channel look more professional — you'll definitely want to pay attention to branding. Incorporate your brand colors, fonts, patterns, and any other visual effects to improve brand recognition and recall in your viewers.
We see the perfect example in this feature update video from monday.com below. The transitions and other visual elements incorporated all use the same brand font and color to help create a consistent design.
Test on Different Devices
Check how your video appears on different devices like a Mac, Windows PC, or smartphone. Ensure on-screen text is legible and key elements stand out on smaller screens.
For example, you'll want to make sure any on-screen text is legible on smaller screens or note any crucial elements in your video that need to be highlighted so that smartphone viewers can notice them more easily.
Create Engaging Thumbnails and Titles
Lastly, make sure your thumbnails and titles grab attention and reel in your videos. This is especially important for YouTube search. If you have bright, click-worthy thumbnails, viewers will flock to your video instead of the others that show up in results.
Here's a great example of brightly colored video thumbnails from Visme. These bright and bold thumbnails are sure to draw attention from the competition.
 |
Thumbnail and video title creation is a part of post-production. Use a graphic design tool to create your thumbnails and input these elements while uploading and optimizing your YouTube video.
5 Best Apps to Edit YouTube Videos
Ready to start editing your YouTube content? Here are five third-party video editing tools to help you create professional videos.
1. Descript
 |
Are we biased? Yes. But is Descript a great video editing tool? Also yes.
Descript is both a video and audio editor, making this a great option for both YouTube content and podcast episodes. Edit with your team in real-time, edit your transcript for accurate captions, improve the sound quality of your video, and create content your brand should be proud to promote.
Pricing: Free plan available. Paid plans start at $12/user/month.
2. Lightworks
 |
Lightworks is popular software used in Hollywood films. It's known for its customizable interface and wide range of supported formats. With a free or paid plan, you'll get access to video and audio editing features as well as color correction and special effects. The free plan can help you create basic video content, or choose to upgrade to the paid version for more powerful tools.
Pricing: Free plan available. Paid plans start at $9.99/user/month.
3. Adobe Premiere Pro
 |
Adobe Premiere Pro is a professional-grade tool that's part of the Adobe Creative Cloud. As you'd expect, Premiere Pro integrates with other Adobe products seamlessly, offering powerful editing and design functions. Content creators can easily use Premiere Pro for video editing, while also subscribing to Photoshop or Illustrator for thumbnail creation.
Pricing: $20.99/month for Premiere Pro only. $54.99/month for the full Creative Cloud.
4. Final Cut Pro X
 |
Final Cut Pro X is Apple's more professional video editing software. It boasts magnetic timelines, advanced color grading, and 360-degree VR editing. It also offers features like object tracking, video filters, animation, and text effects. It's only available on Mac, but unlike many other picks on this list, Final Cut Pro isn' subscription based — pay once and own it for life.
Pricing: One-time price of $299.99.
5. Apple iMovie
 |
iMovie is a free, built-in video editor for Mac and iOS devices. It's a good option for beginners just looking to try out video editing without having to invest in a tool. It has easy-to-use templates, trailers, and basic editing tools. Easily import your video footage and start incorporating transitions, creating sequences, and building out your YouTube videos.
Price: Free on Mac devices.
Best Tools to Edit YouTube Videos
Descript is an all-in-one video editing tool that's perfect for editing YouTube videos quickly and easily. At the heart of Descript's genius is simplicity. You can edit your videos by editing text, and even cut, trim, or rearrange content like you would a text document.
Using AI, Descript offers auto-transcription with remarkable accuracy. The Overdub feature lets you generate a synthetic version of your own voice to fix mistakes without re-recording your videos. If you don't have the best video equipment just yet, and maybe have questionable audio, you can use Descript's Studio Sound to remove background noise and use clear, professional-sounding audio in your YouTube videos.
Sound good? Try our YouTube video editor free today and start publishing better video content.
YouTube Video Editing FAQs
Where can I edit YouTube videos for free?
There are a number of free video editors available. For minor changes, YouTube's video editor is free. But other free tools include Descript, iMovie, Canva, and Biteable for quick and easy edits.
What do most YouTubers use to edit their videos?
Descript and Adobe Premiere Pro are the two most-used video editing software by the pros. Adobe is pricier and more complex, but if you plan to create a lot of content—and quality content—it's a good idea to learn how it works.
How do I start video editing for beginners?
Start small. Use a basic video editing tool. Watch some tutorials online. trim videos and create small sequences. And just keep at it. Eventually, you'll get better and better and be able to create some amazing videos.
Where is the edit button on YouTube videos?
If you're logged into your YouTube channel, you'll see an Edit Video button underneath the bottom right corner of the video player.
What are the best mobile apps for editing YouTube videos?
Some of the best mobile apps for editing YouTube videos include Adobe Premiere Rush, which offers advanced features across iOS and Android, and iMovie for basic edits and transitions on iOS devices. Kinemaster is also a great choice for multi-track video editing on mobile devices.
How can I use YouTube's free editing features effectively?
To use YouTube's free editing features effectively, start by exploring the built-in editor for basic tasks such as trimming and adding music. YouTube also provides filters and effects that can enhance your video's quality. Additionally, take advantage of the royalty-free music library to improve your video's audio. These tools are accessible directly through YouTube Studio and are especially beneficial for beginners.