Your iPhone is a multifaceted tool — it’s a camera, a music player, a calculator, and a portal to the world’s knowledge. It’s also an audio recorder. Whether you want to record personal notes, lectures, or even a podcast, you can do it with your iPhone.
You can use iPhone’s native tool, Voice Memos, to record high-quality audio with the tap of a button. You can trim and edit audio clips in the app, or export them to professional editing software like Descript to fine-tune and publish.
Ahead, you'll learn to record high-quality audio on your iPhone and share it with friends and colleagues.
Can you record audio on iPhone?
Absolutely. Apple's iPhones come with a built-in audio recording app called Voice Memos. It’s perfect for recording voice notes, interviews, or anything else you want to record directly from your phone.
To use Voice Memos, just open the app and tap the red record button. Press the same button again to stop. In the app, you can listen, rename, edit, and share recordings. You can also trim the audio so you only save and share what you want.
🧠 Read: How to use voice recording on iPhone for great podcast audio
How to record audio on iPhone with Voice Memos
1. Find and open the Voice Memos app
Go to your iPhone's Home Screen. Find the Voice Memos app, which has an icon resembling a waveform within a black background. Tap on the memo app to open it.
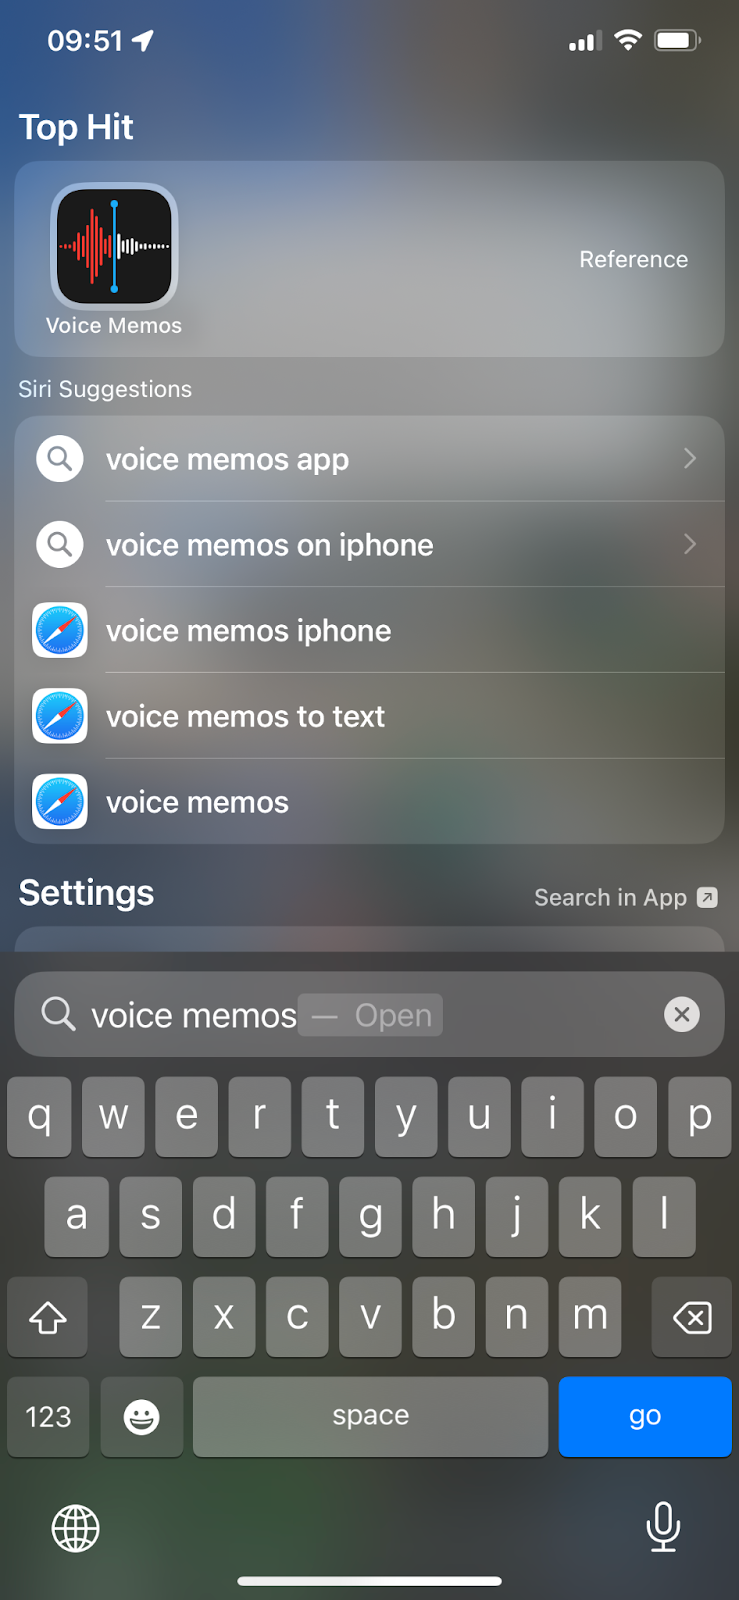
If, for some reason, you’ve removed the app, you can always download it for free on the App Store. Tip: For the best possible sound, open your iPhone Settings, select Voice Memos, tap Audio Quality, and choose Lossless. That preserves more detail and avoids file compression.
2. Position your iPhone correctly
If you’re recording your own voice, hold your iPhone like you would during a phone call, or place it on a flat surface about 6–8 inches away from your face. If you're recording someone else or a group, put the iPhone on a flat surface 6–8 inches from them. Make sure the built-in microphone isn't blocked.
Otherwise, follow the tips you’d use with any microphone to improve your audio quality: make sure you’re in a quiet room without a lot of echo or background noise. But if you can’t avoid it, don’t worry: there are ways to remove background noise later on.
If you’re trying to capture audio of participants who aren’t in your same physical location, you can either instruct them on how to use Voice Memos and have them send you the file, or, ideally, use a remote audio recording tool instead.
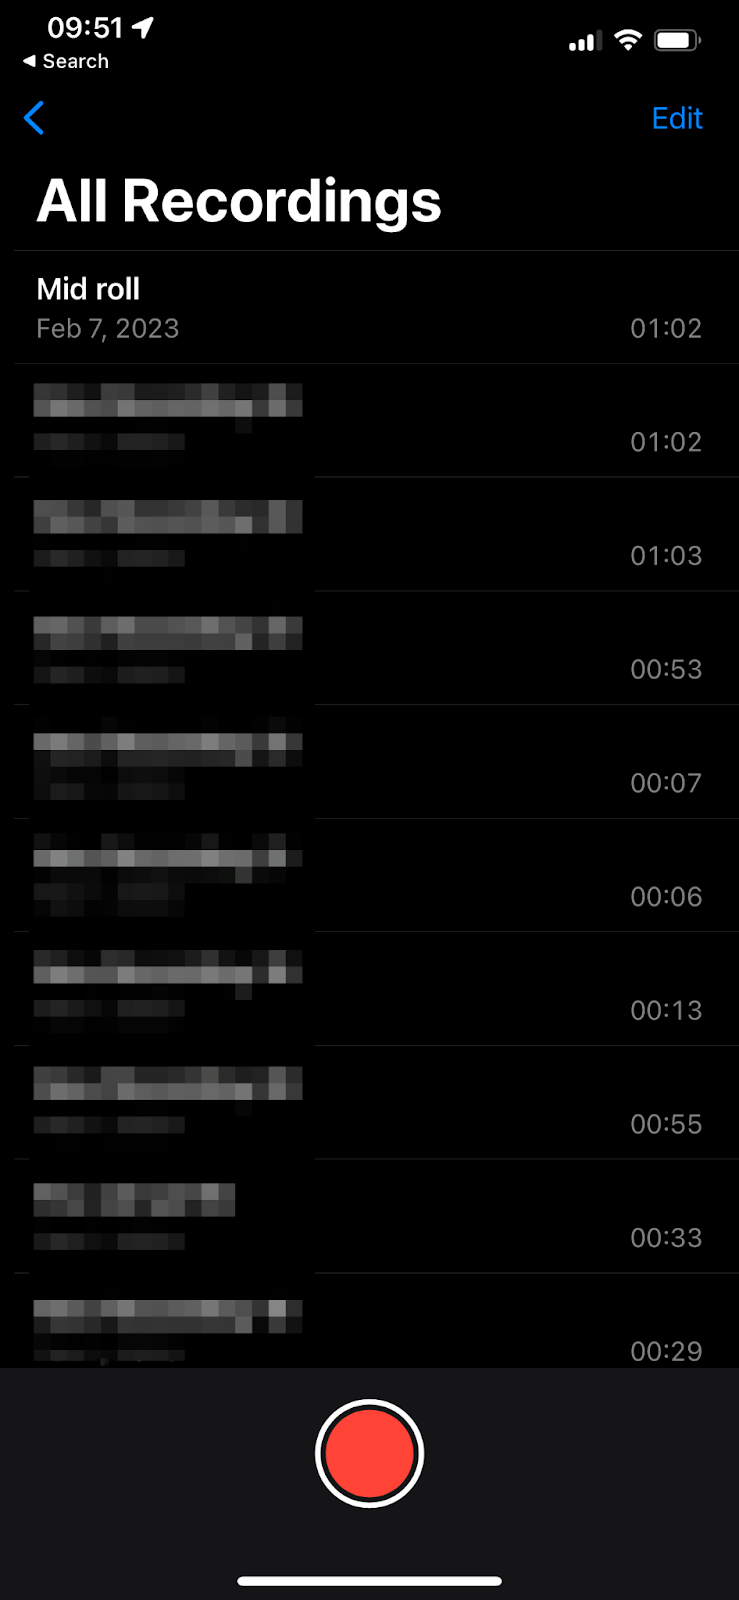
3. Tap the red record button
When you want to record, tap on the large red circle button.
.
4. Record your audio
Speak clearly and at a reasonable volume. You can adjust the recording level by moving the microphone closer or farther away from the source.
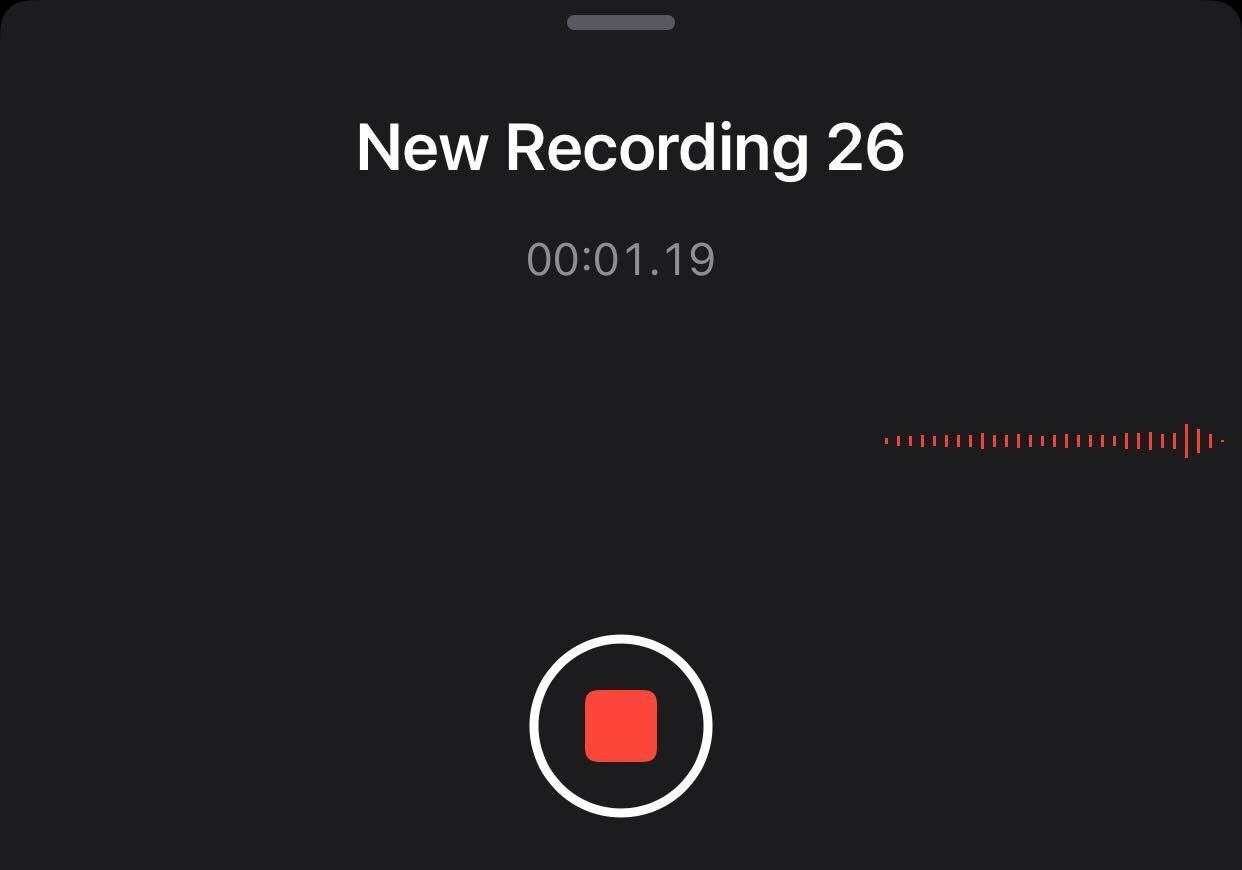
Image of a new recording in progress on iPhone
👉 NOTE: When you use Voice Memos to make recordings, an orange dot appears at the top of your screen to indicate your microphone is on.
If you have an iPhone 14 Pro, iPhone 14 Pro Max, iPhone 15 Pro, or iPhone 15 Pro Max, you can see your recording in progress in the Dynamic Island at the top of the Home Screen.
To get back to Voice Memos, tap the Dynamic Island.
5. Pause or stop the recording
If you’re recording in parts and need to pause, swipe up from the waveform to see more advanced features. Tap the pause button to stop the recording. Tap Resume to continue.

Tap the stop button to finish recording.
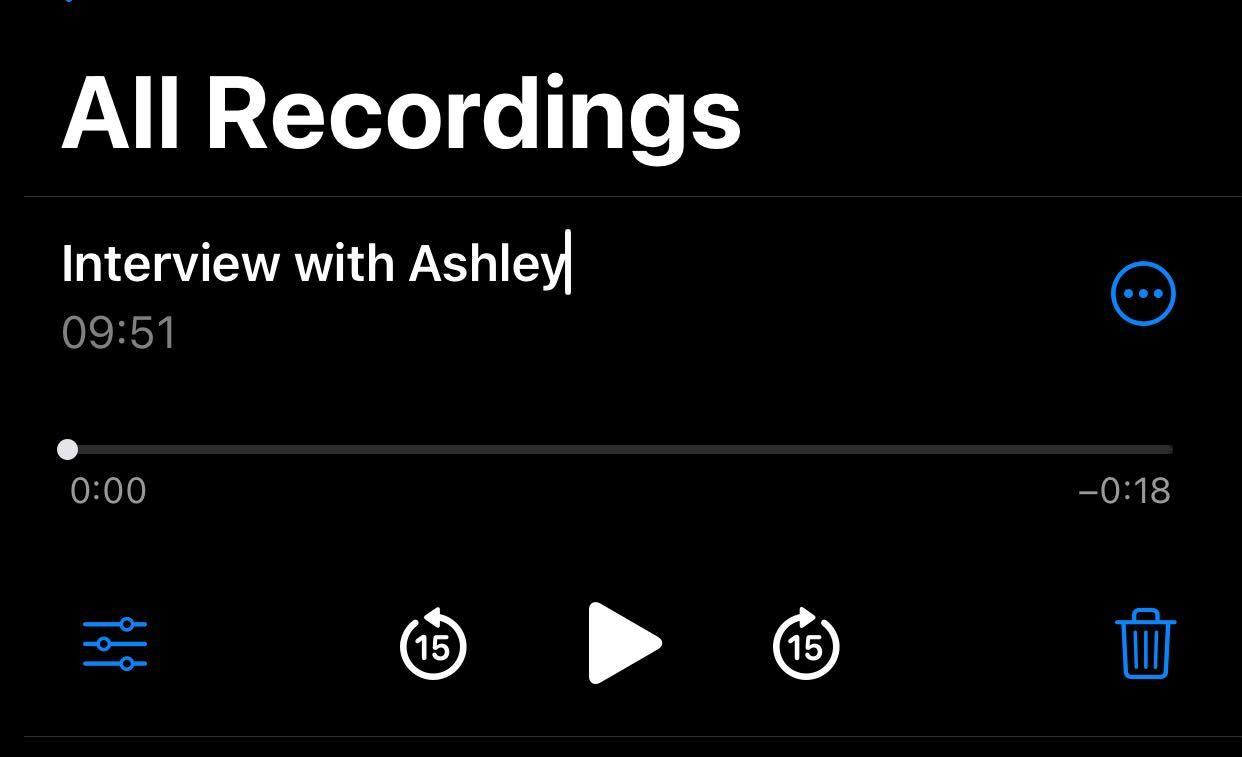
6. Name and save your recording
Recordings are automatically saved with a default name. Tap on the default name to rename it. The keyboard will appear so you can add a new name.
Tap “Return” on the keyboard to save the name.
7. Access and edit your recorded audio
The main Voice Memos screen shows all your recordings. To play a recording, just tap it. You can also edit or delete recordings by selecting them and using the available options.
You can adjust playback speed, remove silence, or improve sound quality to polish up your final product. You can also tap the three-dot menu and select “Enhance Recording,” which reduces background noise and echo.

The Voice Memos app also lets you trim parts you don’t want, record over parts, or replace your entire recording.
To trim your recording, tap the More Actions button, then tap “Edit Recording.” Tap the Trim button at the top right, then drag the yellow trim handles to enclose the section you want to delete or keep.
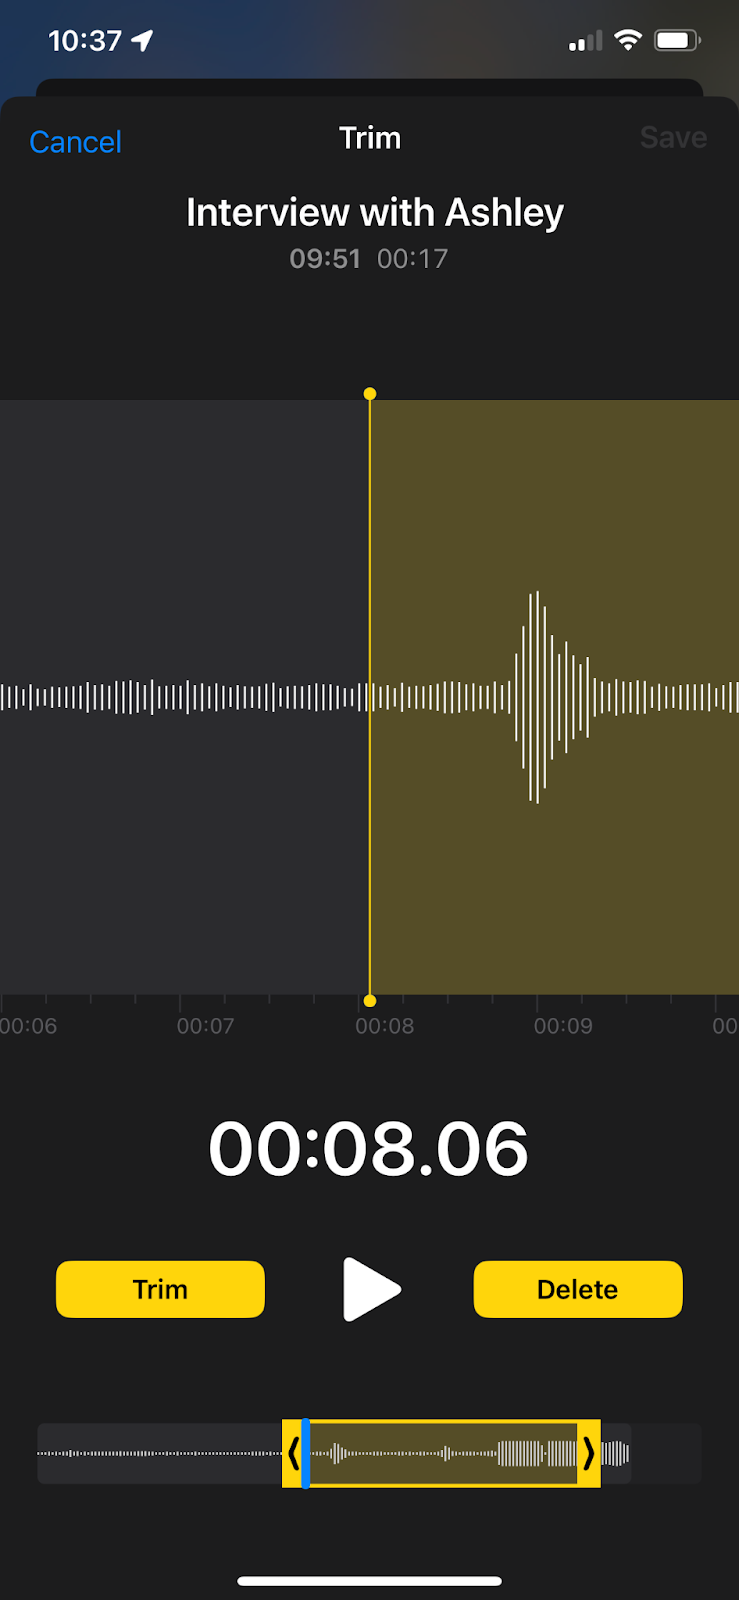
Tap Trim to keep the section and delete the rest of the recording. Or, tap “Delete” to get rid of the highlighted part. When you’re finished, hit “Save,” then tap “Done.”
If you want to record a phone call or record system audio from a computer, you’ll need to use separate tools. Check out our guides on how to record a call and how to record computer audio.
How to share audio recordings on iPhone
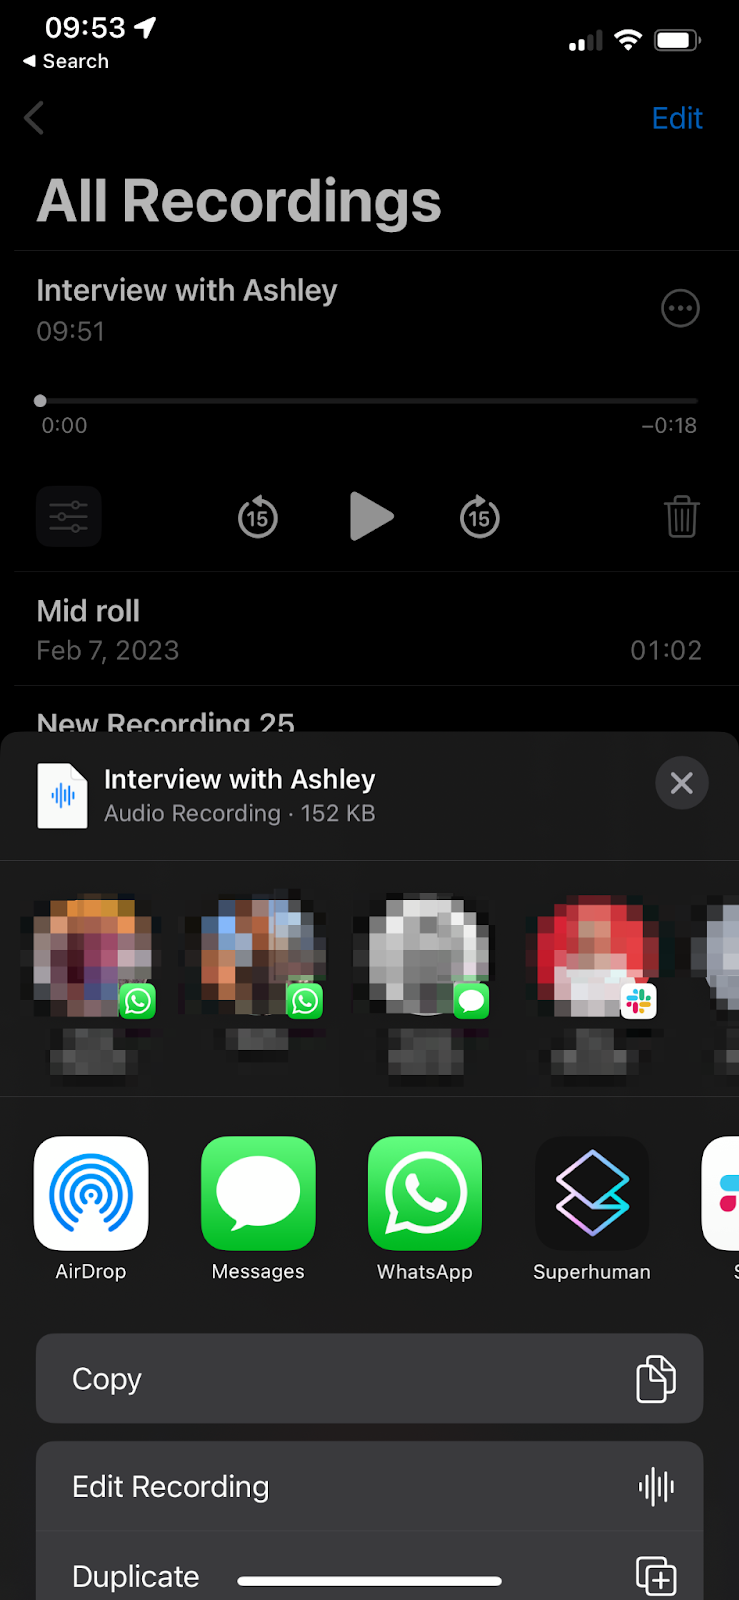
Say you create a podcast on your iPhone and want to transfer it to another mobile device or backup for editing. Voice Memos lets you easily send recordings to your Mac, iPad, or another iOS device through AirDrop.
You can use Messages, Mail, and other options if you want to send the audio file to an Android smartphone or device.
Here’s how:
- Select the recording to export.
- Tap the More Actions button.
- Tap “Share,” then choose a sharing option and follow the onscreen prompts.
The best way to record high-quality audio
Plenty of apps let you record audio, but not all of them deliver the clear, professional sound you might need.
People who already use Descript’s voice recorder benefit from:
- Overdub, which creates an AI clone of your voice to fix voiceover mistakes
- Studio Sound, which makes it sound like you recorded in a professional studio
- Accurate transcription that identifies filler words like “um” and “uh”
- 5GB of free cloud storage with shareable links
- Professional editing tools that allow you to edit audio from text
- Exporting options to share your audio across podcast hosting services
Start creating high-quality audio with the best voice recorder app on Mac and Windows. Take a tour and see why.
How to record audio on iPhone (FAQs)
How do I secretly record audio on my iPhone?
Secretly recording audio without consent can be illegal, depending on where you live. If you do have a legitimate reason and everybody’s permission, simply use Voice Memos or another trusted recording app.
How do I record just the audio on my iPhone?
You can use the built-in Voice Memos app, which saves audio files without any video. Just open Voice Memos and tap the red record button to start. For higher-fidelity sound, consider using a wired external microphone that supports a 48 kHz sample rate. You can also try third-party apps like Descript to record, edit, and enhance your audio in one place.
How do I use my iPhone as a recorder?
To use your iPhone as a recorder, open the pre-installed Voice Memos app and tap the record button. Your recordings are automatically saved and ready to edit or share. If you’d like more advanced options, try a tool like Descript’s recorder to capture crystal-clear audio at 48 kHz, then edit and enhance it—all from your phone.
How does Descript’s Studio Sound feature improve my iPhone recordings?
Descript’s Studio Sound uses AI to remove background noise and enhance speech clarity, making a standard phone recording sound like it was captured in a professional studio. After you record on your iPhone, just upload the file to Descript and apply Studio Sound for a cleaner, more polished result.
Should I use wired or Bluetooth devices to record high-quality audio on my iPhone?
It’s generally best to use wired devices for recording on iPhone if you want consistent, high-resolution audio (up to 48 kHz). Bluetooth devices can introduce latency and usually don’t support the highest sample rates. A wired setup also helps your iPhone recognize the mic or headphones quickly and reduces the chance of disconnections or quality drops.