Next time you’re at a musical festival, a wedding, or a rockin’ funeral, listen closely to how the DJ transitions between songs. They don’t leave a silent gap between tracks or cut jarringly from one to the next. It would kill the vibe. Instead, the DJ typically fades out of the track that’s ending while simultaneously fading into the track that’s beginning — a technique called crossfading.
DJs crossfade songs to keep a natural flow from song to song, but there are tons of other ways to use crossfading. Podcasters crossfade dialogue with musical interludes to hide edit points in a conversation, film sound editors crossfade to create natural sound effects, and musicians crossfade multiple takes together to get the best-sounding recording. Crossfading a fundamental audio-editing technique that you’ll want to master.
What is a crossfade?
Crossfading is an audio editing technique that creates a smooth transition between two audio clips. When you crossfade audio, you make one audio clip fade out as the next clip simultaneously fades in.
Without crossfading, one audio clip can come to a noticeably abrupt end before the next clip begins. That gap sometimes produces a subtle click, blip, or pop, and while that sound might only lasts milliseconds, it’s often still detectable to the human ear. Similarly, if your edit point occurs during a moment of dead air, there may be variations in room tone or background noise that create an audibly disjointed transition. Crossfading solves these types of problems by creating an overlap point between audio clips, so there’s no sudden beginning or end to either of them.
How to crossfade audio
There’s no way to talk about how crossfading works without using a specific editing tool for reference. This is Descript’s blog so we’ll use Descript. These instructions focus on audio projects, but you also follow the same steps for video projects. To begin, import your audio clip into Descript, and then:
If you’re crossfading music, a handy starting point is to overlap the clips by a few seconds — around five seconds is common for a smooth transition. Feel free to adjust based on the energy and rhythm of the track.
1. Zoom in on your audio track timeline
To make it easier to select your edit boundary and be more precise when creating audio fades, zoom in closer on your timeline by sliding the zoom tool to the right. You can also zoom in/out on the timeline by pressing Command + Plus / Command + Minus (MacOS) or Control + Plus / Control + Minus (Windows).

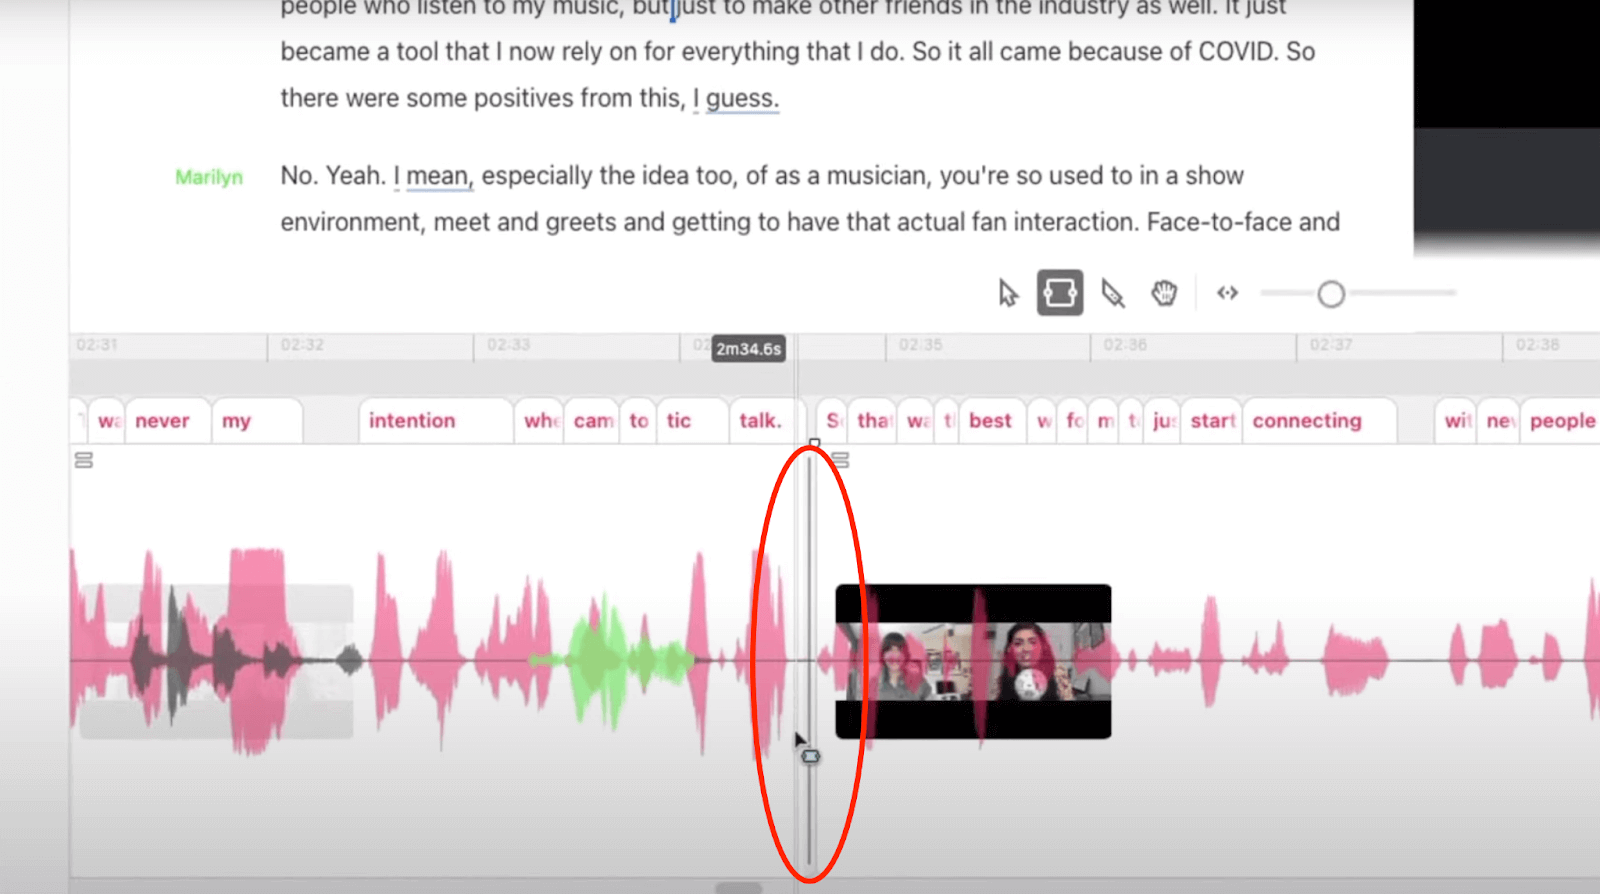
2. Find your edit boundary
Crossfades can only occur at an edit boundary of a clip within your timeline. Edit boundaries occur at any location in the audio clip where you’ve added a cut. Hover over the edit boundary where you want your crossfade to occur, and a vertical gray line appears. This vertical gray line indicates you’re at the exact location of the edit boundary.
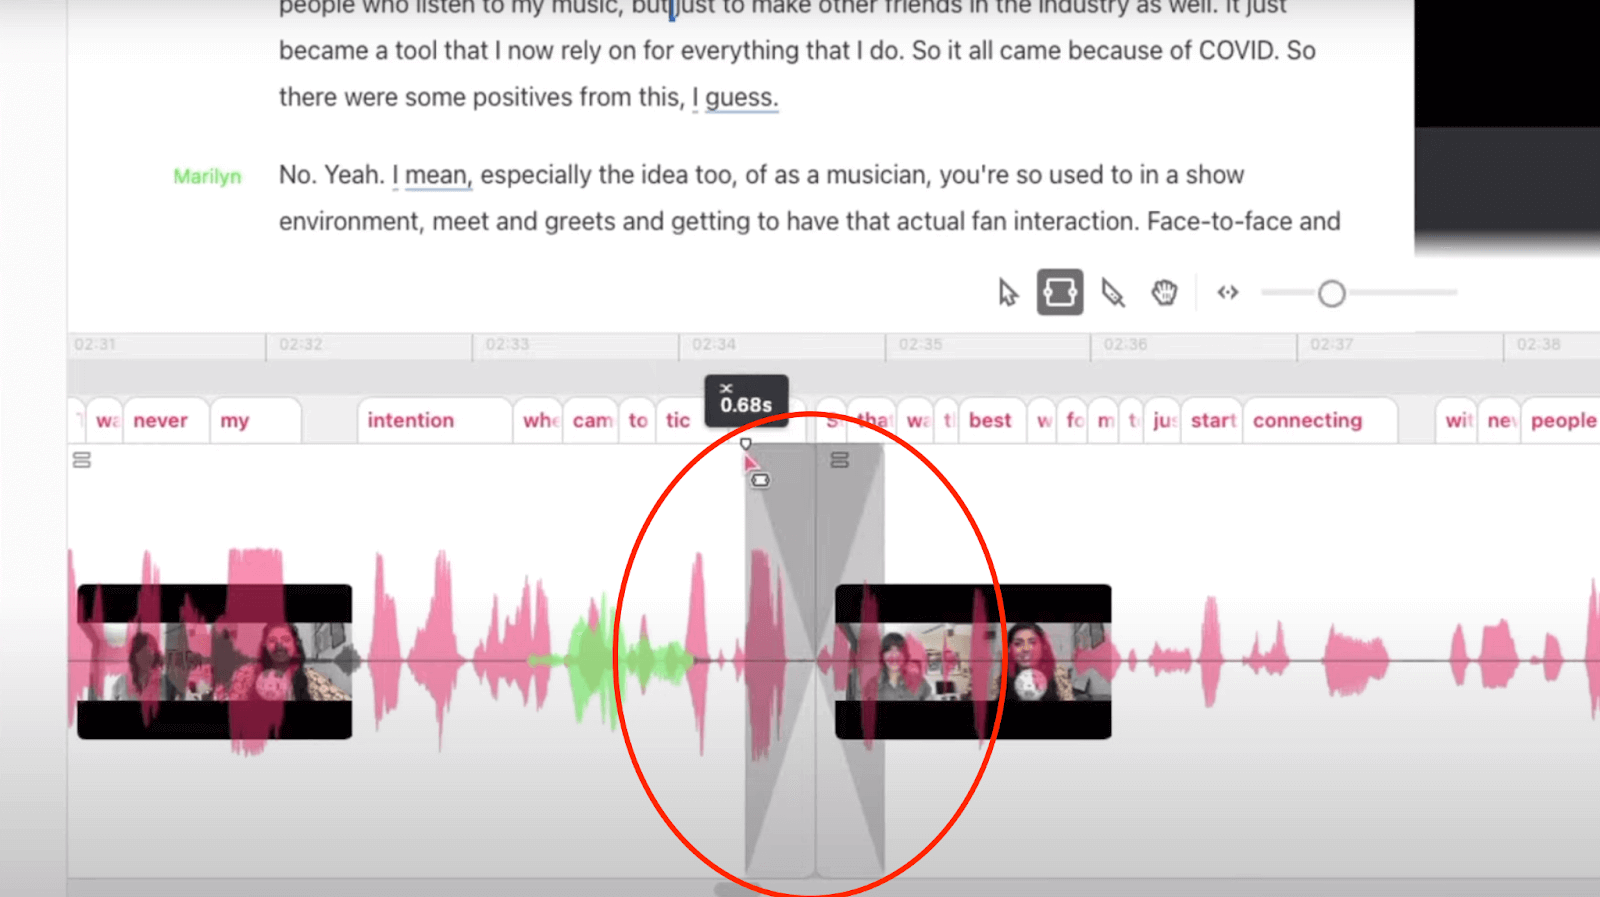
3. Apply a crossfade to your edit boundary
At the top of the vertical gray line, you’ll see a handle resembling a small upside-down triangle. Hover over the handle so that two tiny black arrows appear on either side of the icon. Click the handle and drag it to the left to crossfade the audio. Unlike a regular fade, the gray shaded area created by dragging the handle will form an “X” pattern, showing the crossfade’s duration.
4. Adjust your crossfade duration
After listening to your newly crossfaded track, you might decide you want more or less crossfading. It’s easy to adjust your crossfade duration — just click the same handle icon and drag it farther from your edit point for a longer crossfade or closer to your edit point for a shorter crossfade.
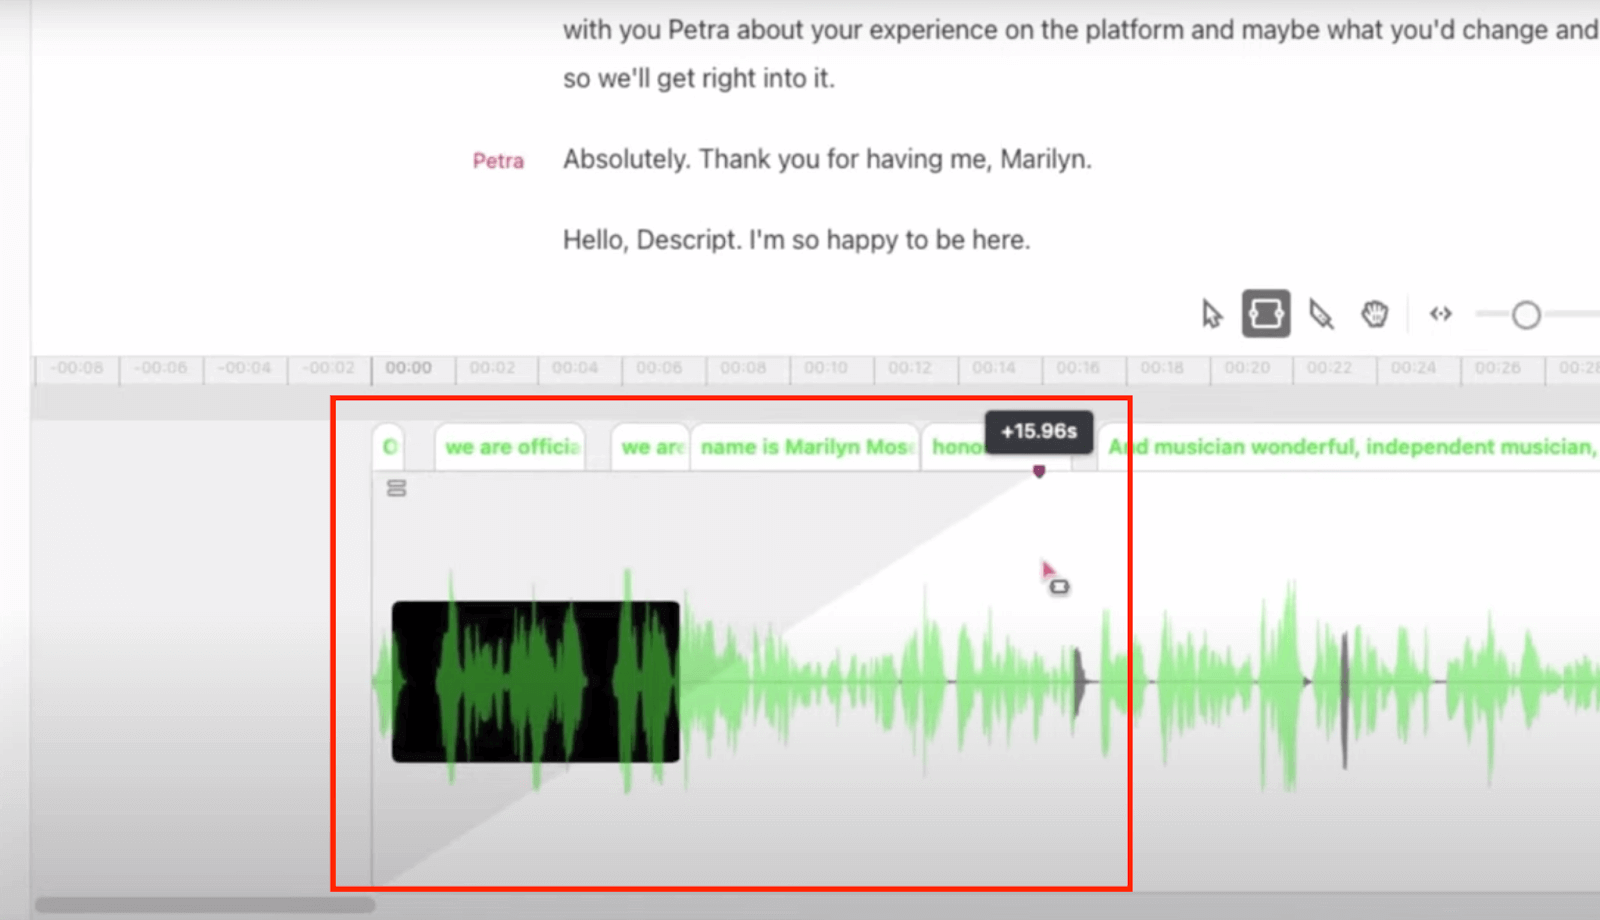
How to fade in or out using Descript
Now that you know how to crossfade audio files, fading in or out of an audio clip should be a breeze. The same vertical gray line that appears at the edit boundaries in the middle of a clip also appears at the beginning and end of a clip. Click the handle icon at the top of the line and drag it in the direction you want your fade to go. Dragging it to the right creates a fade in audio transition; dragging it to the left creates a fade out. The gray shaded area created by dragging the handle shows the fade’s duration and progression.
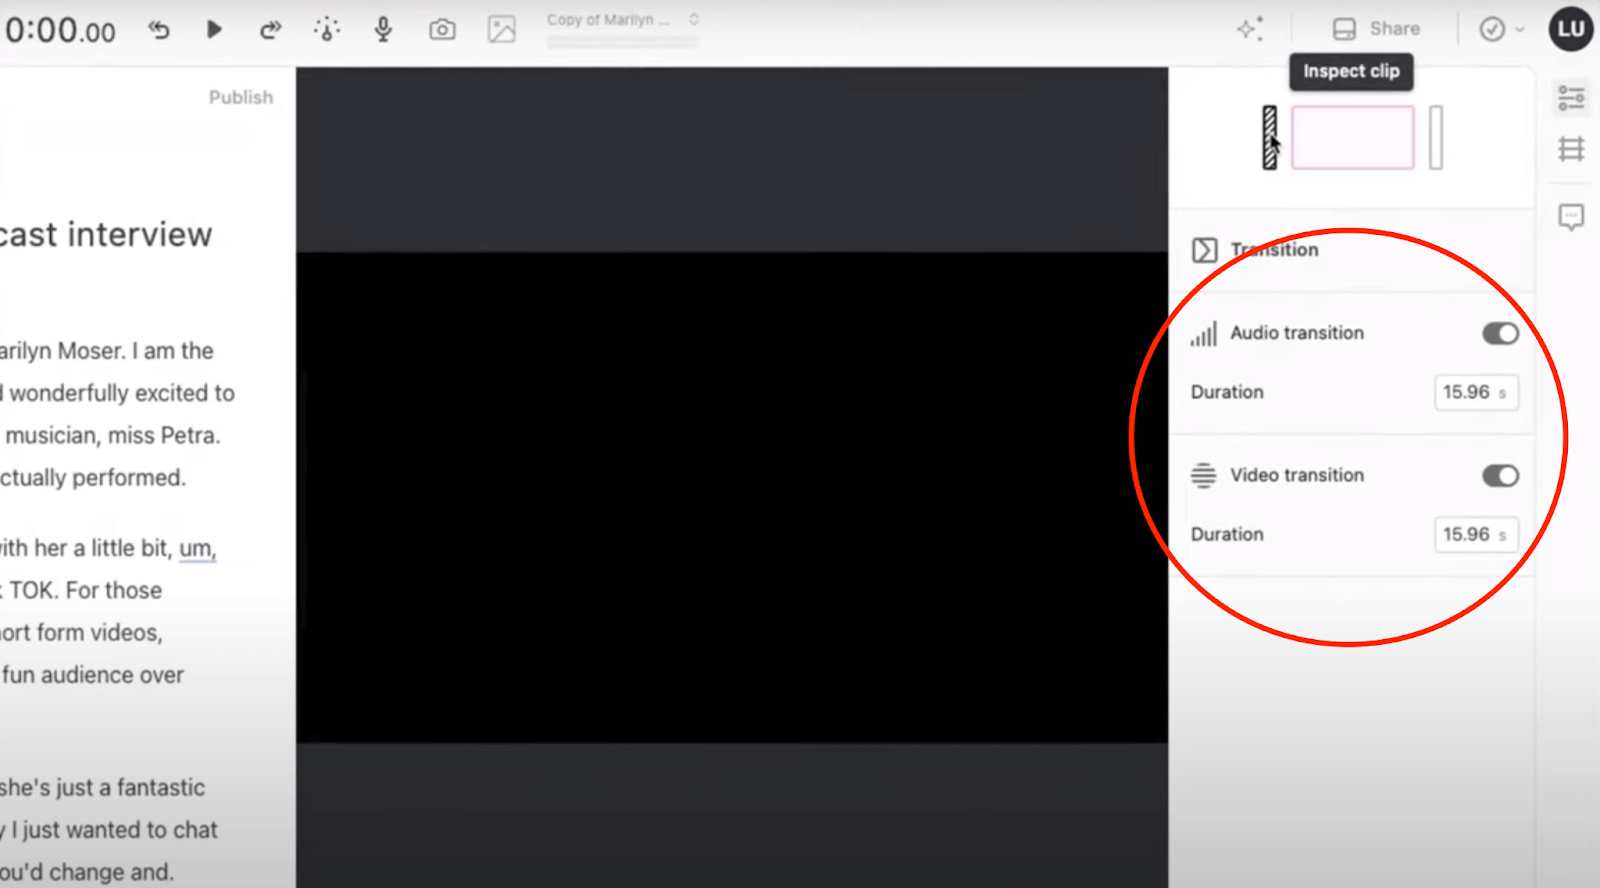
How to isolate crossfade to audio or video
If you’re editing a video and want to apply crossfade to only the audio or only the video, here’s how. Click the “Show Clip Inspector” button along the right-hand side of the preview window to open the Clip Inspector panel. Next, select “Inspect Transition” to view both your video and audio transition properties. To toggle the audio crossfade on or off, click the “Audio Transition” button. To toggle the vide crossfade on or off, click the “Video Transition” button. You can also edit the “Duration” text box so your video and audio crossfades have different durations. You can make the same adjustments to regular fade-in and fade-out transitions too.
Experiment with your audio
The more you apply audio transitions and practice crossfading, the better you’ll get at finding the perfect crossfade duration and making sure the audio levels of both clips correlate. Crossfading not only smooths the transition between clips; it also helps prevent unwanted pops or clicks at those edit points.
To become a true pro at this stuff, try recording room tone — the “silent” low-volume ambiance in your recording space — which you can place under silent moments to make your crossfades even more seamless. If you’re a podcaster, think about how crossfading can benefit for your specific format. For instance, in conversational podcasts, crossfading can help edit out unwanted dialogue and filler words like “um,” “uh,” and “you know” (though you can use Descript’s AI tools to do this automatically). Regardless of your podcast’s format, it likely has a theme song where you can crossfade music with your episode’s introductory dialogue. Keep experimenting. You’re bound to find new ways to make crossfades work for your show.
If you’re a podcaster, think about how crossfading can benefit for your specific format. For instance, in conversational podcasts, crossfading can help edit out unwanted dialogue and filler words like “um,” “uh,” and “you know” (though you can use Descript’s AI tools to do this automatically). Regardless of your podcast’s format, it likely has a theme song where you can crossfade music with your episode’s introductory dialogue. Keep experimenting. You’re bound to find new ways to make crossfades work for your show.
Frequently asked questions
What does crossfade do to music or audio?
A crossfade gently transitions one audio clip into the next by fading the first clip down while the second fades up. This helps avoid sudden volume changes and makes the transition sound natural.
How long should my crossfade last?
Most creators choose anywhere from half a second to a few seconds, depending on the style of the audio. For music transitions, you might experiment with around two to five seconds. In short dialogue edits, a much shorter crossfade often works best.
Why do I hear clicks or pops between edits?
Those clicks happen when audio cuts in or out too suddenly. Using crossfade reduces abrupt volume changes and blends one clip into the next, minimizing unwanted noise.
Does Descript apply any automatic fade or crossfade to prevent popping?
Yes. Descript applies very short microfades at edit boundaries, so you usually won’t hear a click or pop. You can also add longer crossfades for a smoother transition if needed.