Recording Discord audio doesn't have to be complicated, but it does come with options—maybe more than you actually need. Whether you're archiving an epic gaming session or capturing a podcast interview, you can either use third-party audio recording apps, or take advantage of Discord's built-in recording bot that's often hiding in plain sight.
Discord's Craig bot records your conversations with no downloads required—just invite it to your server and you're set. For more control over your audio, third-party recording apps give you additional features like editing tools and the ability to export individual tracks, which is crucial if you're creating something beyond just an audio memory.
Can you record Discord audio?
Recording calls on Discord is possible, but be aware of important legal and ethical considerations. Legally, the rules vary depending on the country and state you live in, with some requiring consent from all parties before recording conversations. Always check your local laws regarding audio recording before proceeding.
For legal compliance and basic ethics, you should always inform everyone involved in the call that you're recording. Even though Discord doesn't explicitly forbid recording, obtaining consent from all participants is not just good practice—it's required by law in many jurisdictions. This transparency builds trust and protects you legally.
There are several legitimate reasons to record Discord audio. Content creators might capture gameplay and conversations for YouTube videos or podcasts. Professionals might record meetings or discussions for reference, documentation, or training purposes. Students might record study sessions or lectures. Whatever your purpose, recording Discord audio can be a valuable tool when used responsibly and ethically.
How to record Discord audio on iOS devices
Recording Discord audio on an iPhone or iPad can be done quickly using iOS’s built-in screen recording feature. First, open Settings and add “Screen Recording” to your Control Center so you can easily access it whenever you need to capture audio from your device. Once in your Discord voice channel, swipe down from the top-right to open Control Center and tap the recording icon to start capturing both system audio and your microphone. If you want extra functionality, third-party apps like Voice Record Pro offer advanced features such as noise reduction and file management. Remember to inform all participants before recording and review this guide if you want to prevent your voice from being inadvertently captured in Discord clips.
How to record Discord audio natively
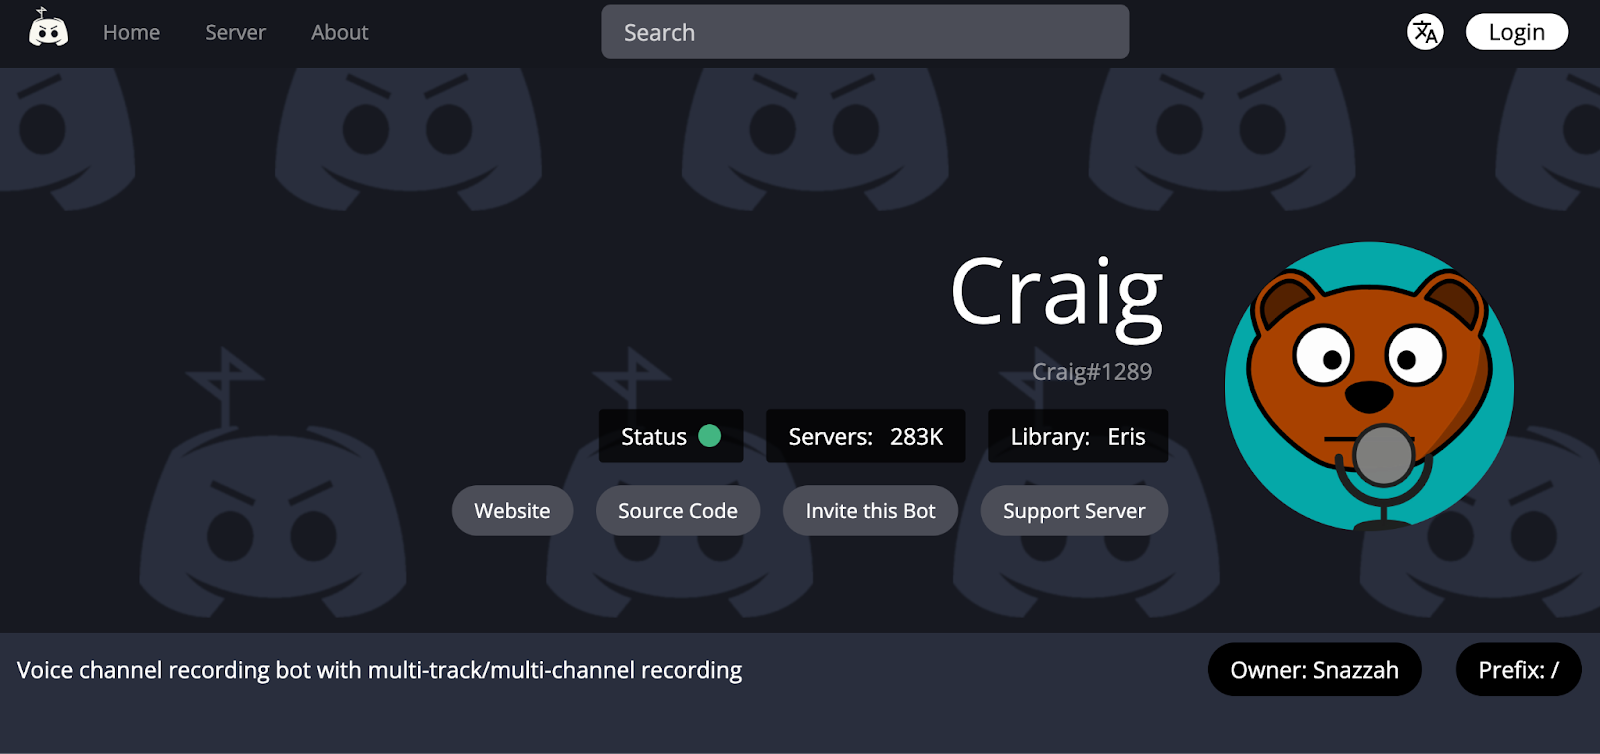
If you have the permissions to add bots to your server, it's easy to record Discord audio on a PC using Discord's Craig Bot. This popular recording bot is designed specifically for recording high-resolution audio on Discord servers, and it works for both desktop computers (Windows & Mac) and mobile (Android & iOS devices). Craig Bot creates separate audio files for each speaker, making it ideal for podcasts or interviews where you need to edit individual voices. Let's take a look at how you do it.
- Invite Craig Bot to your server: The first step is to bring Craig Bot into your Discord server. You can do this by visiting Craig Bot's official website. There, you'll find an option to invite the bot to your server. Ensure you're logged into your Discord account and have the necessary permissions to add bots to the server.
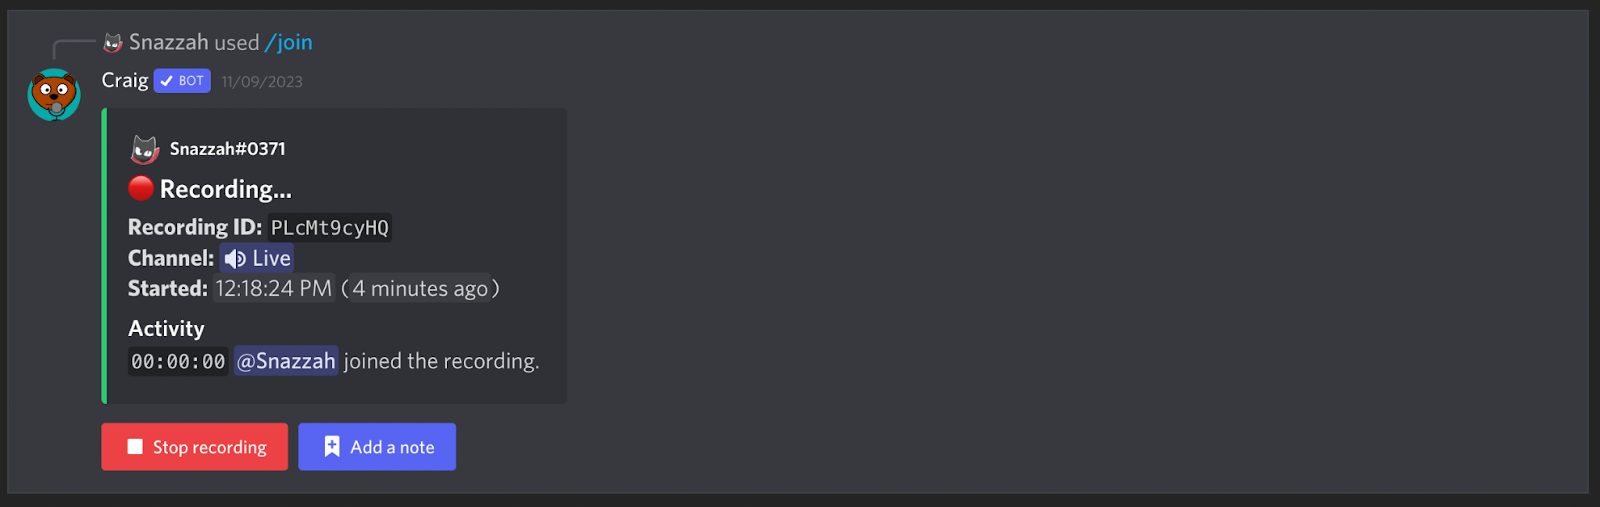
- Set up Craig Bot in your Discord channel: Once Craig Bot is part of your server, you need to set it up in the specific channel you wish to record. This setup usually involves some simple commands. For example, typing “:craig:, join” in the chat field will prompt Craig to join the voice channel you're currently in.
- Start recording: Type “:craig:, record.” This command triggers Craig Bot to begin recording all audio in the channel. Craig Bot records each speaker's audio separately and can record up to six hours of audio, which is pretty great for a free audio recording tool.
Once you have your file downloaded, you can easily upload it to Descript to manipulate each speaker's audio separately with multitrack sound editing tools.
- Access and share your recording: Once your recording session is over, stopping the recording is as simple as typing “:craig:, leave.” Craig Bot will then leave the channel and provide you with a link to download the audio files.
These files can be accessed through the link and are available in multiple formats (MP3, OGG, FLAC), making it easy to share or edit them as needed. The multi-track recording feature gives you separate audio files for each speaker, which is particularly valuable for podcasters and content creators who need to edit individual voices independently.
How to record Discord audio on Android devices
Most modern Android phones let you record Discord audio using the built-in screen recording function, especially on Android 11 or newer devices. Simply pull down the Quick Settings panel and tap “Screen Record” to begin capturing everything, including your voice chat on Discord. If your device lacks a native recorder, reputable third-party apps like AZ Screen Recorder can fill the gap by offering user-friendly controls and multiple audio settings. Always double-check your microphone permissions under Settings to ensure the recorder can capture audio from Discord. For stronger privacy management, consult this resource to learn how to disable unintended voice captures in Discord clips.
How to record Discord audio with Descript
Descript is a user-friendly audio recording and editing tool that offers a quick way to record Discord calls with professional quality. Beyond just recording audio, Descript offers features like automated transcription and multitrack editing, which makes it ideal for podcasters, gamers, content creators, and professionals who need clean, editable recordings of Discord conversations.
Here's how it works:
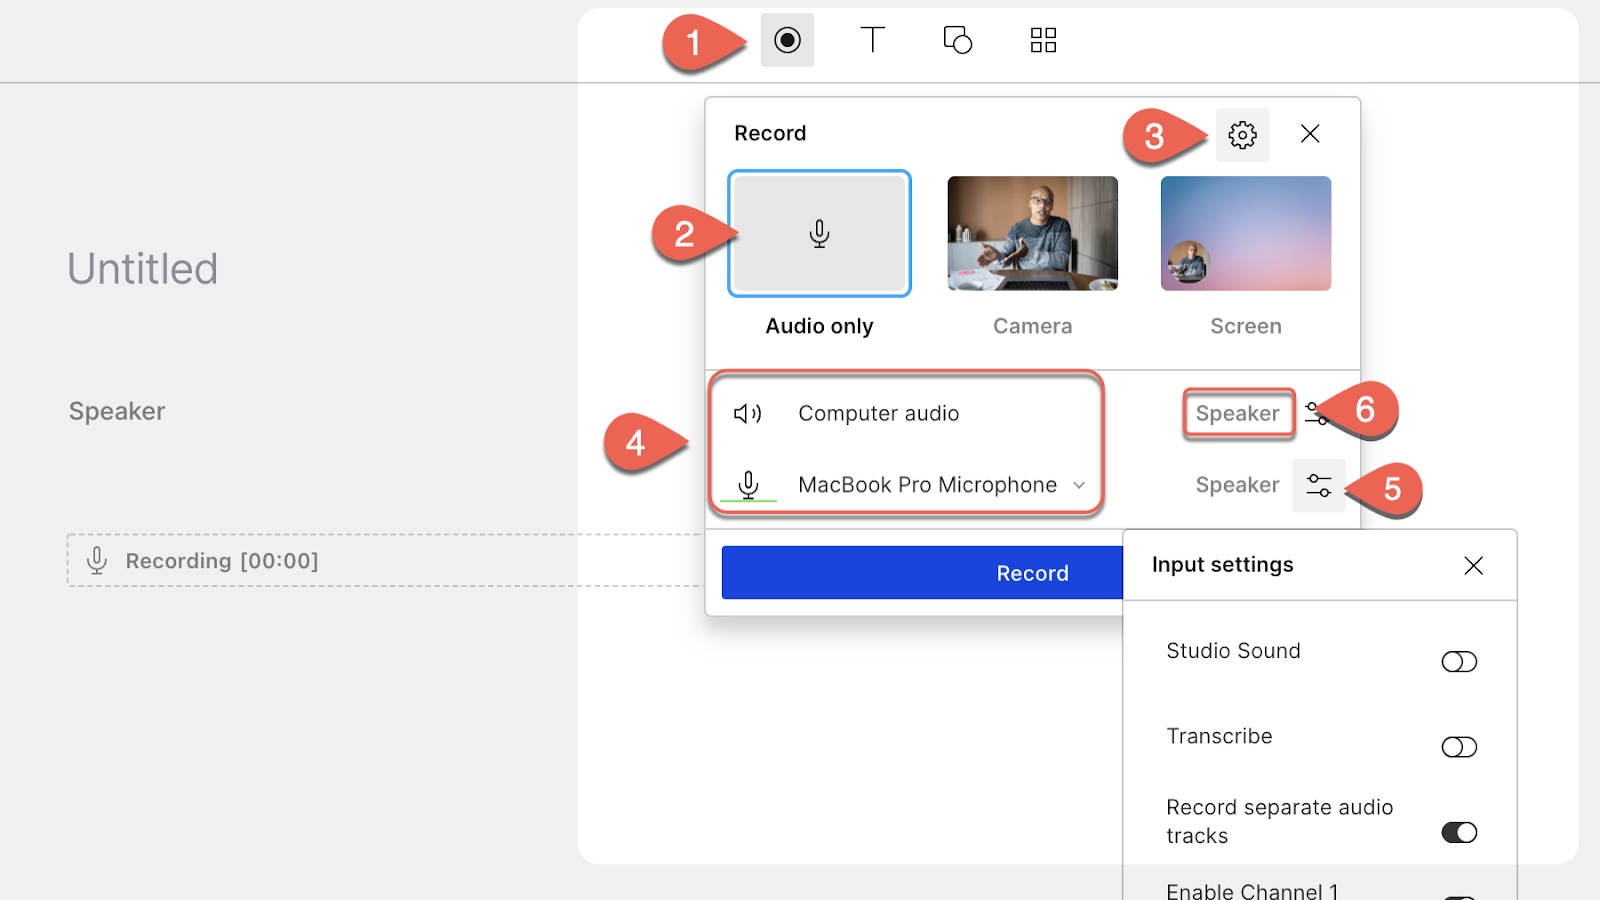
- Open Descript. At the top of the editor, click and open the Record panel.
- Select the Audio only option, then choose Computer audio and your recording device. Alternatively, you can also choose Screen to record video as well.
- Click the settings icon and make adjustments to your recording settings. You can set a transcription language, countdown timer, the option to highlight mouse clicks, and more.
- Click the computer audio icon or microphone icon to choose your input. If both are enabled, the inputs will be recorded separately.
- Click the Input settings icon and choose if you want to enable Studio Sound or transcription.
- If you want, you can add speaker labels by typing them into the box inputs.
Now you're ready to record Discord audio! Choose the Record into script as your recording option. Then, click Record at the bottom of the Record panel to start capturing your Discord conversation.
Head to the voice channel in your Discord community, and start your recording. Descript will capture everything into your dashboard with an automatic transcription, making it easy to edit, review, and repurpose your Discord audio afterwards for podcasts, videos, or other content.
Overall, Descript has become the industry standard for video and audio editing, especially for Discord recordings, thanks to its text-based editor, unparalleled transcription accuracy, powerful audio effects, and collaborative workflows that make editing team conversations simple.
You can edit video content, add sound improvement tools like Studio Sound and AI Voices, integrate SquadCast, and even publish your recordings directly to YouTube.
How to record Discord audio with OBS
You can also record Discord audio using OBS (Open Broadcaster Software), which is compatible with Windows, macOS, and Linux.
OBS is a popular open-source recording and live streaming tool that offers high-quality recording features for Discord audio. Unlike Craig Bot, OBS records all audio in a single track, which is perfect when you need a simple recording without separate speaker tracks. Here's a step-by-step tutorial to record Discord audio using OBS:
- Install and set up OBS: The first step is to download and install OBS on your device. After installation, open OBS and go through the initial setup process. This includes selecting your recording and output device (like your headset or microphone) and choosing the file format for your recordings, such as WAV, FLAC, or AAC.
- Create a new scene: In OBS, your recording layout is organized into scenes. Start by creating a new scene for your Discord recording. Click the + button under the Scenes box. You can name this scene something like “Discord Audio.”
- Add audio sources: Now, add your audio sources to the scene. You need two main sources: Audio Output Capture to record the audio from your Discord voice channel and Audio Input Capture to include your microphone.
Click the “+” under the Sources box and select these options from the drop-down menu. This setup ensures you capture both the Discord audio and your voice.
- Start recording: With your scene and sources set up, you're ready to start recording. Click the Start Recording button in OBS. Make sure you're connected to your \voice channel and have invited Craig to your Discord server if you're using Craig Bot for multitrack recording. OBS will now capture the Discord audio along with your voice input.
- Stop recording: To stop recording, simply click the Stop Recording button in OBS. Your recording will be saved in the designated file format to your chosen location. This file can be used for gameplay reviews or other purposes where you need separate audio files from your Discord conversations.
The great thing about OBS is that it has more functionality than just recording Discord calls. You can record desktop audio, capture Discord voice calls on iOS and Android devices when screen sharing, add a webcam for video podcasts, and customize your recording setup with filters and effects for professional-quality output.
🧠 Learn: Capture cards: How to use a capture card for streaming
How to record Discord audio with Audacity
Recording Discord audio with Audacity, a popular open-source audio recording software, is straightforward. Here's how to do it:
- Get Audacity and set up audio preferences: First, download and install Audacity on your device. It's available for Windows, macOS, and Linux operating systems. After you've installed it, open Audacity and set up your audio preferences. Go to Edit > Preferences, and under Recording ensure the correct audio input (like your microphone) and output (such as your headset or speakers) devices are selected.
- Set Discord audio output: Configure Discord to ensure its audio output matches Audacity's input. Open Discord, go to User Settings (gear icon), and under Voice & Video set the Output Device to match the one you've chosen in Audacity. This step is crucial for capturing Discord voice chat in your recording.
- Begin recording in Audacity: Now, return to Audacity. Click the Recording button to start capturing audio. Audacity will record all sounds played through the selected output device, so ensure only Discord audio is active for clarity.
- Start a Discord call: With Audacity recording, start your Discord call or enter a voice channel. Audacity will record both your voice and others' in the call.
- Stop recording and save: Once your Discord conversation is complete, click the Stop Recording button in Audacity. Save your recording in your preferred file format, such as WAV, FLAC, or AAC.
Thousands of video creators already rely on Descript for screen capture and video editing. If you're ready to join them, take a tour of Descript today.
Frequently asked questions about Discord recording
Can you record Discord video calls?
Yes—you can record video calls on Discord using tools like Descript for high-quality audio and screen recordings with automated transcription tools. When recording video calls, make sure to capture both the Discord window and system audio for the best quality. This is particularly useful for creating tutorials, podcast interviews, or gaming content that includes both audio and visual elements.
Is it safe to record Discord calls?
Yes, it's safe to record Discord calls when using trusted software like OBS Studio, Craig Bot, or Descript, and adhering to legal requirements such as obtaining consent from all involved parties. Always ensure you're using secure and reputable recording tools to safeguard your audio files. For additional security, consider password-protecting your recordings and storing them in secure cloud storage or an encrypted drive.
How do I record Discord audio on PC?
For voice recording on Discord using a PC, select a tool like OBS Studio for a comprehensive set of audio-capture features and screen recording capabilities, Craig Bot for simplicity and multi-track recording with separate audio files for each speaker, or Descript for advanced functionalities including transcription and professional audio editing. Your choice should depend on whether you need separate tracks for each speaker, transcription, or simple single-track recording.
How can I prevent my voice from being recorded in Discord clips?
Discord allows short Clips that pick up your voice by default. To control this, go to User Settings, select “Clips,” and disable the “Allow my voice to be recorded in clips” option. If you need more detailed guidance, this how-to article offers extra steps. Always ensure you communicate with others in the chat before adjusting recording settings to maintain transparency.
How can I identify speakers in a recorded Discord conversation?
You can identify speakers by recording each participant on its own track with a tool like Craig Bot or a multi-track recorder in software such as Descript. After the session, label each track based on who was speaking, so you can easily isolate voices in post-production. For extra accuracy, use specialized editing apps that offer waveforms or transcription to quickly pinpoint active speakers.