Making a YouTube video is the full run: planning or scripting, recording footage, cutting for pace, and uploading with a title, thumbnail, and captions. Beginners get the fastest results from clean audio, no dead air, and captions added before publishing. Descript lets you record, edit by editing the transcript, and add captions in one place.
Whether you're sharing a personal passion or hoping to build a business through video monetization, you'll probably find yourself with a YouTube channel. It's unavoidable. YouTube is the second most visited website in the world, only after Google itself.
At first glance, that sounds great! All these viewers in one place, gleefully browsing and enjoying your content. But don't let the numbers fool you; your YouTube videos have to be pretty damn good to attract viewers on the platform.
And it all starts with learning how to make good videos. This guide shares everything you need to know when creating your first YouTube video, including the editing tools required and tips for producing high-quality content.
10 crucial steps for creating great YouTube videos
Creating great YouTube videos involves bringing together many small but essential details. It's why good video content requires a good number of steps:
- Research and choose your topic and target audience
- Plan your video content
- Choose the right recording and editing tools
- Get ready to shoot and prepare your stage
- Edit your YouTube video and improve it
- Optimize your videos for SEO
- Craft catchy titles and descriptions
- Take into account YouTube specs
- Design a great YouTube thumbnail
- Upload your YouTube video and share it
Step 1: research and choose your topic and target audience
For starters, decide what kind of video content you want to create. Ideally, this is a cross between:
- Passion: What do you have a natural knack or excitement for?
- Skill: What skills do you have that most other people don’t?
- Demand: Are people interested in said topic?
Your topic informs your target audience. For example, if you’re making videos about advanced programming techniques, your target audience is likely to be experienced programmers or computer science students, not a general audience.
Your topic also fulfills an audience's need or interest. Are they looking for tutorials, vlogs, or entertainment? Your best bet is to align your channel's theme with their content preferences, including content type and topics.
Consider these four types of universal content as a starting point:
- Emotional content: News stories, movie reviews, reaction videos
- Utility content: DIY tutorials, recipe guides, tech tips
- Numbers-drive: Market research analysis, infographics, polls
- Story-based: Customer success stories, documentary videos
If you’re still stuck, try:
- Social media polls and questions: Use your existing social media platforms to ask your audience about their preferences. Polls on platforms like Instagram, Twitter, and Facebook can provide quick insights into what your followers are interested in. People tend to be bad predictors of what they’ll actually watch, though, so take these answers with a grain of salt.
- Analyze competitor content: Study what similar content creators in your niche are doing. Be sure to note the topics and formats that receive the most engagement and consider how you can put a unique spin on these same elements. Remember, though you want to be original, you don’t want to reinvent the wheel.
- Join online communities: Participate in forums, Facebook groups, Discord channels, or subreddits related to your content area as part of your YouTube marketing strategy. Pay attention to the discussions and questions that come up—they can be great indicators of what people are interested in.
Your ideal audience, no matter how big or small, will often tell you the exact content they’d like to see.
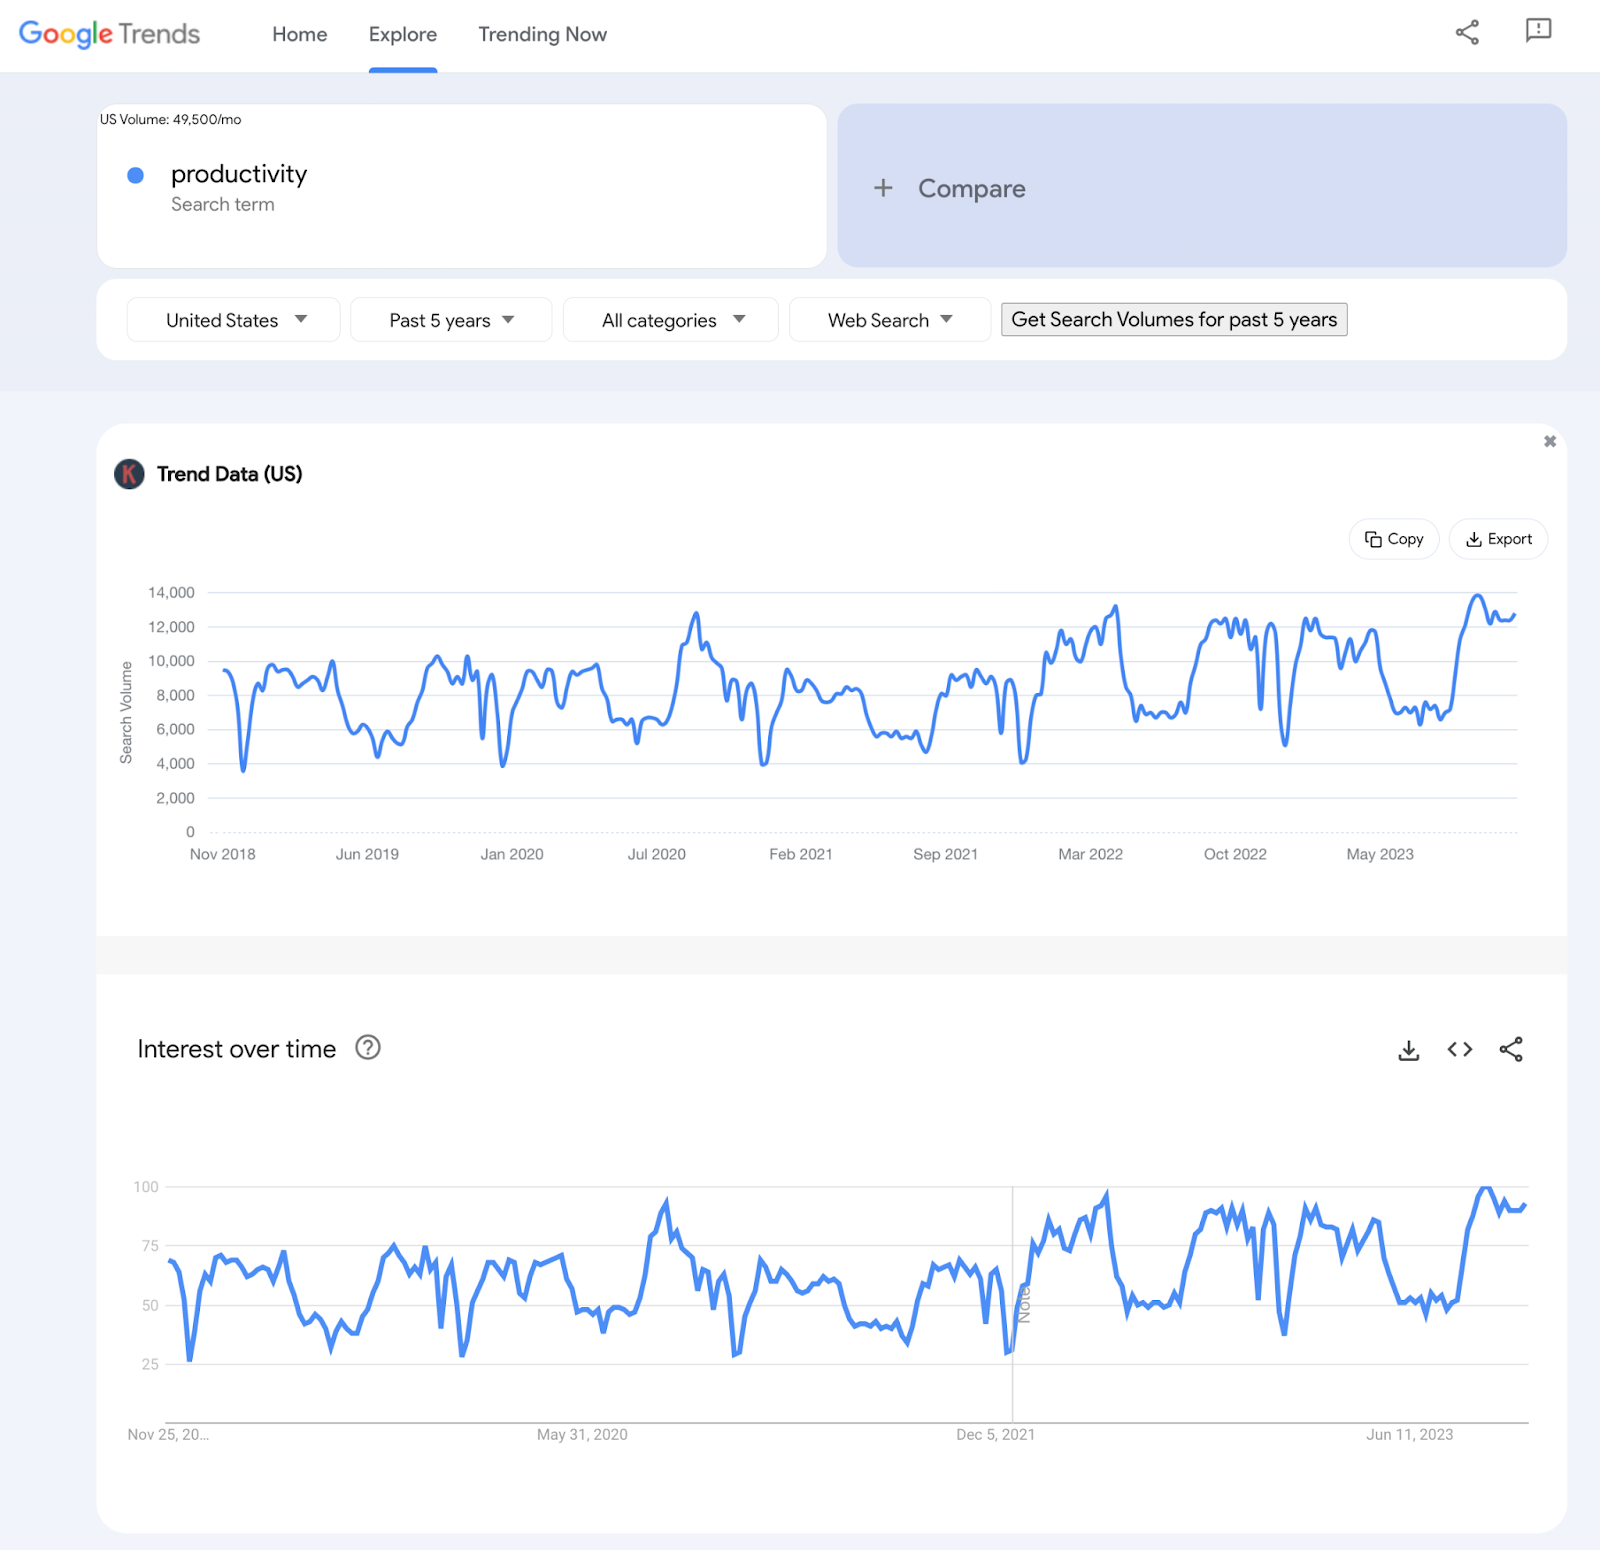
Once you have an idea, use tools like Google Trends, YouTube's search bar, or SEO tools like Ahrefs or SEMrush to understand what topics people are searching for in your niche. It’ll also give you an idea of the demand for your topic.
Inside Google Trends, for example, you can see people’s interest in a topic. The graph below shows search volume data and interest over five years for the term “productivity.” Seems like a pretty popular topic!
 |
💡 Get inspired: 53 YouTube video ideas for 2023
Above all, consider this a starting point—don’t feel pressured to find the one perfect topic for your channel. All good creators adjust their content over time according to what performs well and what their audience is asking for.
Step 2: plan your video content and create a storyboard
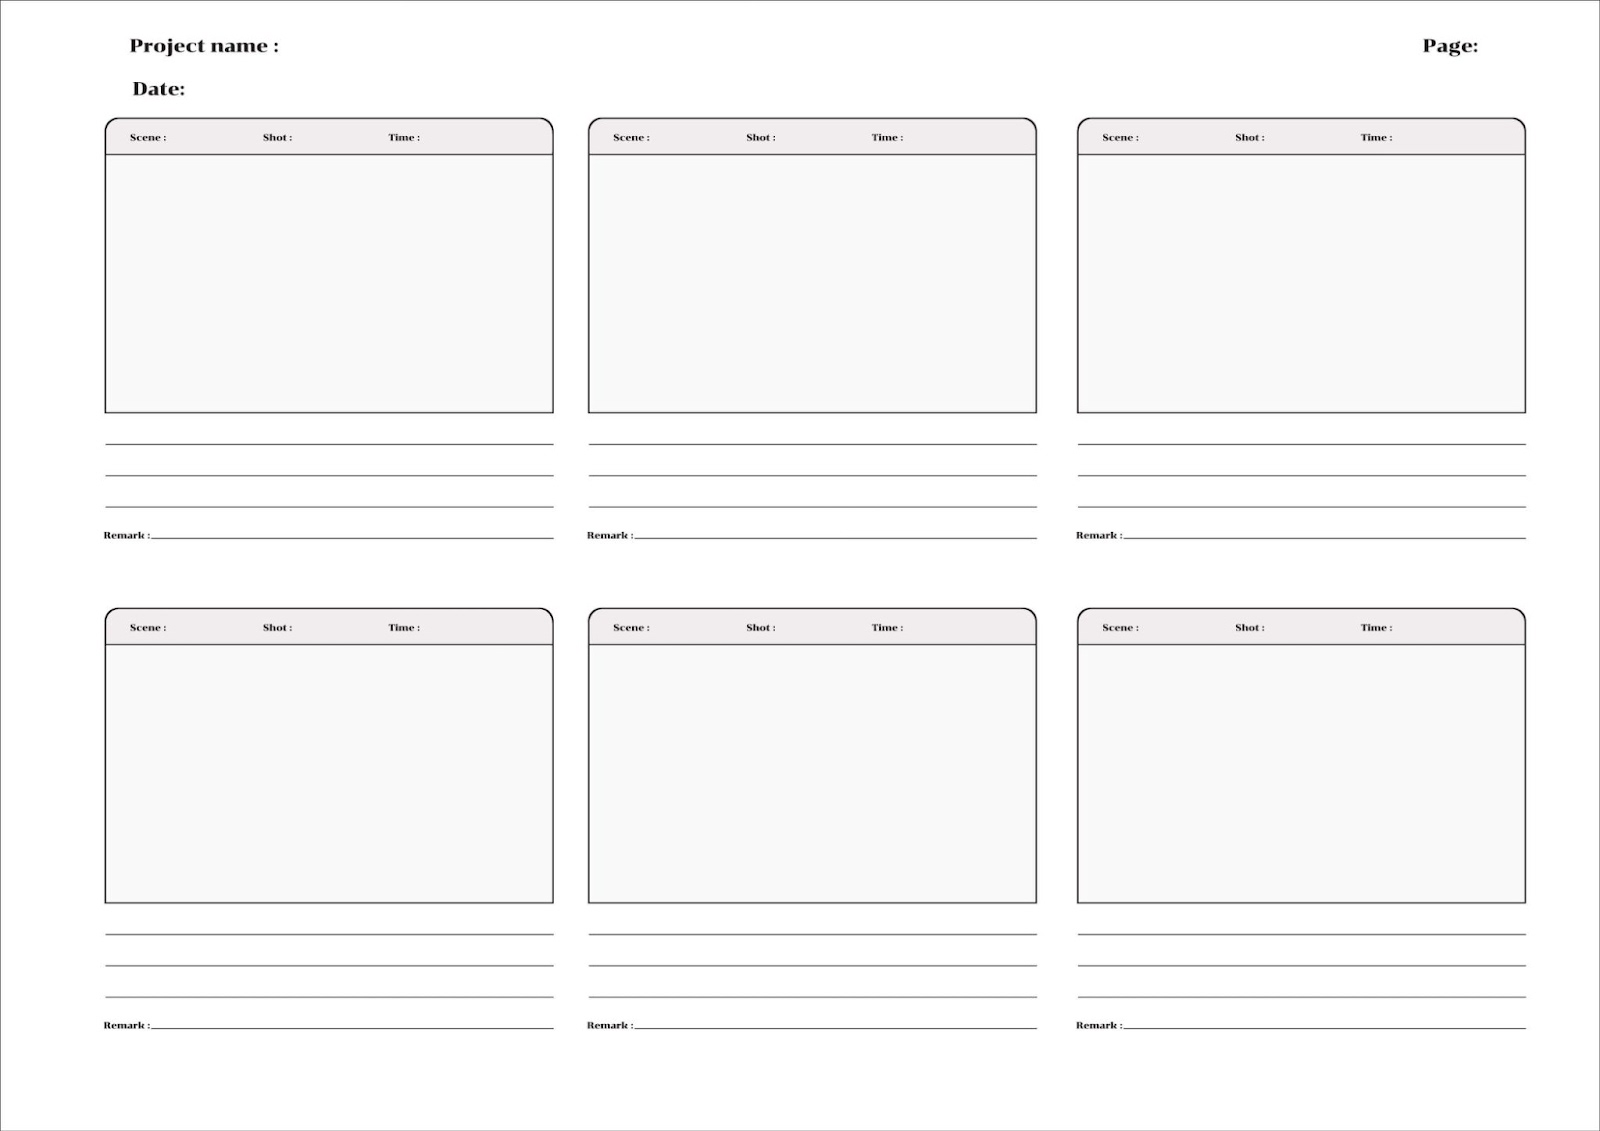
After selecting your topic and understanding your audience, move on to planning a storyboard. A storyboard shows composition, camera angles, character movement, and dialogue snippets associated with a particular scene. It gives you an idea of what every shot will look like.
Here’s an example of a storyboard.
 |
To create a storyboard:
- Write a script. Start with a rough outline of what you’d like the video to include, then start writing the actual lines you’ll say. Make sure to use simple, conversational language that sounds the way people naturally speak.
- Separate your script. Break down your finished script into individual scenes and link each scene to a specific storyboard slide. This helps plan your shoot and estimate your video’s total length.
- Create blank slides. Insert each scene into your storyboard template. Include space beneath each slide for filming instructions and dialogue snippets related to that scene.
- Sketch out your video. Draw each scene. You can use anything from simple stick figures to full on illustrations—whatever you’re more comfortable doing.
- Add script and filming directions. Incorporate sections of your script and specific filming instructions into the corresponding frames.
Once you’re finished, you’re ready to gather the equipment needed for your shoot.
Step 3: choose the right recording and editing tools
Recording and editing video yourself requires the right tools.
Though not an absolute must, these tools do make a difference in the quality of your content. So, consider this list of video equipment enhance your production process:
- Camera: A good quality camera is essential. Beginners can start with a smartphone with a decent camera, like an iPhone or a high-end Android phone. For higher quality, consider investing in a DSLR or mirrorless camera.
- Microphone: Clear audio is crucial. Use an external microphone like a lavalier mic for smartphones or a USB microphone for computers.
- Tripod or stabilizer: To avoid shaky footage, mount your camera on a tripod for stationary shots or a handheld stabilizer/gimbal for moving shots.
- Lighting: Good lighting makes a significant difference. Start with natural light or invest in an affordable ring light or softbox lighting kit.
You’ll also need video editing tools. Think of Descript as the all-in-one toolbox that helps you get it all done from end to end—no matter what type of video you’re creating.
Step 4: get ready to shoot and prepare your background
Get ready to shoot by giving your equipment a once over before hitting record:
- Check your camera is functioning properly and is set to record at the highest quality possible.
- Make sure your camera lens is clean and free of smudges or dust.
- Check that your battery is fully charged. If you’re using a smartphone, make sure you have enough storage space.
- Test your microphone to ensure its capturing sound clearly without any interference.
Next, get your backdrop ready. This depends on what you’re shooting. For example, if you’re documenting bird migration, your backdrop is made for you—it’s the great outdoors.
However, if you’re filming indoors at your homemade YouTube studio, tidy up your space and add elements that make your video more appealing, like plants, artwork, or relevant props.
Make sure you’re in a quiet place to prevent background noise. But if your neighbor is out there mowing the lawn and there’s some hum in your audio, you can use Descript’s Studio Sound to wipe out any background noise and enhance your voice in postproduction.
Step 5: edit your YouTube video
Editing is where you turn your raw footage into an engaging story. It’s where the magic truly happens, and you don’t need professional experience to pull it off. Descript’s intuitive workspace lets you edit with nothing more than basic computer know-how — just highlight text to cut or move clips.
Choose video editing software that’s specifically tailored for YouTube content creators, such as Descript (which we think is the best, naturally).
With Descript’s YouTube video editor, you can:
- Edit via text: Edit your video by editing the transcribed text. This unique feature allows for a more intuitive editing process, especially for those familiar with text editing.
- Add transcription and subtitling: Descript offers automatic transcription of your video's audio, which can be used to create accurate subtitles, enhancing accessibility and SEO.
- Screen recording: Directly record your screen for tutorials or presentations, integrating them smoothly into your YouTube videos.
- Ready-to-use video templates: Don’t want to start from scratch? Descript provides tons of templates you can personalize and use as a starting point. Once finished, save your custom template to use it whenever you need it.
- Multitrack editing: Trim and cut multiple audio and video tracks for precise control over your edit and a more dynamic final product.
- Effects and transitions: Add plenty of animations, video effects, and transitions between clips for a more branded look that’s unique to your channel.
Other video editing software options include Final Cut Pro, Premiere Pro, or even iMovie for Mac users.
Step 6: optimize your video for SEO
YouTube isn’t just a video sharing site; it’s the world’s second-largest search engine. By optimizing your YouTube videos for SEO, you could reach millions of people already looking for content you share.
Here’s a handy checklist to optimize your YouTube videos:
- Incorporate keywords into your title: Determine your video’s primary keyword, usually whatever your video is about, worded in the way most people will search for it. (SEO tools like TubeBuddy can help with this). Ensure your video's title includes your primary keyword. Keep it clear, engaging, and under 70 characters.
- Optimize your video description: Do the same thing for your description: Explain what your video is about using your keywords. The first two lines are crucial because they appear in search results, so include key information and keywords there.
- Use tags: Add relevant tags to your video that include your main keywords. This helps YouTube understand your video's content and context, which helps it accurately categorize it on the platform.
- Create a custom video thumbnail: Create an eye-catching thumbnail that reflects your video content. Keep in mind that thumbnails affect click-through rates, which is a significant factor in SEO rankings.
- Use closed captions (CC) and subtitles: Closed captions make your content accessible and easy to follow, especially for users who rely on screen readers or audio description tools to consume content.
- Engage with your audience: Encourage viewers to like, comment, and share your video. High engagement rates signal to YouTube that your content is valuable, and therefore, should be ranked higher.
- Create high retention videos: Audience retention is a key metric in YouTube's SEO algorithm. Focus on creating video hooks that don’t make your video introduction too long.
Step 7: craft catchy titles and descriptions
Your video's title and description play a significant role in attracting YouTube viewers. It’s one of the first things they look at when they come across your content. They should be attention-grabbing and informative so that they give viewers a clear idea of what your video is about.
Use compelling language and include relevant keywords in your YouTube video title. Destin Sandlin of SmarterEveryDay, for example, uses this title for one of his videos: “I Was SCARED To Say This To NASA... (But I said it anyway)”. This opens a curiosity gap that makes viewers want to find out what he said. (Just make sure you fulfill the promise of the title, or the algorithm will penalize you for posting clickbait.)
For the YouTube video description, provide a detailed overview of the video content, and don't forget to add links to your social media channels or any relevant websites. Some creators go as far as adding links to the equipment and products they use in the video. Don’t be afraid to play around with a format that works for you.
For an optimized video description, use generative AI tools as a starting point to craft a perfectly optimized description. Descript, for example, will use AI to write a YouTube video description for your content in seconds.
 |
Step 8: consider YouTube’s specs
Before you upload videos to YouTube, ensure your video meets the platform’s technical specifications. This includes the correct video format, aspect ratios, resolution, and file size—all of which guarantees your video displays correctly on multiple devices.
- Aspect ratio: 16:9
- Maximum video file size or length: 128GB or 12 hours (whichever is less)
- Accepted video formats: .mov, .mpeg, .mp4, .avi, .wmv, .mpegps, .flv, .webM, .3GPP
- Recommended video dimensions: 640x360 or 480x360
Step 9: design a great YouTube thumbnail
A compelling video thumbnail can make a huge difference in attracting viewers. It's the first thing viewers see, so it should be eye-catching and representative of your video's content—hence why 90% of their best performing YouTube videos contain a custom thumbnail.
It’s good practice to use high-quality images, engaging text, and vibrant colors to draw attention. Additionally, consider a few design principles when creating your thumbnails:
- Make sure your thumbnail image is as large as possible because video thumbnails appear differently across devices.
- Use people; a Netflix study suggests that including a person’s face with an emotion in a thumbnail leads to more clicks.
- Create interesting images by following the rule of thirds. You can then overlay your images with your branding and descriptive text. Just remember to use a readable font if you're adding text.
- Make the design as simple as possible. Dynamic color and composition can help grab the viewer's attention, but too much can overwhelm the eye.
🎨 Learn more: 5 tips for creating a click-worthy YouTube thumbnail
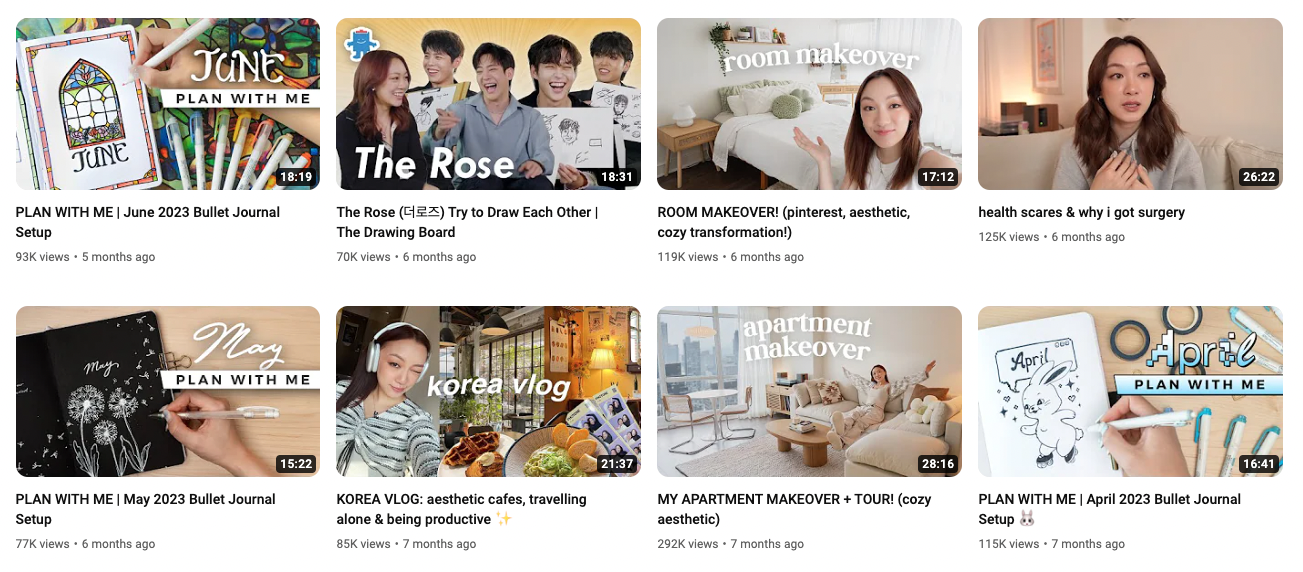
Creators like Amanda Rach Lee take all these pointers to create varied, eye-catching thumbnails while still staying on brand and delivering content her audience wants to see.
 |
Step 10: upload your YouTube video and share it
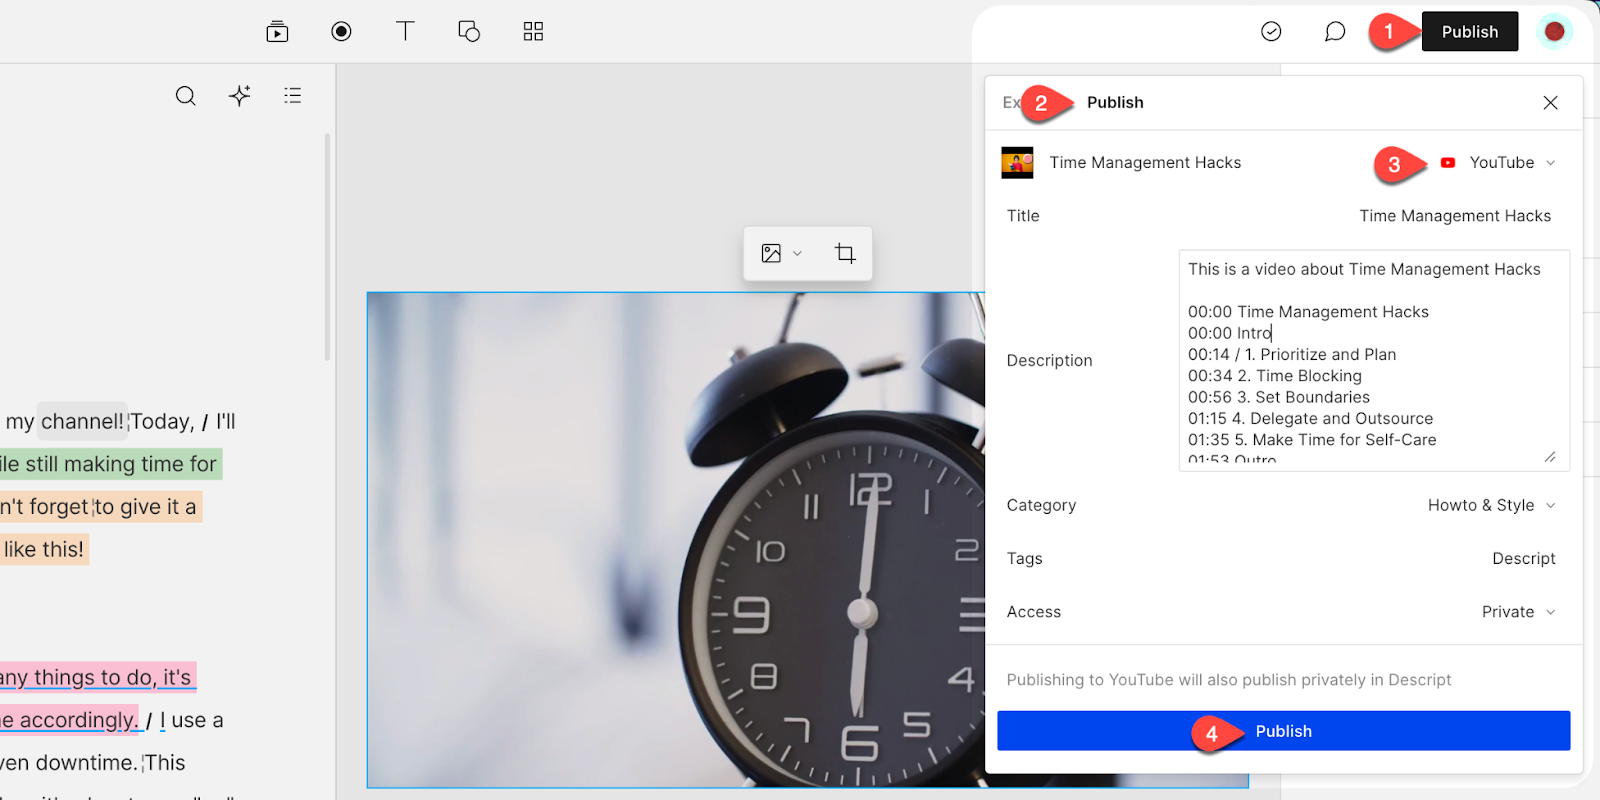
Once your video is ready, it's time to upload it to your YouTube account. Remember to write a captivating title, a detailed description, and relevant tags all within the editor. If you’re using Descript, there’s no need to move from one app to another (to another). You can upload YouTube videos directly from the video editor, as seen in the following image.
 |
Your work isn’t done once your YouTube video goes live. Get your first few viewers by sharing your content beyond YouTube to reach a broader audience. That means:
- Posting about it on social media
- Asking video guests or co-hosts to share your content with their own audience
- Converting your YouTube video into a blog post
- Sending it to your email subscribers (if you have an email list)
- Repurposing your long-form content into YouTube Shorts
Plus, with tools like Descript's YouTube to Instagram converter, you can repurpose your content for other platforms. People can watch a snippet of your video—something much more engaging than a screenshot or piece of text.
3 tips for making engaging YouTube videos
Standing out among millions of creators who make YouTube videos is hard. Check out three solid tips to help you stand apart.
Add captions and chapters to your videos
Captions make your videos more accessible and can also help YouTube’s algorithm to understand what your video is about.
Use video editing software like Descript to generate accurate captions you can add to your video during the upload phase. Then, use chapters. They improve the viewer experience by allowing people to navigate easily to the parts of the video that interest them the most. This step-by-step segmentation can be vital in tutorials or longer vlogs.
Besides chapters, creators like Andrew Huberman often add a list of timestamps to their video descriptions, adding yet another way for his target audience to consume his content.
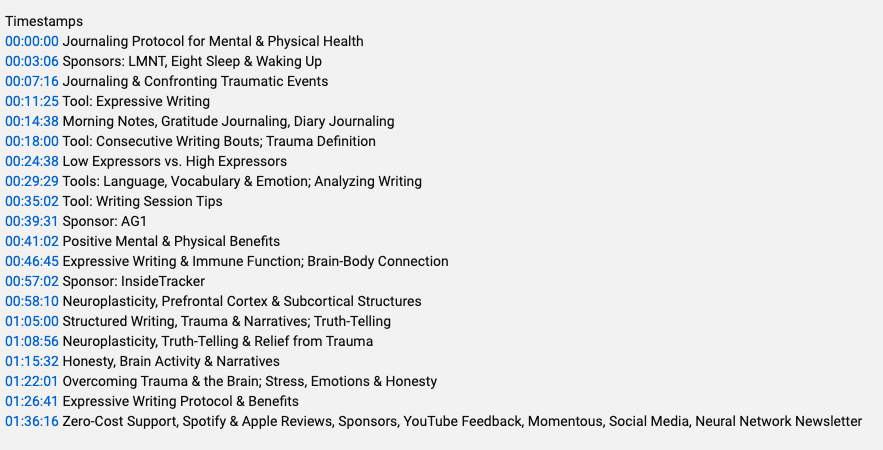 |
Maintain audio and video quality
High-quality video and audio are key components of a solid video. If possible, invest in a good camera, like a DSLR or even a high-end smartphone (like an iPhone) to capture clear and crisp video clips.
Audio quality is just as important, but you can refine sound quality in post-production. There’s no need to invest in an expensive microphone if you’re using Studio Sound.
Set aside time to engage with your viewers and subscribers
Interaction is key on social media platforms, and YouTube is no exception. Encourage viewers to comment—and make sure you respond—to build community around your channel. This can keep viewers coming back to watch more.
Use your video’s outro to guide viewers to your next video or playlist. The Food Network channel, for example, uses the YouTube end screen to convince viewers to subscribe to its channel. This builds an audience of people who get notified when the channel publishes new content.
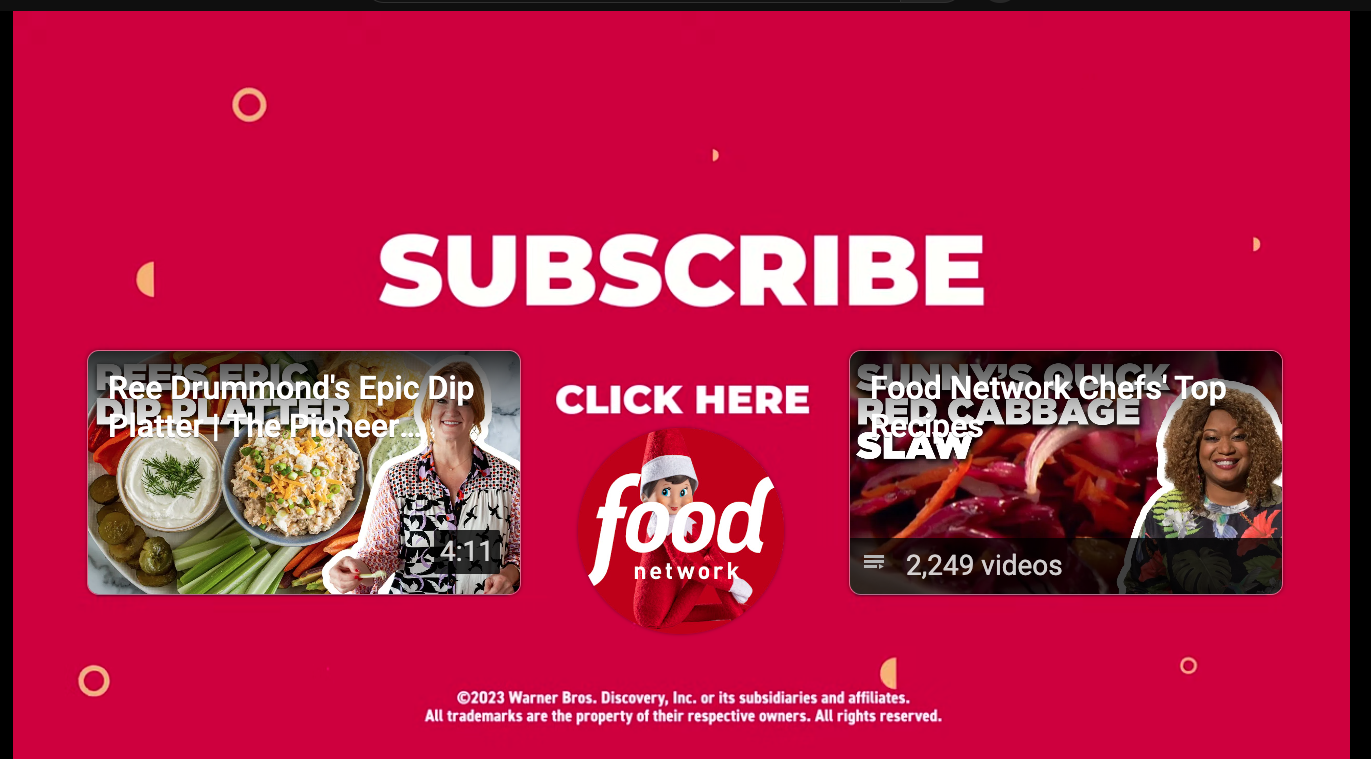 |
Software to create, edit, and publish YouTube videos as easily as a doc
Creating captivating YouTube videos requires the right tools, and Descript stands out as a no-brainer choice for content creators focused on YouTube content creation.
It’s specifically designed to support every stage of your video production journey—from brainstorming ideas to the final upload.
Descript outshines typical video editing software with some key YouTube-friendly features:
- Collaborate in real time: Share your project link so team members can edit, comment, and give feedback — all in one place.
- Edit videos like you’d edit a Google Doc
- Easily add your new video to existing YouTube playlists directly from Descript
- Add effects like AI Voices and Studio Sound to improve video quality
- Automated YouTube subtitles and video descriptions
- Royalty free background music and sound effects
- Stock visuals on tap: Never run out of images or video assets. Fully customize your YouTube videos with high-quality stock videos, icons, images, GIFs, and more, all from within Descript.
- Record your voice, your screen, and your webcam—all within one platform
Ready to make your first YouTube video? See the best of what Descript has to offer with a free plan—where premium features come as standard. Get started today.
Frequently asked questions
How do I create a video for YouTube?
You record and edit your footage with a tool like Descript, then upload the finished file to your YouTube channel. Decide on your video’s topic, plan a rough script, film what you need, and edit out mistakes or extra footage. In Descript, you can edit just by editing text, add subtitles, then publish directly to YouTube.
Is it free to make videos on YouTube?
Yes. YouTube is free to use and you pay nothing to upload videos. You may have other costs—like gear or software subscriptions—but you don’t pay YouTube to host or publish content.
Does YouTube pay $1 per 1000 views?
There’s no flat rate. Earnings per 1,000 views vary by audience location, the type of ads shown, and watch time. Some creators earn only a few dollars per thousand views, others might earn much more.
How many YouTube subscribers do I need to make $10,000 a month?
There’s no magic number. YouTube’s Partner Program requires 1,000 subscribers and 4,000 watch hours to monetize in the first place, but making $10,000 a month usually requires hundreds of thousands of subscribers or a highly engaged, niche audience plus extra revenue sources like sponsorships.